


39
7. SETTING UP THE INSTRUMENT
3. Power ON the instrument.
C
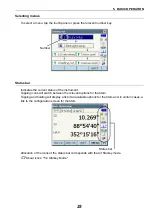
The electric circular level is displayed on the <Tilt>.
“
z
” indicates the bubble in circular level. The range
of the inside circle is ±1.5' and the range of the
outside circle is ±6'.
4. Center “
z
” in the circular level.
When the bubble is in the center, proceed to step
7.
5. Turn the instrument until the telescope is parallel
to a line between levelling foot screws A and B.
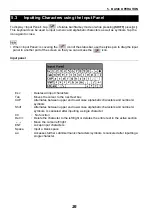
6. Set the tilt angle to 0° using foot screws A and B
for the X direction and levelling screw C for the Y
direction.
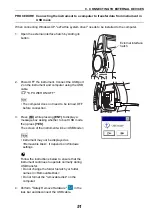
7. Loosen the centering screw slightly.
Looking through the optical plummet eyepiece, slide
the instrument over the tripod head until the survey
point is exactly centered in the reticle.
Retighten the centering screw securely.
If the instrument is levelled using laser plummet,
emit the laser plummet beam and check it again.
C
"7.1 Centering PROCEDURE Centering with
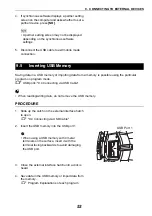
8. Check again to make sure the bubble in the electric
circular level is centered.
If not, repeat the procedure starting from step 6.
9. Press
{ESC}
to return to Observation mode.