background image

4

USING THE SLOW COOKER

1. Put the food in the Pot according to recipe.
2. Plug  the  Slow  Cooker  in.  The  power  pilot  light  (green)  will  come  on  showing 

that the unit is plugged in but not turned on. The digital display will also light up 
showing the default setting of 06:00 or 6 hours.

3. Press the "Set" button once and the hour display will start to flash. Press "+” or 

"-” to set the cooking time (in hours). Time settings, in full hours, range from a 
minimum of 4 to a maximum of 12 hours. When the required cooking time in full 
hours has been set, press the "Set” button again and the minutes will start to 
flash. Press the "+” or "-” button to select the cooking time in minutes. Minutes 
settings  range  from  00  to  50  minutes.  Push  "Set”  once  more  to  finalise  the 
setting and the digital display will stop flashing and show the selected cooking 
time.

4. Select the cooking time as indicated in your recipe. 
5. Press the ON/OFF button after setting the cooking time. The pilot light will switch 

from green to red and the word "Cook" will appear in the left corner of the digital 
display.

6. When the cooking time has been completed, the slow cooker will automatically 

switch to "Keep Warm” mode and the word "Warm” will appear in the top right 
corner of the digital display. 

Note: We do not recommend using the "Warm” 

mode for longer than 4 hours.

7. Push the ON/OFF button to turn the slow cooker off. The pilot light will turn green 

and the digital display will show the default time 06:00; this indicating the unit 
is plugged in. Disconnect from the mains socket. 

Note: To reduce the risk of 

electric shock, cook only in the removable pot supplied with your slow 
cooker.

USING THE SLOW COOKER

Most foods are suited to the slow cooking method. 
Tips. 

Cut vegetables in small or medium-sized pieces and put them at the bottom of 
the pot.

Do not fill the slow cooker more than three-quarters full.

Trim 

the 

fat 

off 

meats 

and 

sear 

or 

fry 

to 

eliminate 

as 

much fat as possible. 

N.B.: Do not use frozen meat. Thaw meat thoroughly 

before slow cooking.

Browning  meat  and  blanching  vegetables  before  slow  cooking  improves 
appearance and makes sauces thicker.

Always unplug the slow cooker when not in use and before cleaning.

Always use oven gloves when lifting the slow cooker.

Always  keep  the  lid  on  throughout  the  cooking  process.  Don’t  lift  the  lid 
repeatedly to check progress. 

Use fresh or dried herbs instead of ground herbs; fresh herbs retain their flavour 
better through the prolonged cooking time.

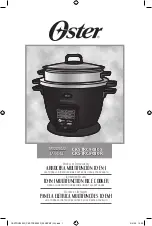
PC310 / PC510  DIGITAL SLOW COOKER

INSTRUCTION MANUAL

Summary of Contents for PC310

Page 1: ...DIGITAL SLOW COOKER INSTRUCTION MANUAL 2 GARKOCHER GEBRAUCHSANLEITUNG 6 MIJOTEUSE MODE D EMPLOI 10 BRASIERA ISTRUZIONI PER L USO 14 OLLA DE COCCIÓN LENTA MODO DE EMPLEO 18 PANELA PARA COZEDURA LENTA INSTRUÇÕES DE UTILIZAÇÃO 22 ...

Page 2: ...liance for other than the intended use 12 Avoid sudden temperature changes For example do not put deep frozen foods direct into a heated pot 13 To disconnect press the ON OFF button then remove the plug Always hold the plug to remove it never tug at the cord PLEASE KEEP THE OPERATING INSTRUCTIONS FOR REFERENCE This appliance is for HOUSEHOLD USE ONLY There are no user serviceable parts inside Ther...

Page 3: ...MANUAL KNOWING YOUR SLOW COOKER Features 1 Glass lid 2 Ceramic pot 3 Base unit 4 Control panel 5 Power pilot light 6 ON OFF power button 7 Timer setting button 8 LCD display 9 button increase cooking time 10 button decrease cooking time 11 Handles ...

Page 4: ... Warm mode and the word Warm will appear in the top right corner of the digital display Note We do not recommend using the Warm mode for longer than 4 hours 7 Push the ON OFF button to turn the slow cooker off The pilot light will turn green and the digital display will show the default time 06 00 this indicating the unit is plugged in Disconnect from the mains socket Note To reduce the risk of el...

Page 5: ...an be cleaned with a soft cloth and warm soapy water Wipe dry Never use abrasive cleaners REMOVABLE CERAMIC POT The removable pot is dishwasher proof Or simply wash it in hot soapy water Never use abrasive cleaners A cloth a sponge or rubber spatula will usually remove any residues Use a non abrasive cleaner or vinegar to remove water spots and other stains TAKING CARE WITH YOUR CERAMIC POT As wit...

Page 6: ...t nie in der Nähe eines heissen Gas oder Elektro Ofens aufstellen oder in den heissen Backofen stellen 10 Äusserste Vorsicht ist geboten wenn Sie den heisses Öl oder andere heisse Flüssigkeiten enthaltenden Garkocher verschieben wollen Stets Topflappen benutzen wenn Sie das Gerät verschieben 11 Der Garkocher darf nur für den vom Hersteller vorgesehenen Zweck verwendet werden 12 Vermeiden Sie plötz...

Page 7: ...r autorisierten Servicestelle oder einer qualifizierten Fachperson ersetzt werden Hinweis Bei der ersten Inbetriebnahme kann es zu einer leichten Rauch und oder Geruchsbildung kommen Dies ist bei vielen Hitze erzeugenden Geräten normal und hört nach mehrmaliger Verwendungen auf GERÄTETEILE Bestandteile 1 Glasdeckel 2 Keramiktopf 3 Basisgerät 4 Bedienfeld 5 Betriebskontrollleuchte 6 ON OFF Betriebs...

Page 8: ...e Betriebskontrollleuchte wechselt von grün auf rot und das Wort Cook erscheint in der linken Ecke der Digitalanzeige 6 Wenn die eingestellte Garzeit beendet ist schaltet der Garkocher automatisch in den Warmhaltemodus und das Wort Warm erscheint in der oberen rechten Ecke der Digitalanzeige Hinweis Es wird davon abgeraten den Warmhaltemodus länger als 4 Stunden zu verwenden 7 Um den Garkocher aus...

Page 9: ...DES METALLGEHÄUSES Die Aussenflächen können mit einem weichen Lappen und warmem Seifenwasser gereinigt werden Gerät anschliessend abtrocknen Keine scheuernden Reinigungsmittel verwenden HERAUSNEHMBARER KERAMIKTOPF Der herausnehmbare Keramiktopf kann im Geschirrspüler oder in heissem Seifenwasser gereinigt werden Keine scheuernden Reinigungsmittel verwenden Rückstände lassen sich normalerweise mit ...

Page 10: ... pour déplacer la mijoteuse contenant de l huile chaude ou tout autre liquide chaud Toujours utiliser des poignées à casseroles pour déplacer l appareil 11 Ne pas utiliser la mijoteuse à d autres fins que celles prévues par le fabricant 12 Eviter les chocs brutaux de température ne pas mettre d aliments congelés dans la marmite de céramique chaude 13 Pour éteindre l appareil presser la touche de f...

Page 11: ...gère fumée et ou odeur Le phénomène est normal pour de nombreux appareils produisant de la chaleur et cesse après quelques utilisations DESCRIPTION DE L APPAREIL Eléments 1 couvercle de verre 2 marmite de céramique 3 base 4 tableau de commande 5 témoin lumineux de fonctionnement 6 touche de fonctionnement ON OFF MARCHE ARRET 7 touche SET réglage du temps 8 affichage LCD 9 touche prolonger le temps...

Page 12: ...mot Cook apparaît dans le coin supérieur gauche de l affichage numérique 6 Une fois écoulé le temps de cuisson réglé la mijoteuse passe automatiquement en mode de tenue au chaud et le mot Warm apparaît dans le coin supérieur droit de l affichage numérique Remarque il est déconseillé d utiliser le mode de tenue au chaud pendant plus de 4 heures 7 Pour éteindre la mijoteuse presser la touche ON OFF ...

Page 13: ...er avec un chiffon doux et de l eau savonneuse chaude Essuyer ensuite l appareil Ne pas utiliser de produits abrasifs MARMITE DE CERAMIQUE AMOVIBLE La marmite de céramique amovible peut se laver en machine ou dans de l eau savonneuse chaude Ne pas utiliser de produits abrasifs Les restes d aliments s enlèvent normalement avec un chiffon une éponge ou une spatule de caoutchouc Pour éliminer les tac...

Page 14: ...di bollenti Usare sempre le presine per spostare la brasiera 11 Usare la brasiera unicamente per lo scopo previsto dal produttore 12 Evitare improvvisi sbalzi di temperatura non versare cibi surgelati nel contenitore di ceramica già caldo 13 Per spegnere la pentola premere il tasto di accensione e spegnimento ON OFF e staccare la spina dalla rete di corrente Estrarre la spina senza mai tirare il c...

Page 15: ...producono calore e la situazione si normalizza dopo qualche uso COMPONENTI Componenti 1 Coperchio di vetro 2 Contenitore di ceramica 3 Unità di base 4 Pannello dei comandi 5 Spia luminosa di funzionamento 6 Tasto di accensione e spegnimento ON OFF 7 Tasto Set regolazione oraria 8 Display LED 9 Tasto allungare il tempo di cottura 10 Tasto abbreviare il tempo di cottura 11 Manici ...

Page 16: ...le 6 Al termine del tempo di cottura desiderato la brasiera si spegne automaticamente e si posiziona sulla funzione Mantenere a temperatura Sul display digitale compare la parola Warm in alto a destra Nota è sconsigliato lasciare la brasiera per oltre 4 ore nella funzione di mantenimento della temperatura 7 Per spegnere la brasiera premere il tasto ON OFF La spia luminosa diventa verde e sul displ...

Page 17: ...ro può essere lavato in lavastoviglie PULIZIA DELL UNITÀ METALLICA Le superfici esterne possono essere pulite con un panno morbido e acqua calda e sapone Asciugare bene Non usare prodotti per la pulizia abrasivi CONTENITORE DI CERAMICA ESTRAIBILE Il contenitore di ceramica estraibile può essere lavato in lavastoviglie o con acqua calda e sapone Non usare prodotti per la pulizia abrasivi Pulire eve...

Page 18: ...o en un horno 10 Se recomienda desplazar la olla con mucha precaución cuando contenga aceite caliente u otros líquidos calientes Utilizar siempre manoplas al desplazar la olla 11 Limitarse a los usos previstos por el fabricante 12 Evitar los cambios bruscos de temperatura no introducir alimentos congelados en el cazo de cerámica caliente 13 Para apagar el aparato pulsar el botón de puesta en march...

Page 19: ...der un ligero olor cuando se use por primera vez Esto es normal en aparatos que producen calor y cesará cuando se haya usado algunas veces PIEZAS DEL APARATO Componentes 1 Tapa de cristal 2 Cazo de cerámica 3 Carcasa del aparato 4 Panel de mando 5 Luz piloto de funcionamiento 6 Botón ON OFF de puesta en marcha EN MARCHA PARADO 7 Botón Set ajuste del temporizador 8 Visualización 9 Botón aumentar el...

Page 20: ...CD Nota No se recomienda utilizar el modo calienta platos durante más de 4 horas 7 Pulsar el botón ON OFF para apagar la olla de cocción lenta El piloto se pone en verde y se visualiza 06 00 por defecto lo que indica que el aparato está aún enchufado Desenchufar la clavija de la toma de corriente Nota Para evitar descargas eléctricas cocinar exclusivamente en el cazo extraíble INSTRUCCIONES DE USO...

Page 21: ... DE CERÁMICA EXTRAÍBLE El cazo extraíble puede ponerse en el lavavajillas o lavarse en agua caliente y jabonosa No usar nunca productos de limpieza abrasivos Los restos pegados al cazo pueden limpiarse con un paño una esponja o una espátula de goma Utilizar un limpiador no abrasivo o vinagre para sacar manchas de cal u otras manchas CUIDADO EN EL USO DEL CAZO DE CERÁMICA El cazo de cerámica puede ...

Page 22: ...o cuidado quando desejar deslocar a panela para cozedura lenta contendo óleo ou qualquer outro líquido quente Utilize pegas sempre que deslocar o aparelho 11 A panela para cozedura lenta só deve ser usada para os fins previstos pelo fabricante 12 Evite choques de temperatura repentinos não coloque alimentos congelados na cuba cerâmica quente 13 Para desligar o aparelho prima a tecla ON OFF LIG DES...

Page 23: ... colocação em funcionamento é possível o aparecimento de fumos ou de cheiros Isto é normal no caso de aparelhos que desenvolvem calor e desaparece após algumas utilizações PEÇAS DO APARELHO Partes integrantes 1 Tampa de vidro 2 Cuba cerâmica 3 Base do aparelho 4 Painel de comando 5 Luz de controlo de operação 6 Tecla de operação ON OFF LIG DESL 7 Tecla Set timer 8 Display LCD 9 Tecla prolongar o t...

Page 24: ...nto esquerdo do display digital 6 Depois de terminado o tempo de cozedura ajustado a panela para cozedura lenta muda automaticamente para o modo manter quente e a palavra Warm aparece no canto superior direito do display digital Indicação Não é recomendável utilizar o modo manter quente por mais de 4 horas 7 Para desligar a panela para cozedura lenta prima a tecla ON OFF A luz de controlo de opera...

Page 25: ... louça LIMPEZA DA CARCAÇA DE METAL As superfícies exteriores podem ser limpas com um pano macio e com água quente e sabão Em seguida secar o aparelho Não utilize produtos de limpeza abrasivos CUBA CERÂMICA AMOVÍVEL A cuba cerâmica amovível pode ser lavada na máquina de lavar louça ou com água quente e sabão Não utilize produtos de limpeza abrasivos Normalmente os resíduos podem ser eliminados com ...

Page 26: ...sind Nutzung des Gerätes im gewerblichen Bereich äussere Einflüsse nichtfachgerechteInstallation NichtbeachtungderBedienungsanleitungoderBetriebsvorschriften höhere Gewalt unsachgemässer Gebrauch Eingriffe von nicht autorisierten Stellen sowie normaler Verschleiss Ausgeschlossen sind ebenfalls Schäden die auf Herunterfallen Wasser oder den Betrieb mit falscher elektrischer Spannung zurückzuführen ...

Page 27: ...ración La garantía perderá su validez o expirará antes de la fecha de caducidad si los daños que presenta el aparato son debidos a las siguientes causas utilización del aparato para fines industriales influencias externas instalación incorrecta incumplimiento de las instrucciones de uso o de funcionamiento fuerza mayor uso inadecuado intervención de servicios no autorizados y desgaste normal Tambi...

Page 28: ... 6341 Baar www sobabaar com Telefon 41 0 41 769 70 70 Telefax 41 0 41 769 70 71 Contact us for Customer Service addresses in other countries Information from SOBA International Trading AG Übrige Länder auf Anfrage Auskunft erteilt SOBA International Trading AG Autres pays sur demande Renseignements auprès de SOBA International Trading S A Altri paesi su richiesta Informazioni presso SOBA Internati...

Reviews: