background image

Charging the internal battery

Connect the Device to the PC or external power, the unit will switch On 
automatically. To charge the battery, swit

ch the unit off b

y holding the power 

button for 7-10 seconds. The battery icon will appear on the screen to indicate 
that the unit is on charge. 

Note: The new battery’s full performance is only achieved after two or three 
complete charges and discharges. The battery icon indicates that the battery 
is charging ONLY and does not indicate the level of charge currently within 
the battery. When fully charged you will see an icon similar to the picture on 
the right.

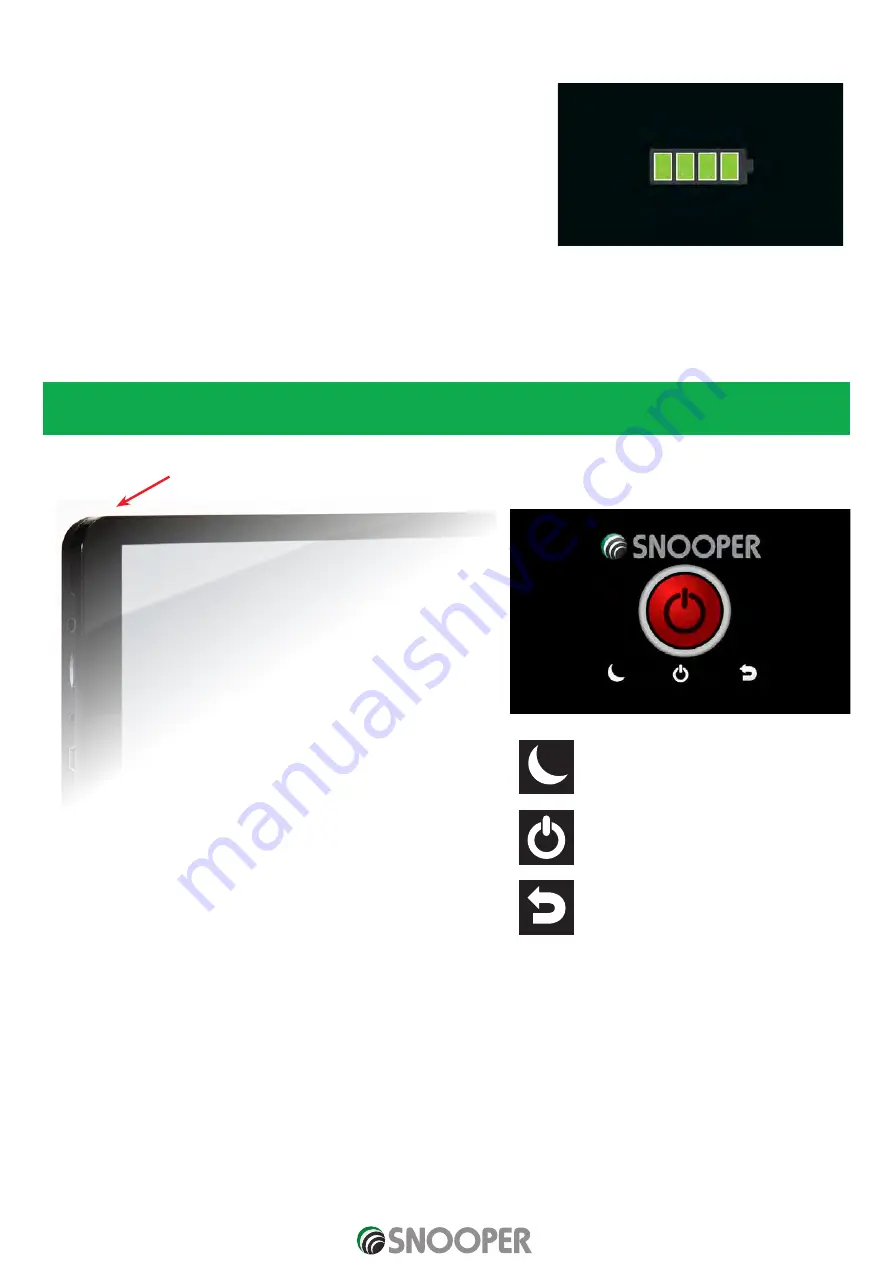
Powering Snooper using the built-in battery

Once Snooper is fully charged, it is ready for use. Press and hold the power switch on the top of the unit for 2 seconds to switch on 
the device.

Note: the battery is designed to be a back up ONLY and Snooper recommends that the the navigation device is powered from 
the vehicle charger when in use.

On 

Press and hold for 2 seconds

Off  

Press and hold for 7 - 10 seconds 

Note: when the power button is held there are 3 options 

Sleep: this will switch standby mode for a 
faster restart but it may discharge the 
internal battery.

Shut down: this will completely shut the 
Unitdown , conserving the internal 
battery.

Return to the previous screen

Pictures are for illustrative purposes only.

4 of 10

QSG EN  v1.1 11/19

Summary of Contents for S2700

Page 1: ...ot activate when you press and hold the standby power button for 2 seconds it may require charging Refer to the section Charging the internal battery later in this manual What s included 1 x Snooper satellite navigation system 1 x Micro SD Card Mapping 1 x 8GBMicroSD card DVR SC5800 and SC5900 DVR only 1 x Windscreen Mounting Bracket 1 x Active magnetic mount S6900 ONLY 1 x Protective case except ...

Page 2: ...d quality glass cleaner This allows a more secure seal on the windscreen Place the suction cup and bracket on the windscreen and twist the locking lever to secure the bracket Adjust the angle of the bracket so that when the unit is attached to it you can view the display and operate the controls safely Position Snooper onto the bracket by inserting the bottom of the unit first and then clipping th...

Page 3: ...e lighter adaptor into your vehicles cigarette lighter socket 3 Press and hold the standby power switch on the top of Snooper for two seconds to switch the device ON Note The device will power up automatically if there is power being supplied by the vehicle power cable If Snooper does not power up please check that the cigarette lighter socket is clean of any debris remembering not to insert metal...

Page 4: ...r to the picture on the right Powering Snooper using the built in battery Once Snooper is fully charged it is ready for use Press and hold the power switch on the top of the unit for 2 seconds to switch on the device Note the battery is designed to be a back up ONLY and Snooper recommends that the the navigation device is powered from the vehicle charger when in use On Press and hold for 2 seconds...

Page 5: ...tion and direction is indicated by the icon Tip To reduce the cold start GPS time remain stationary 2 Bring up the main navigation menu by touching the centre of the display Select Find by Post Code Tip This indicates that there are more options on the next screen currently there are three screens in total 3 You will see a standard browser screen used for entering postcodes Enter the full UK postc...

Page 6: ...isplayed but with the route now highlighted for you As you approach a specific turn in the calculated route Snooper will advise you what to do For example After 200 yards turn left followed by Now turn left As you proceed along your journey following the voice instructions you will notice that the navigation view is updated constantly always showing approaching roads and junctions and presenting t...

Page 7: ...LD REPLACE THE BATTERY PLEASE DISPOSE OF USED BATTERIES ACCORDING TO LOCAL WASTE MANAGEMENT RULES AND REGULATIONS FURTHER INFORMATION CAN BE FOUND LATER IN THIS USER MANUAL Setting up vehicle parameters For Truckmate Ventura or Bus and Coach to calculate a route suitable for your vehicle it needs to know certain information about the vehicle itself such as its height weight and width It is possibl...

Page 8: ...category E Passage forbidden through tunnels of category D and E Bulk or tank carriage Passage forbidden through tunnels of category D and E Other carriage Passage forbidden through tunnels of category E least restrictive Passage forbidden through tunnels of category E Passage allowed through all tunnels For UN Nos 2919 and 3331 see also ADR 8 6 3 1 Tunnel Category Truckmate ONLY ADR Tunnel Codes ...

Page 9: ...e All LEZs affect heavy duty goods vehicles usually over 3 5 tonnes Gross Vehicle Weight GVW and most buses and coaches usually defined as over 5 tonnes GVW Some LEZs also affect vans cars and motorcycles Most LEZs operate 24 hours a day 365 days a year with some of the Italian LEZs currently the only exceptions to this rule To enter your environmental setting press on the arrow once in the Enviro...

Page 10: ...s When TMC data is integrated directly into a navigation system traffic information can be used in the system s route calculation Performance Products Ltd Cleaver House Sarus Court Manor Park Runcorn Cheshire WA7 1UL Tel 44 0 1928 579579 E customerservices snooper eu For technical support Tel 44 0 333 121 2252 E Support snooper eu PLEASE NOTE Due to our desire to continually improve our products t...

Reviews: