C
ONFIGURING
THE
S
WITCH
5-28
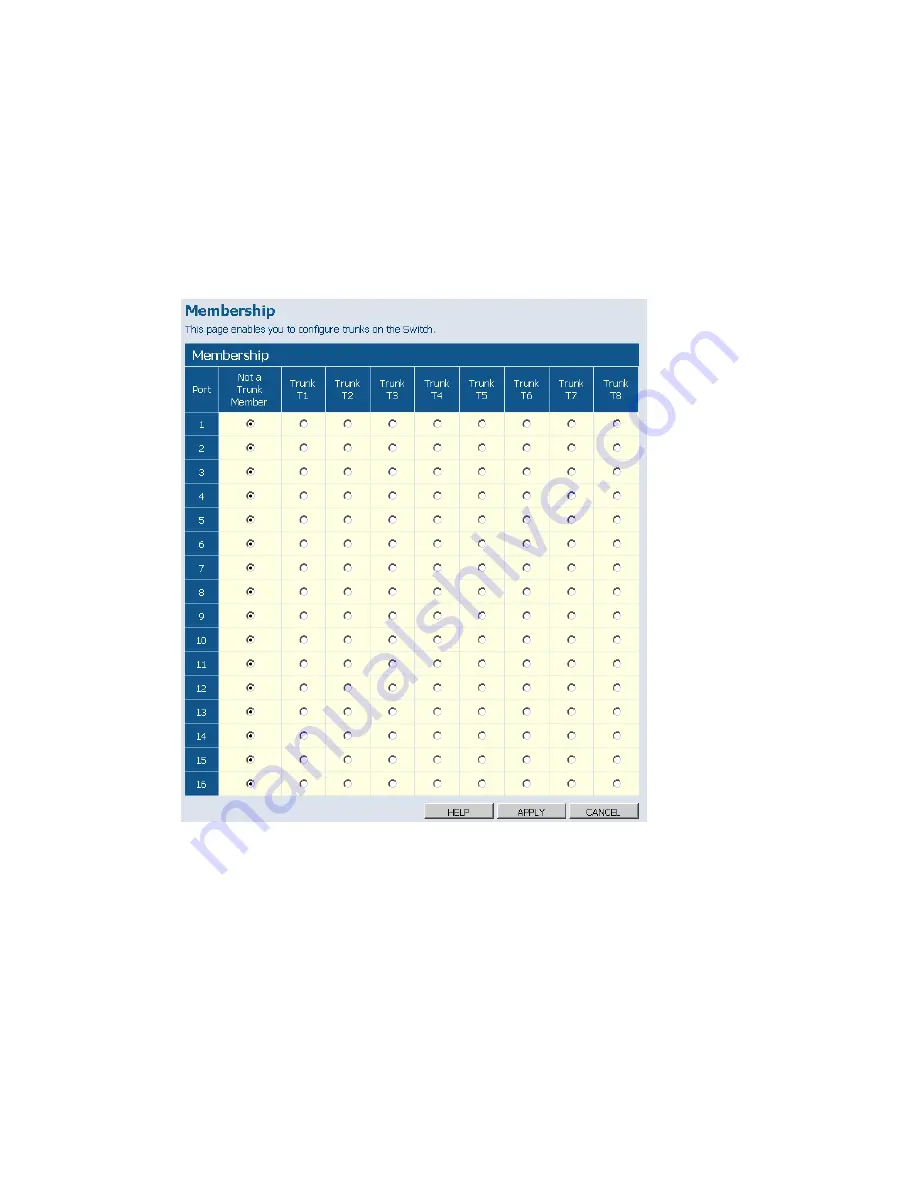
• Trunk T1-T8
– These columns correspond to the eight trunks that are
supported by the switch. To assign a port to a trunk, click on the radio
button in the corresponding column, then click APPLY.
Web
– Click TRUNKS, Membership. To assign a port to a trunk, click the
required trunk number, then click APPLY.
Figure 5-20 Trunk Membership
Trunk Configuration
Field Attributes
•
Trunk
– Indicates trunk identification.
•
Speed/Duplex
– Allows you to manually set the port speed and duplex
mode for all ports in the trunk.
Summary of Contents for EZ Switch SMCGS24C-Smart
Page 1: ...USER GUIDE EZ SwitchTM 10 100 1000 24 Port Smart Switch SMCGS24C Smart ta...
Page 2: ......
Page 18: ...TABLE OF CONTENTS xiv...
Page 22: ...FIGURES xviii...
Page 58: ...CONFIGURING THE SWITCH 5 8 Web Click STATUS Overview Figure 5 3 Switch Information...
Page 70: ...CONFIGURING THE SWITCH 5 20 Web Click SYSTEM Counter Config Figure 5 14 Counter Configuration...
Page 92: ...CONFIGURING THE SWITCH 5 42 Web Click IGMP Snoop Status Figure 5 29 IGMP Snoop Status...
Page 104: ...SPECIFICATIONS C 4...
Page 106: ...ORDERING INFORMATION D 2...
Page 112: ...GLOSSARY Glossary 6...
Page 116: ...INDEX Index 4...
Page 117: ......


