


Fitting Drive Unit to Door
Note:
The following instructions are for
RIGHT HAND
SIDE
installation (from the inside looking out).
WARNING: Do not allow persons around
the door during installation. Serious
personal injury and/or property damage
and/or death can result from failure to
follow this warning. People have been critically
injured by falling doors and shutters.
WARNING: If the unit is being retro-
fitted to an existing door - now is a good
opportunity to check the quality of the
installation of the previous technician
to make sure that the door bracket and door
are properly fixed to the wall. If the work is not
acceptable make sure that the door is appropriately
fixed and that no persons have access to the door
before that repair is made.
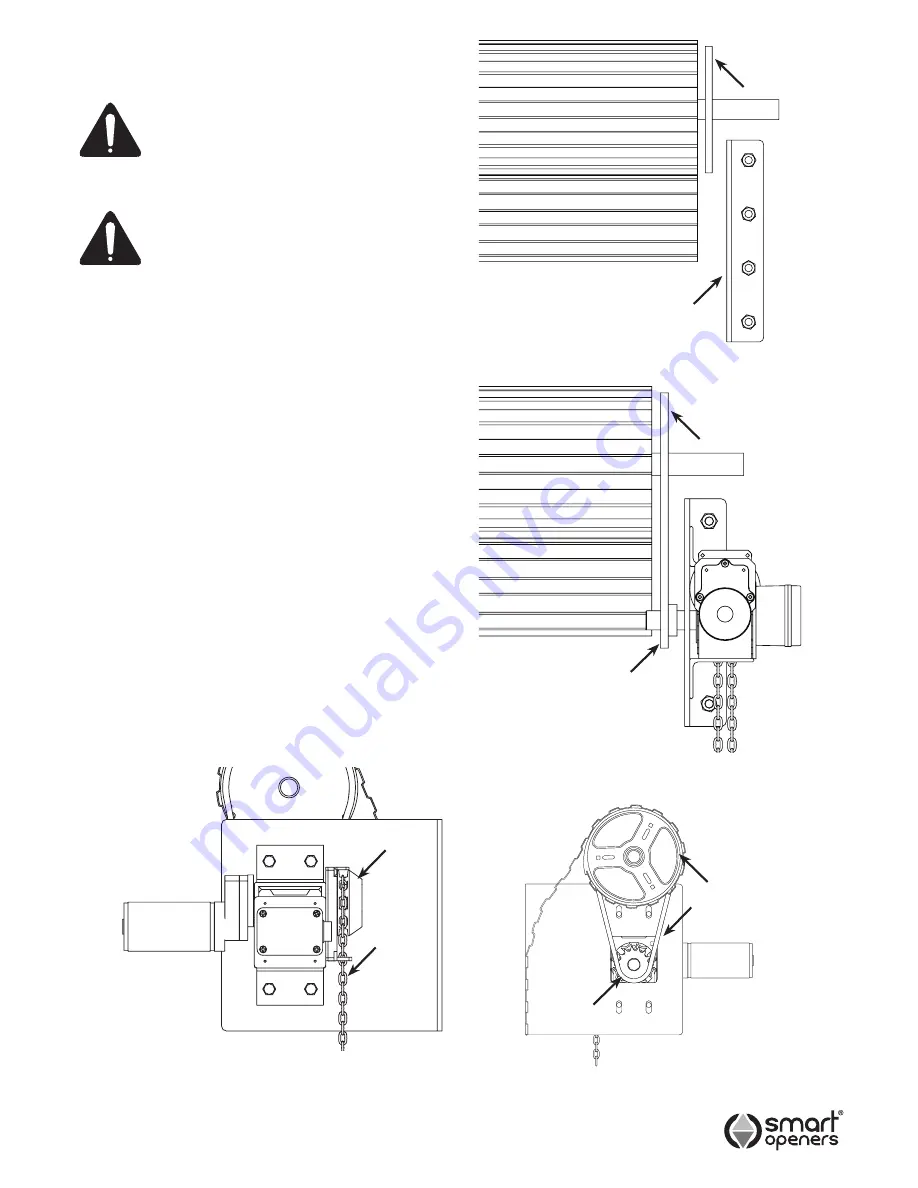
1.
Ensure that the existing door bracket is suitable to
have an opener fitted. If not fit an appropriate bracket
or use the mounting plate supplied with the opener.
Note:
The mounting plate must be fitted to a solid fixture.
The mounting holes in the plate are slotted for fine
adjustment to achieve appropriate tension on the
drive chain.
2.
Fix the mounting plate to the wall as required using
appropriate fasteners (M10) Fig. 3.
3.
Fix the drive unit to the plate using M8 bolts and
ensure that the drive sprocket is aligned with the door
drive gear Fig. 3a.
4.
Fit drive chain around door gear and drive sprocket.
Fig. 4.
5.
Ensure manual operation chain is seated properly in
the hub wheel Fig. 5.
-7-
Fig. 3
Fig. 3a
Fig. 4
Fig. 5
© June 2009 Smart Openers Pty Ltd
Mounting Plate
Drive Sprocket
Door Gear
Door Gear
Drive Sprocket
Door Gear
Drive Chain
Manual Chain
Hub Wheel