background image

9

www.smartavi.com

Using HotKey Commands

The default factory hotkey is the left “ctrl” key. To use a hotkey command simply hit ctrl twice, 

and then the appropriate command. 

HOTKEY SEQUENCE

FUNCTION

EXAMPLE

Q + #

Change to quad mode

Ctrl + ctrl + Q + 2

(quad mode)

F + #

Change to full mode of channel

P + #

Change to picture in picture mode for 

that channel (Note, user control will 

default to the last channel selected.)

Ctrl + ctrl + F + 1

(full mode with ch. 1)

U + #

Change the user control

Ctrl + ctrl + P + 3

(picture in picture 

mode with ch. 3 as the 

main)

O

Bring up the OSD

-

B

Re-Boot the HDMV-Plus

-

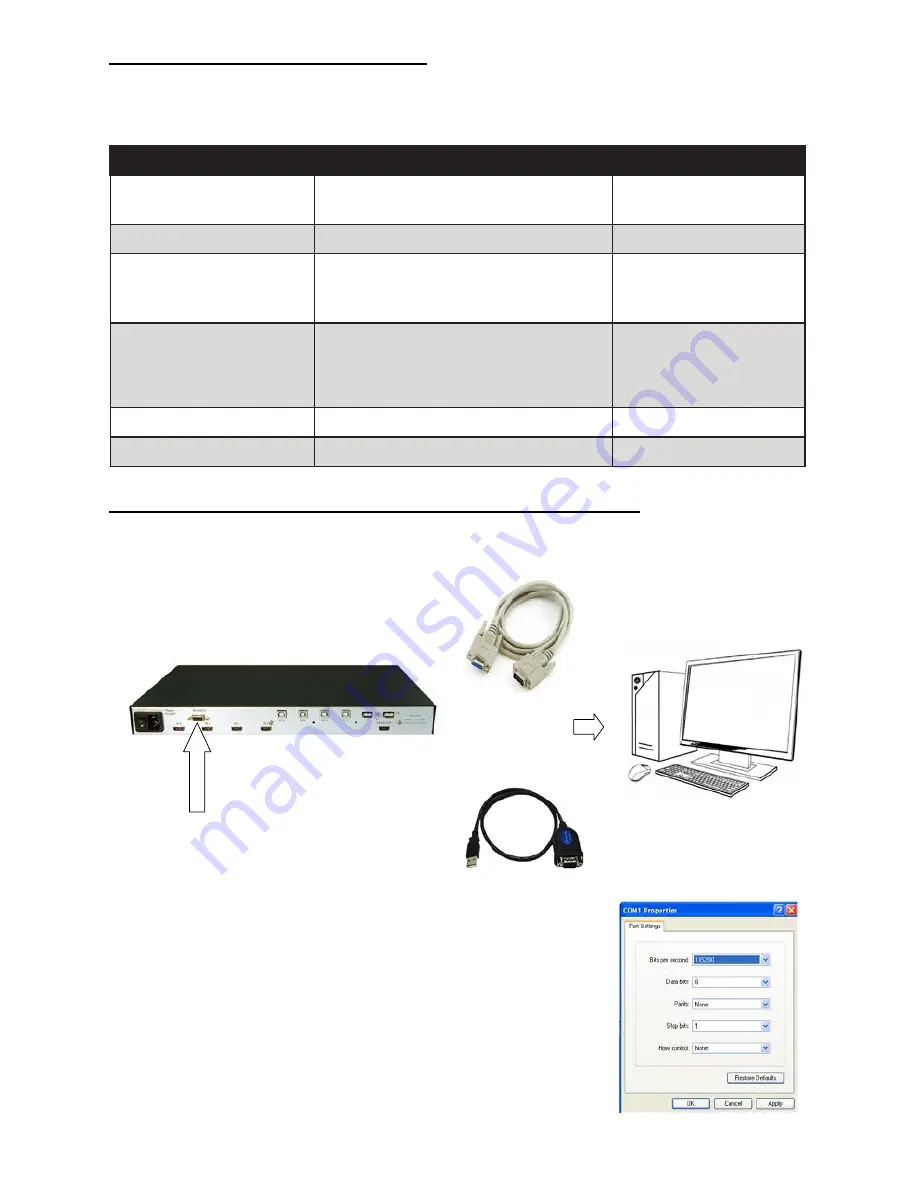
RS-232 Operation and Console Commands

OR 

USB to RS-232 Adapter Cable 

RS-232 Cable 

The HDMV-Plus may also be controlled via RS-232 commands; this feature requires an RS-232 

card installed on your computer or a USB to RS-232 adapter. First connect the RS-232 cable 

between your PC and the HDMV-Plus.

Next connect to the device using HyperTerminal or a similar serial 

data application and an DB9 for RS-232 connection. The settings for 

the connection are shown in the picture on the right.

Any serial data application similar to HyperTerminal will be able to 

connect to the HDMV-Plus provided the Bits per second are 115200, 

the data bits are set to 8, the Parity is “None,” the stop bits are “1,” and 

there is no flow control. HyperTerminal comes standard on windows 

XP and can be enabled on Windows Vista, Windows 7, and Windows 

8. There are many applications available for windows, Linux, and 

Mac operating systems.

Summary of Contents for HDMV-Plus

Page 1: ...com Installation Manual 4 Port Full HD Multiviewer HDMV Plus www smartavi com 1 800 AVI 2131 Made in the U S A View four different HDMI video sources simultaneously on one screen with USB keyboard and...

Page 2: ...e CBLDB906 1 6ft DB9 Serial RS 232 Cable Table of Contents TABLE OF CONTENTS AND TECHNICAL SPECIFICATIONS 2 3 INTRODUCTION AND FEATURES 4 APPLICATIONS 5 CONNECTING THE BOX AND USING THE FRONT CONTROL...

Page 3: ...0 Output Cable Length Up to 20 ft HDCP Compliance 1 0 2 0 Video Bandwidth Single link 340MHz 10 2Gbps Input Interface 4 HDMI Output Interface HDMI Connector Type A 19 pin female CONTROL Front Panel T...

Page 4: ...ing them all through a single display and set of controls Features View up to four computers on a single monitor at the press of a button Supports USB keyboard and mouse On screen display OSD makes se...

Page 5: ...te Servers User Control Call Centers for Technical Support Industrial Long Range Workstation Isolation Airport Installations Air Traffic Control Passenger Information H D M I O u t D V I D I n R S 2 3...

Page 6: ...nd mouse control will default to the last channel selected To switch to Quad Mode press QUAD on the front control panel and then select the desired channel 1 2 3 or 4 The keyboard and mouse control wi...

Page 7: ...to factory defaults To change modes with the OSD simply navigate with the attached keyboard and press the up and down arrow keys press the right key to activate the submenu and the left to deactivate...

Page 8: ...k scroll down to Factory Reset and press enter The HDMV Plus will perform a power reset on itself The position of the OSD can be moved around Select the OSD Position text and press enter Next use the...

Page 9: ...Commands OR USB to RS 232 Adapter Cable RS 232 Cable The HDMV Plus may also be controlled via RS 232 commands this feature requires an RS 232 card installed on your computer or a USB to RS 232 adapte...

Page 10: ...reen displaying full screen F4 Full mode input 4 selected Picture in Picture Mode P CR 4 inputs on screen main selection largest Area P3 Picture in picture mode input 3 selected Change User Control U...

Page 11: ...None the stop bits are 1 and there is no flow control HyperTerminal comes standard on Windows XP and can be enabled on Windows Vista Windows 7 and Windows 8 There are many applications available for...

Page 12: ...19200 baud 8N1 XON XOFF we suggest to start with 19200 baud even though higher baud rates are possible depending of target MCU clock Set the line endings on your terminal program to CR LF for outgoing...

Page 13: ...erminal The ASCII setup is found by clicking ASCII Setup under the settings tab in properties In the console type menuon and press enter Next type bootusb and hold the shift u button quickly afterward...

Page 14: ..._________________________________________________________________________________ Q I see vertical lines on the display What happened A The video memory needs to be refreshed Issue a console command...

Page 15: ...15 www smartavi com Notes...

Page 16: ...Rights Reserved S M A R T AU D I O V I D E O I N N O VAT I O N SmartAVI Inc Twitter smartavi 11651 Vanowen St North Hollywood CA 91605 Tel 818 503 6200 Fax 818 574 5581 http www SmartAVI com At SmartA...

Reviews: