


26
27
PART VII : CONFIGURE THE HAND CONTROL
7.1 Display and Keypad
7.2 Alignment Star Filter
7.3 Sorting Method of the Alignment Star List
1.
Access the menu “
Setup \ Handset Setting
” and press the
ENTER
key.
2.
Use the scroll keys to select “
LCD Contrast
”; then use the left/right direction keys to adjust
the contrast of the LCD screen.
3.
Use the scroll keys to select “
LED Backlight
”; then use the left/right direction keys to adjust
the brightness of the keypad’s LED backlight.
4.
Use the scroll keys to select “
LCD Backlight
”; then use the left/right direction keys to adjust
the brightness of the LCD screen’s backlight.
5.
Press
ESC
to exit the adjustment.
1.
Access the menu “
Setup \ Alignment Stars \ Sort by
” and press the
ENTER
key.
2.
Use the scroll keys to select “
Magnitude
” and press the
ENTER
key to sort the list by mag-
nitude (from the brightest to the faintest).
3.
Use the scroll keys to select “
Alphabet
” and the press the
ENTER
key to sort the list alpha-
betically.
•
The alignment star’s altitude must be above 15 degrees.
•
For an equatorial mount, the alignment star’s declination must be between -75 and +75
degrees.
•
For an alt-azimuth mount, the alignment star’s altitude must be below 75 degrees or within
the altitude limits defined by the user
(Section 6.3)
.
Not all combinations of alignment stars are good for a 2-star alignment or 3-star alignment.
The SynScan hand control uses a built-in advanced alignment star filter to show only the stars
which is suitable to work with the 1
st
or 2
nd
alignment star(s), when asking the user to choose
the 2
nd
or 3
rd
alignment star. It helps to improve the success rate of the alignment.
Some advanced users or those who have limited visible sky can turn on/off this advance filter
with the following steps:
1.
Access the menu “
Setup \ Alignment Stars \ Adv. Filter
” and press the
ENTER
key.
2.
Use the scroll keys to choose “
OFF
” and then press the
ENTER
key to disable the filter.
3.
Use the scroll keys to choose “
ON
” and then press the
ENTER
key to enable the filter.
Note:
Even if the advanced filter function is turned off, the SynScan hand control will still
apply
the following rules to generate the list of alignment stars:
PART VIII : AUXILIARY FUNCTIONS
8.1 Editing Date, Time, Coordinates, Time Zones, and Daylight Saving Time
8.2 Re-aligning the Mount
8.3 Show Position
8.4 Show Time and Local Sidereal Time
8.5 Display Version Information
1.
Press the “
MENU
” shortcut key.
2.
Use the scroll keys to select “
Date
” and press the
ENTER
key to edit the date. Press the
ENTER
key to apply change, or press the
ESC
key to exit. (Note: The setting of the date is
in mm/dd/yyyy format, i.e. 10/24/2012)
3.
Use the scroll keys to select “
Time
” and press the
ENTER
key to edit the time. Press the
ENTER
key to apply change, or press the
ESC
key to exit. (Note: The setting of the time is
in 24 hours format, i.e. 18:30:00 is entered for 6:30pm.)
4.
Use the scroll keys to select “
Observation Site
” and press the
ENTER
key to edit the geo-
graphic coordinates. Press the
ENTER
key to apply the change or press the
ESC
key to exit.
Edit the time zone. Press the
ENTER
key to apply change or press the
ESC
key to exit.
5.
Use the scroll keys to select “
Daylight Saving
” and press the
ENTER
key, and then use the
scroll keys to select between “
Yes
” and “
No
”. Press
ENTER
to apply change.
Note:
refer to Step 5 in
Section 2.2
for detailed input instructions.
1.
Access the menu “
UTILITY FUNCTION \ Show Position
” and press the
ENTER
key.
2.
Use the scroll keys to switch between the following coordinates:
•
Dec/RA
: Displays the current celestial coordinates of the telescope.
•
Alt/Azm
: Displays the current horizontal coordinates of the telescope.
•
Ax1/Ax2
: Displays the current coordinates of the mount.
Ax1
is the position of the dec-
lination or altitude axis, and
Ax2
is the position of the R.A. or azimuth axis.
Tip
: Users can use the direction keys to slew the mount to specific coordinates by referring
to the real-time coordinates display.
Users can execute the 1-star alignment, 2-star alignment or 3-star alignment at any time with-
out restarting the mount.
1.
Access the menu “
SETUP \ Alignment
” and then press the
ENTER
key.
2.
Use the scroll keys to select an alignment method and press the
ENTER
key to start the
alignment process. For detailed instructions on alignment, please refer to
PART III
.
Access the menu “
UTILITY FUNCTION \ Show Information \ Time
” and press the
ENTER
key to
display the current local time and the local sidereal time. Press the
ESC
key to exit.
Access the menu “
UTILITY FUNCTION \ Show Information \ Version
” and press the
ENTER
key,
and then use the scroll keys to browse through the following information. Press the
ESC
key
to exit.
7.4 Naming of Stars
1.
Access the menu “
Setup \ Alignment Stars \ Set Star Name
” and press the
ENTER
key.
2.
Use the scroll keys to choose between “
Common Name
” and “
Bayer Designation
”, press the
ENTER
key to confirm
.
Summary of Contents for EQ5
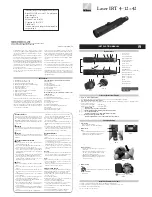
Page 1: ...INSTRUCTION MANUAL Telescopes with NEQ3 EQ5 Mount 031007V3 ...
Page 14: ......
Page 27: ......
Page 29: ...INSTRUCTION MANUAL SynScan TM 140303V4 Copyright Sky Watcher ...
Page 51: ...SynScan TM ...