Skymaster DVR 8080 Operating Instructions Manual Download Page 21

GB 21

12. Recorder – Control functions

13. Troubleshooting

No antenna signal

(no signal on the device and via signal indicators in the OSD):
1. Check the antenna cable first: The screening braid and the aluminium foil have to have contact with the F plug,

but should not touch the inner conductor!

2. Check the LNB settings. LNB 1 should be set for ASTRA satellites. Use a conventional digital LNB, the values

9750 MHz and 10600 MHz have to be set for the lower and upper frequency. In order to detect the fault, connect
the LNB and the receiver directly, remove the change-over switch and the distributor for the time being.

Malfunctioning

1. The device displays incorrect air times in the EPG or the incorrect time: After switching on the receiver, the data

has to be read and evaluated. Depending on the transponder, this procedure can take a while. Sometimes it may
be necessary to recall the EPG or to switch channel.

2. The device no longer reacts: Disconnect the mains plug and wait a few seconds until restarting the device. If it is

a software error, you can quickly download a software update onto the receiver via satellite.

Only a few channels

1. The antenna has been aligned to the wrong satellite position. When aligning the antenna it is possible that you

receive one of the numerous other satellites which transmit at a similar frequency and address the signal
indicators of the receiver. In this case, foreign channels often appear when switching channels and very often
the message “No signal” is displayed. It is often sufficient to slightly move the antenna to the east or west to
receive the desired channels.

2. Check whether you have activated the correct channel list. Press the BROWSE button to call the channel list.

Press the 

or 

button to select the desired channel list (e.g. “All satellites”).

Playback – Skip: When pressing the SKIP button, you can skip parts of the broadcast and continue
the recording at any point: When entering 01:30:20, the playback will fast forward to and continue at
1 hour, 30 minutes, and 20 seconds of the recording time.
Playback – Loop: You can also run the playback in a continuous loop. Once the playback has
finished, it will start again and continue to repeat itself until the STOP or LOOP button is pressed
again.
Playback – Repeat: You can select any sequence from the recording and repeat it continuously.
Press the REPEAT button at the beginning of the sequence (point A will be established) and press
REPEAT again at the end of the sequence (point B). The scene between point A and B will be repeated.
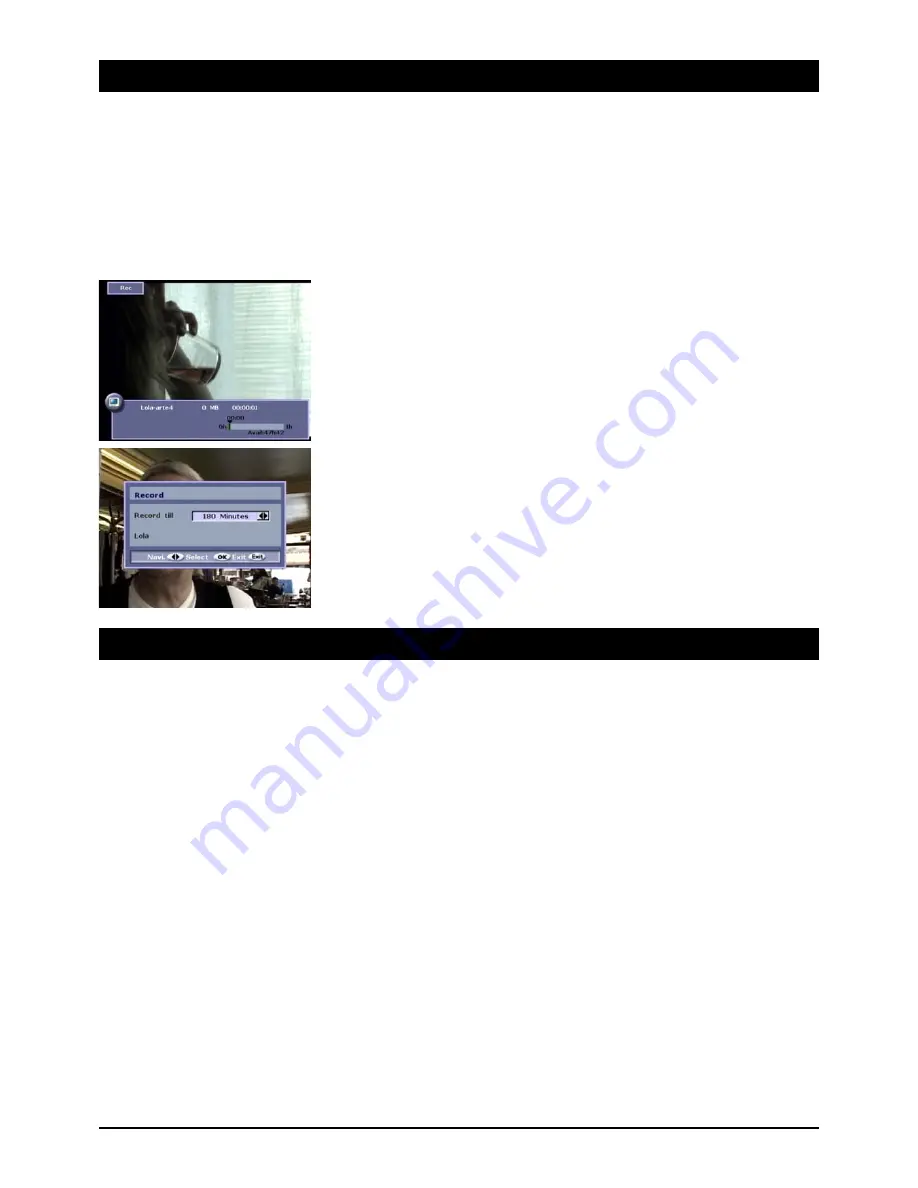
Direct recording
Press the recording button [ O ] to start the direct recording feature. Pressing the PAUSE button or
selecting the image search feature does not affect the direct recording function in any way.

Press the STOP button to exit the recording. Should you intend to store the recording, answer YES to
the question. If you select ABORT the recording will continue.

Note: Prior to starting the recording, you can decide when to automatically stop it: You can choose
between 30 - 180 minutes or select to finish the recording by pressing the STOP button.

Summary of Contents for DVR 8080

Page 1: ...SATELLITE RECEIVER DXR 8000 DVR 8080 OPERATING INSTRUCTIONS 39718 39748...

Page 2: ...Videotext 7 EPG Electronic Program Guide 8 7 Welcome 9 Easy speed set up of your receiver 9 Language settings 9 OSD language 9 Audio language subtitles 9 Satellite selection Initial set up of the sat...

Page 3: ...ation work has been completed Earthing Antenna systems must always be earthed paying heed to the pertinent local and VDE regulations ASTRA EUTELSAT T RKSAT DiSEqC and Skymaster are registered trademar...

Page 4: ...hed to AV mode by the connected devices e g VCR DVB T or SATELLITE receiver This is achieved by a switching voltage 12 V which forces the TV to switch to AV mode The useful function can be deactivated...

Page 5: ...ected 5 Close the cover and turn the device on 6 Initialising formatting of the hard disc may take several minutes Note A variety of the most common IDE hard discs 40 240 GB were used to test the DXR...

Page 6: ...on EXIT Due to the digital receiver technology and ever increasing programme selections the list can include numerous stations and become very complex For this reason several options are available to...

Page 7: ...function above you can also invoke your favourite lists from the general programme list If you do not create your own favourite programmes empty lists or an error message will be displayed To compile...

Page 8: ...of the selected station will be displayed Some stations provide a preview of up to a fortnight The desired day can be selected by pressing the VOL button Nearly all EPG overviews allow the pre selecti...

Page 9: ...r multiple user satellite systems Simply choose the desired selection and start the search run under Satellite Prior to the search run it is possible to define whether the search should include only F...

Page 10: ...Welcome menu satellite selection contains further possibilities to set up another satellite con figuration or further positions You can select the following options via button 1 2 3 or 4 1 Add satell...

Page 11: ...ettings In this menu you can add further satellite positions delete positions and carry out various search run functions In the lower part you can monitor the signal strength and quality Satellite Use...

Page 12: ...der details are e g Example TV 12 449 75 V 12450 vertical SR 27500 27500 FEC 3 4 the FEC error correction is determined automatically Change transponder If the transponder settings have been changed b...

Page 13: ...button i to change from upper to lower case characters 7 Moving To move a selected programme to a new position press button 7 The colour of the selected line will change Subsequently use the buttons C...

Page 14: ...o update the software of the device To improve the functions with technical innovations to eliminate errors or channel reception problems The search for the latest software version can take a few minu...

Page 15: ...tched to the recording mode Playback to play back a recorded file at a pre determined time Setting up the password You can lock programmes with contents unsuitable for minors and the receiver to preve...

Page 16: ...g you would like to lock and press button 5 After you have entered the password a little padlock symbol will be displayed on the right hand column 6 Renaming If you would like to rename a certain reco...

Page 17: ...video audio and picture recordings Video guide The video guide provides you with a detailed overview of all available TV recordings It contains a preview the duration of the recording and the recordin...

Page 18: ...uired storage space for the time shift mode see Chapter 12 Reserve 1 4 hours of hard disc storage space for the time shift mode or completely remove the restriction Hard disc power shut off This featu...

Page 19: ...Select the first recording which you would like to record on your external video recording device and press the VOL VOL button You can determine and store the sequence of all broadcastings in the colu...

Page 20: ...ange to time shift mode by pressing the pause button The time shift mode will be shown on the receiver s display as tSht The current TV broadcasting will be paused on the screen but continues to be re...

Page 21: ...tching channels and very often the message No signal is displayed It is often sufficient to slightly move the antenna to the east or west to receive the desired channels 2 Check whether you have activ...

Page 22: ...creen menu It is possible to access channel information or change receiver settings via the OSD PVR Personal video recorder PVR receiver are called receiver with integrated hard disc QAM See modulatio...

Page 23: ...4000 TV channels radio stations Electronic Programme Guide EPG with extensive information about current and subsequent programmes Individual channel list arrangement Sleep and recording timer Conveni...

Page 24: ...9903971802 BDA GB 05 2006 9903974802 BDA GB 05 2006...

Reviews: