background image


23


The number of bytes received and transmitted 


Duration of the current connection 


IP address and Subnet Mask for the device 


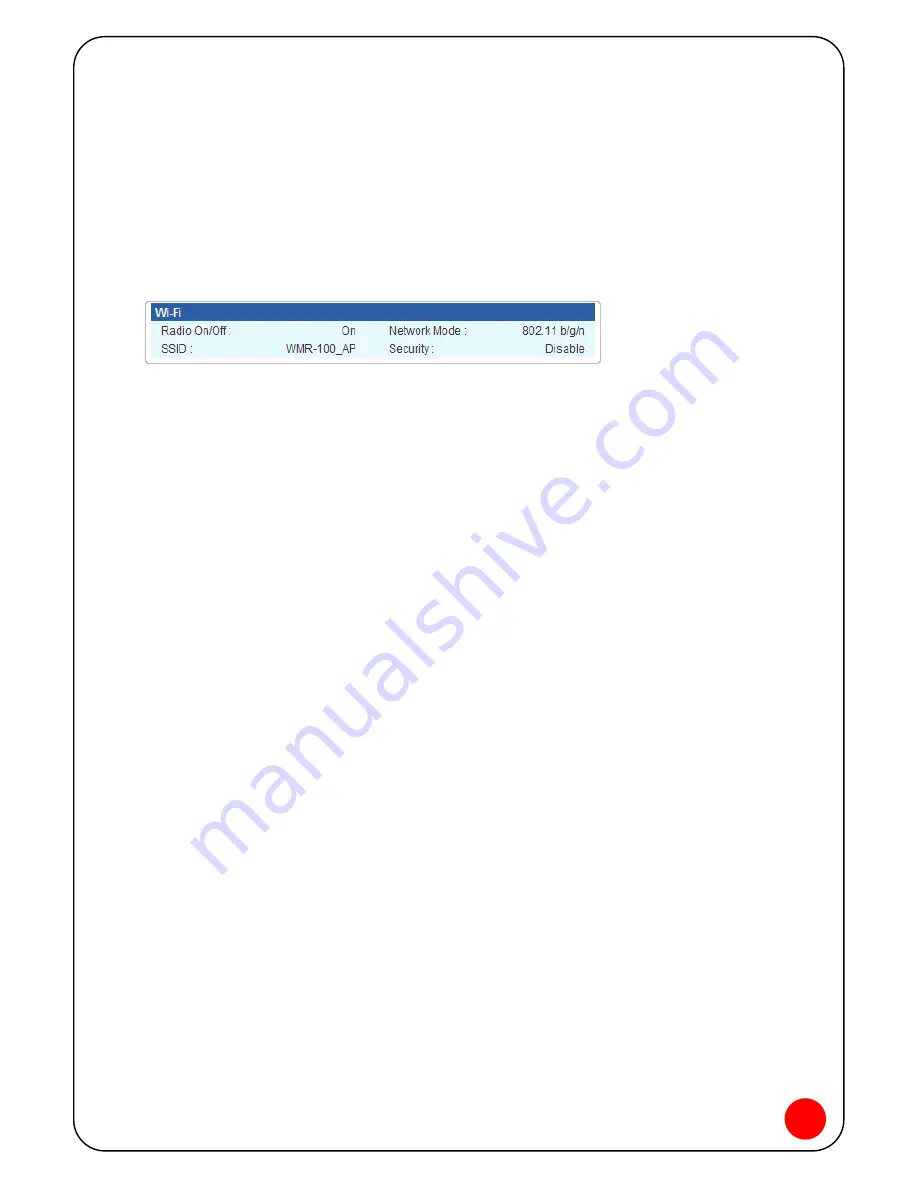
3. Wi-Fi 


Wi-Fi section tells: 


The Radio Status 


The network mode 


The network name (SSID) 


The Security Status 

To change Wi-Fi settings, use the Wireless Settings Menu in Advanced settings. 


Summary of Contents for BEETLE WMR-100

Page 1: ......

Page 2: ...1 SKYLINK BEETLE User Manual ...

Page 3: ...e 450MHz band and Wi Fi enabling you to connect several devices to the internet and Wi Fi enabled devices anywhere Customer service For customer service contact at info wetelecom net Address WeTelecom Co Ltd The O Plus 1604 Sanbon dong Gunpo City Kyunggi do KOREA Phone 82 70 8699 3873 Limitation of Liability The information contained in this document is subject to change without notice and should ...

Page 4: ...allation for Windows OS 13 NetKit Installation for MAC OS 13 Minimum System Requirements 14 Power Source and Battery Charging 15 LED States 15 How to insert RUIM Card Battery and Charge the Battery 16 Powering the Skylink BEETLE On and Off 18 Choose between Wi Fi mode and USB Modem Mode 18 4 Wi Fi Mode Connection for the First time 19 Browser Interface 19 How to Connect to the Skylink BEETLE 19 Op...

Page 5: ... and Uninstall Windows XP 39 NetKit Installation and Uninstall Windows Vista or 7 43 8 Descriptions of the NetKit GUI in USB Modem Mode 47 Launch the NetKit 47 Interface overview 47 9 Internet Services in USB Modem Mode 48 Accessing the Internet 48 History Information 48 10 SMS Service in USB Modem Mode 49 Creating and sending a Message 49 Inbox 49 Outbox 50 11 PhoneBook in USB Modem Mode 51 Creat...

Page 6: ...n 53 Unlocking the PIN 53 Selecting a PPP mode 53 Enable Disable PIN 54 Change PIN Code 54 Selecting Always On Top mode 54 Selecting a Pref Mode 55 Selecting a language 55 13 How to Mac OS in USB Modem Mode 56 14 Trouble Shooting 57 Reset and Factory Reset 57 15 Product Specification 59 Technical Specification 59 ...

Page 7: ... 7 Store the Skylink BEETLE in a safe place when not in use 8 Turn the power off and remove the battery from device when not in use if possible 9 Due to the transmission and reception properties of wireless communications data can occasionally be lost or delayed This can be due to the variation in radio signal strength that results from changes in the characteristics of the radio transmission path...

Page 8: ...ate the Skylink BEETLE in any area where a potentially explosive atmosphere may exist Sparks in such areas could cause an explosion or fire resulting in bodily injury or even death Be aware and comply with all signs and instructions Users are advised not to operate the Skylink BEETLE while at a refueling point or service station Users are reminded to observe restrictions on the use of radio equipm...

Page 9: ... aircraft in order to comply with these regulations The Skylink BEETLE can transmit signals that could interfere with various onboard systems and controls While operating a vehicle The driver or operator of any vehicle should not operate a wireless data device while in control of a vehicle Doing so will detract from the driver or operator s control and operation of that vehicle In some countries o...

Page 10: ...g with Wi Fi or USB Cable Single user One can use it with USB data cable as Modem mode or without data cable as Wi Fi mode Multiple users Use as Wi Fi mode The Skylink BEETLE package includes a battery to work on both Wi Fi mode and USB Modem mode When using as USB Modem mode the driver and NetKit program will automatically installed into PC Notebook Using as Wi Fi Mode Multiple users can access t...

Page 11: ...Mini Hotspot 1 Power Button and Status Indicators Indicates power battery and CDMA communication activities Please refer to the Power Button LED status page See page 14 for Power Button LED description 2 Wi Fi Router Status Indicator Indicates Wi Fi Router status See page 14 for Wi Fi Router Status Indicator LED description 3 External Antenna Connector Enable you to use external antenna for better...

Page 12: ...or Connects to desktops notebooks with a Type A USB port 5 Factory Reset button Resets the device to initial factory settings 6 RUIM Card Slot RUIM card is inserted here 7 Battery Compartment Battery is inserted here 5 6 7 ...

Page 13: ...ice and charge it for 3 hours before using the device 6 Choose between either Wi Fi Mode or USB Modem mode When multiple users are using choose Wi Fi mode When single user is using choose USB Modem mode or Wi Fi Mode 7 Using as Wi Fi mode for the first time Press the Power button on Skylink BEETLE shortly The Power button LED and Wi Fi LED will flash Use Wi Fi manager on your computer to locate th...

Page 14: ...t software for either Windows OS or Mac OS as follows NetKit Installation for Windows OS i If USB DRIVER is not present Modem package Installer will run automatically Tip If Modem package Installer doesn t work automatically Execute RunPack exe manually ii Select the desire language and press OK Welcoming message for using NetKit Program window will be shown iii Press Install button The program st...

Page 15: ...C Notebook at speed of 300 MHz or higher Wireless LAN is essential Recommending 802 11 b g n 2 4GHz Minimum 233 MHz speed required Intel Pentium Celeron products AMD K6 Athlon Duron products or compatible processors Recommend to use 128MB RAM or higher At least 100 MB of free hard disk space is required Motherboard or PCI card that supports USB Video adaptor with Super VGA 800 x 600 or higher reso...

Page 16: ...aptor are connected If USB cable is connected between the device and PC notebook the device will be turned on automatically without pressing the Power button When Power button is not pressed then battery will be charged only through either USB Cable or AC Travel Adaptor LED States Wi Fi Router Status LED LED Status Status information LED not lit No Power Wi Fi mode off LED Green Solid Wi Fi Powere...

Page 17: ... to EVDO LED Blue Blink Connected to 1x LED Orange Solid Charging LED Orange Blink Fully Charged How to insert RUIM Card Battery and Charge the Battery For first time use of Skylink BEETLE Mini Hotspot we recommend to follow below sequences Note Before using the Skylink BEETLE Mini Hotspot for the first time please insert RUIM card and fully charged battery 1 Open the battery cover which located i...

Page 18: ... service provider See the below picture for more detail 3 Insert the battery by lining up battery contact point with the gold contact points 4 Once the battery is securely settled put the battery cover back into the device until it locks firmly ...

Page 19: ... And solid green LED indicates the device is in service area and ready to connect Press Power button for two to three seconds to power on To power the device off Press the Power button until the Power LED shuts off Press Power button for two to three seconds to power off Choose between Wi Fi mode and USB Modem Mode When setup is completed you can choose one of two modes Wi Fi mode or USB Modem mod...

Page 20: ...n to connect to Wi Fi mode 3 Use your default Wi Fi manager to locate the Skylink BEETLE wireless network Tip The Steps of connecting to a Wi Fi network vary depending on your operating system whether you use the native application or third party software Generally you click an icon often in the Windows notification area or System Preferences Network on a Mac where you can select View Available Wi...

Page 21: ...de you through setting up security sequences for your device Important Be sure to write down both the administrative password and the network key which you created from the initial Setup wizard If you cancel the wizard your network will be left unsecure open 10 Follow the instructions on the screen as shown Choose one from 3 different connection mode Auto Manual and On Demand Click Next button ...

Page 22: ...ox and to write Pass Phrase Pass Phrase is your password 11 After you click Done your device will start Open the Browser Interface 1 Open your Web browser and type http 192 168 0 254 into the address window 2 Type in the administrative password into the Login Popup window and press Enter key Important If this is the first time you are entering the browser interface or if you have used the factory ...

Page 23: ...ain point of entry for all your work in the browser interface 1 Status Bar Status bar runs horizontally along top of the browser interface It displays information about the device as shown below From the left is Signal Strength Service status Connection status RUIM status Battery level 2 Internet Connection Internet connection tells ...

Page 24: ...tion of the current connection IP address and Subnet Mask for the device 3 Wi Fi Wi Fi section tells The Radio Status The network mode The network name SSID The Security Status To change Wi Fi settings use the Wireless Settings Menu in Advanced settings ...

Page 25: ... for connecting to 3G network 1 RUIM Status PIN Lock Indicates RUIM Lock Status PIN Count Indicates the number of PIN Verification attempts 3 attempts are possible for PIN Verification If failed after 3 tries RUIM card will be blocked To reuse the card one must enter the validated Unblock code Unblock code can be tried for upto 10 times Note Pin Unblock code is on the RUIM card Important If RUIM c...

Page 26: ...f PIN code failed after 3 attempts card will be blocked To unblock the card and set a new PIN one must enter the Unblock code When Unblock code is properly inserted the device will reboot and RUIM stays in a Locked position PIN Code Setting PIN code 3 WWAN Connection Mode Setting 3G connection mode On Demand User trying to access the Internet when the device is connected to Wi Fi network it will a...

Page 27: ... Selecting Security settings If not selected Wi Fi network becomes unsecure When enabled must setup a password Pass Phrase Pass code or password used to access the network The default value is WPA2 PSK Temporary Hotspot This Function allows you to set up a temporary hotspot for multiple users in your working area maximum of five to go online at the same time It generates a temporary network name a...

Page 28: ... example shown above the temporary network name is WMR 100_638p and the temporary network key is br7ecsrf 2 Click Apply Members of your workgroup can now use the temporary network name and network key to connect to your device Tip Make sure Enable check box is selected to create a new network name and network key ...

Page 29: ... subnet mask can be altered by entering new numbers and pressing Apply button If you have devices with local static IP addresses these addresses should not be within the DHCP range If all clients in the Network use static IP the user can disable DHCP server When setting DHCP range End IP address value must be larger than Start IP address UPNP UPnP Universal Plug and Play is a protocol in Window s ...

Page 30: ...correct settings on the client s network card for proper connection SSID Wi Fi network name You can assign a name to distinguish with other router devices Broadcast Network Name enable disable Your SSID will broadcasted Frequency Channel It is strongly recommend to use the default values TX Power 0 25 50 75 100 User can change TX power based on distance from Base Station or environment Note Very c...

Page 31: ...y when you try to reconnect then delete the existing old network name from your Preferred Networks list Try to reconnect again 3 WPS User can setup security easily by choosing PIN or PBC method in Wi Fi Protected Setup The WPS feature allows to connect Wi Fi and to setup security with a single button If there is a same SSID nearby the AP it changes SSID and assigns a random password using alphabet...

Page 32: ...ccept 2 System Security You may configure the system firewall to protect AP Router itself from getting attacked Remote management Setting remote access If enabled it is possible to access remotely but it may get intrusion from outside Ping from WAN Filter It can block PING from outside or unblock it Stateful Packet Inspection Stateful Firewall enable A stateful firewall any firewall that performs ...

Page 33: ...the Internet to connect to a specific computer or service within a private local area network LAN with mapping of IP address and port number How to set Port Forwarding 1 In the menu Advanced Settings Traffic Control Port Forwarding do as follows A Comment Assign a name for Port Forward rules B Protocol Set Port Forward protocol TCP or UDP C IP address Set IP address for packets received from exter...

Page 34: ...ber DMZ makes it possible If assigned as above settings all ports from AP will be set as designated IP 192 168 0 123 to send packets 3 QoS It is possible to control the speed of the Client s connection to the Internet based on bandwidth of connected AP For proper operations it is important to know the basic values of internet speed of connected AP and set accordingly Example CDMA EVDO rev A Down 3...

Page 35: ...P 2 DDNS In AP network that uses PPP or DHCP with dynamic IP for FTP or Web server the external IP address may get altered User needs to check each time and must make changes accordingly By using DDNS service it provides a residential user s Internet gateway that has a variable often changing IP address with a well known hostname resolvable through standard DNS queries easily In order to use DDNS ...

Page 36: ...ce site 4 Setting registered Host Name Use host name which registered in the service site 5 Click Apply 3 Advanced Routing Advanced Routing allows setting of routing table directly Setting up 1 Destination Set Target IP 2 Range Choose Host or Network 3 Gateway Set Gateway address that transmits with Target 4 Interface Choose Interface LAN or WAN or custom 5 Comment ...

Page 37: ...function 2 Firmware Upgrade When AP is connected to the Internet it is possible to upgrade the firmware through the menu Update Firmware Update Bootloader 3 Settings Management User can save system settings for review load or reset to factory default Export Settings Save current status of AP to a PC Before the firmware upgrade Export function saves configurations to a file Import Settings Restore ...

Page 38: ... Network Information 3 Modem Status Indicates status of the Modem Modem State Connection status Network service status Received Signal Strength information and Battery level System Information Roaming indicator IP address Subnet mask and Connection time RUIM RUIM Lock status PIN PUK Count EVDO Indicates EVDO Network Status Channel PN offset State Session RSSI Ec Io Tx Adjust Tx Power DRC 1x Indica...

Page 39: ...ties User can check the AP s activities through System Log It is possible to review AP s acting status IP distribution status PPP connection status and others 5 Information It displays Manufacturer Information Firmware Version and Contact ...

Page 40: ...The device will power on automatically If USB DRIVER is not present Modem package Installer will run automatically Note If Modem package Installer doesn t work automatically Execute RunPack exe manually 2 Select the desire language as shown below 3 Press button to proceed By pressing button the installation of NetKit program will be aborted 4 Welcoming message for using NetKit Program window appea...

Page 41: ...40 5 Press Button The program starts automatically ...

Page 42: ...Please check whether the driver has been installed properly by checking Device Manager Start Control Panel System Hardware Tab Device Manager If Device Manager for Modems and Ports indicate as WeTelecom Mobile USB Modem and WeTelecom Mobile Serial Port 1 2 then the driver has been successfully installed ...

Page 43: ... from Driver directory Run Setup exe to install NetKit manually 2 USB Driver Uninstall 1 Disconnect the modem from USB port before uninstalling the driver 2 By clicking Uninstall in the Start All program wetelecom it will start uninstalling as shown below ...

Page 44: ...present Modem package Installer will run automatically Note If Modem package Installer doesn t work automatically Execute RunPack exe manually 2 Select the desire language as shown below 3 Press button to proceed By pressing button the installation of NetKit program will be aborted 4 Welcoming message for using NetKit Program window appears ...

Page 45: ...44 5 Press Button The program starts automatically ...

Page 46: ...Please check whether the driver has been installed properly by checking Device Manager Start Control Panel System Hardware Tab Device Manager If Device Manager for Modems and Ports indicate as WeTelecom Mobile USB Modem and WeTelecom Mobile Serial Port 1 2 then the driver has been successfully installed ...

Page 47: ...rom Driver directory Execute Setup exe to install NetKit manually 2 USB Driver Uninstall 1 Disconnect the modem from USB port before uninstalling the driver 2 By clicking Uninstall in the Start All program wetelecom it will start uninstalling as shown below ...

Page 48: ... are unavailable Interface overview 1 Shortcut Icons Internet Connection Voice Call interface Phonebook Interface SMS Interface Setting Interface 2 Status Information Network signal Indicates the signal strength of the network Network information Display the profile of the current network SMS information Display SMS message Notification 1 Text SMS 2 Voice Mail Modem USB connection information Disp...

Page 49: ...nection interface 2 Select Connect tab 3 Enter proper UserName Password ServiceNum and Click 4 Open web browser on the PC to access the internet Note You can disconnect the internet any time by pressing button History Information History Information indicates connected time and Packet amount 1 Click to display the Connection interface 2 Select History Tab Search History by Date Delete the selected...

Page 50: ...4 Click to search phone number and Double click searched number if you want to send 5 Click to send message Note If you don t want to save sent message you can select Not Save when SMS window appears Otherwise the sent message will save in RUIM Inbox Inbox stores the received messages 1 Click to display the SMS interface 2 Select Inbox Tab 3 It displays received message phone number timestamp and ...

Page 51: ... Outbox stores the transmitted message 1 Click to display the SMS interface 2 Select Outbox Tab 3 It displays received message phone number timestamp and content You can see all messages by clicking the message Delete the selected message Delete All messages Reply to the selected message Forward the selected message ...

Page 52: ...ick then new window will popup 2 Enter Index Name and Phone number and click If you don t want to save click Exit button Editing a Contact 1 Click after selecting a contact it will popup phonebook edit window 2 Click to edit the contact Deleting a Contact 1 Select the contact and Click Searching a Contact 1 Select the category for searching 2 Click you can see searched result in list box ...

Page 53: ...52 Sending a message 1 Select contact and then Click 2 Click to send the message ...

Page 54: ...sion Information Unlocking the PIN 1 When the RUIM card is locked the Unlock PIN dialog box is displayed after you start the NetKit 2 Enter the correct PUK code 3 Enter the new PIN code 4 Click OK to complete the modification Selecting a PPP mode 1 Click to display the Setting interface 2 Select User Tab 3 Choose from the list in and Click ...

Page 55: ... 4 Enter pin code for Old PIN Code New PIN Code and Verify New PIN Code and then Click Note Entering the wrong PIN codes for 3 times the RUIM card will be locked and cannot use it until you have entered the correct PUK code The NetKit prompts you each remaining number of attempts for entering the PIN code or the PUK code Selecting Always On Top mode 1 Click to display the Setting interface 2 Selec...

Page 56: ... the Setting interface 2 Select User Tab 3 Select Evdo 1x or Evdo only or 1x only in Pref Mode and then Click Selecting a language 1 Click to display the Setting interface 2 Select User Tab 3 Select your language in Language list and then Click ...

Page 57: ...rivers install 1 Plug the Skylink BEETLE modem in USB port MAC PC Open SkyLink CD start mintechUSBCDC and install MAC Drivers 2 Restart MAC PC 3 Execute any connection manager for Skylink BEETLE Mobile Products 4 Enter the User ID Password and Number in Network Preference and connect Internet ...

Page 58: ... the configuration settings Battery depleted Press the power button to turn it on Remove Battery AC Travel Adaptor and USB Cable Reinsert battery and press the power button again If battery is depleted charge it fully No connection or No Service No Service area RUIM card damaged RUIM Card not inserted Factory Reset Check antenna signal strength Insert RUIM Card again Check Wi Fi settings Check bat...

Page 59: ...A From Skylink BEETLE Open the battery compartment Press RST button located in lower left corner with sharp ended pen or similar for 5 seconds By pressing it the device will reboot and all the Wi Fi settings will be initialized to factory settings B From homepage http 192 168 0 254 Open the Web browser and enter ID and Password Open Administration and Setting Management Click Load Factory Defaults...

Page 60: ...ing Time by AC T A Full Charging Time by USB port of PC 1510mAh 3 Hours when not in use 4 5 Hours when not in use Power Consumption 850mA max Chipset QUALCOMM MSM6800A RALINK RT3050 Interface Type MicroUSB port for the device Type A USB Port for computer Table 2 CDMA Technology Technology CDMA 1x EVDO Rev A 0 1xRTT Band Designation 450MHz Transmit Frequency 452 5 457 475MHz A Block Receive Frequen...

Page 61: ... 4 2 4835 GHz Nominal Output Power 802 11 b 802 11 g n 17dBm 14dBm Minimum Receiver Sensitivity Level 802 11 b 11Mbps 802 11 g 54Mbps 802 11 n 135Mbps Below 76dBm Below 65dBm Below 61dBm Table 4 Environmental Specifications Operating Temperature 10 C 50 C Storage Temperature 20 C 65 C ...

Reviews: