17
DesignView Presentation System is a product of Skyline Exhibits
Patents Pending
©2011 Skyline Exhibits
DesignView
®
Presentation System
aPPEnDIX - nEc ProjEcTor
5.
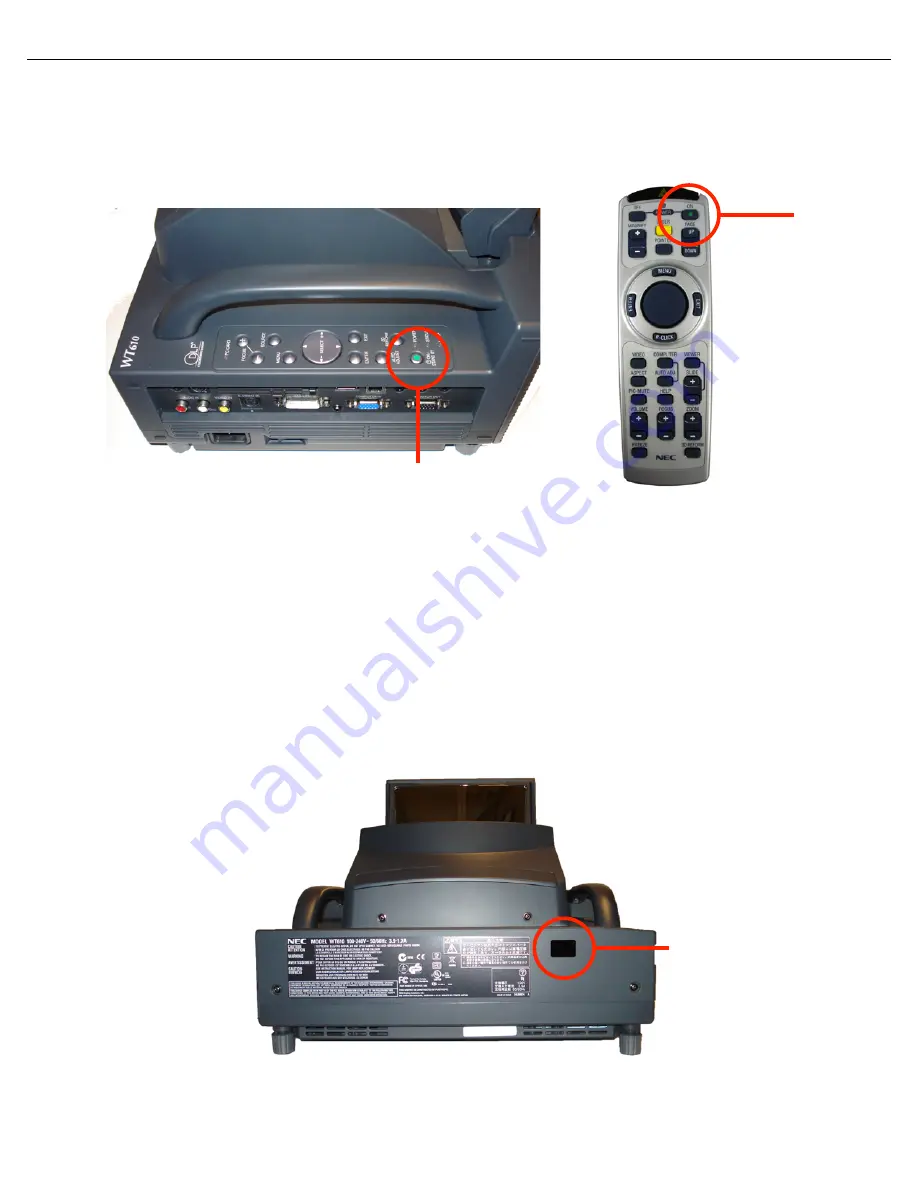
TURn on THe MaIn PoWeR sWITCH on THe PRoJeCToR
by pressing the Projector power switch to the
on position. Then press the power
“on/sTanD bY”
button on the top of the projector or the Power
“on”
button on the remote control for a minimum of two seconds, until the power indicator light turns to
a steady green.
on/
STanDBY
on
6.
MoVe THe PRoJeCToR ToWaRD oR aWaY fRoM THe sCReen UnTIl THe IMaGe fITs THe WIDTH of
THe sCReen
. note that as the size of the image increases or decreases the displayed image will move
up or down. Smaller images will move less than larger ones.
THe sCReen HeIGHT WIll HaVe To be
CHanGeD UsInG THe aDJUsTable feeT If THe PRoJeCToR Is MoVeD
. The distance between the
screen and projector cannot be changed without changing image size.
7.
PRess THe MenU bUTTon To see THe MenU DIsPlaY on THe sCReen
. Each menu tab includes
different menu selections. You must hit the tab to access each of its selections. (It is generally easier
to use the remote control than the control panel on the projector.) make sure that the remote control is
pointed at the sensor in the projector to assure it receives the signal.
SEnSor locaTIon


