


Part V: Astronomy with the SynScan Version 4
18
4.
Time Zone:
The LCD screen will display “Set Time Zone” in the first line, and display the
current time zone in the second line.
•
Use the scroll keys to change the leading “+” or “-” sign when the cursor is on it. The
“+” sign is used for time zones in the Eastern Hemisphere (Europe, Africa, Asia,
Oceania), while the “-” sign is used for time zones in the Western Hemisphere (North
and South America).
•
Press the numeric keys at the cursor position to fill the time zone digits.
•
Press the
(
ENTER
)
key to confirm the input and proceed to the next step.
•
Press the
(
ESC
)
key to return to the previous step (Setting Information of the
Observing Site).
5.
Date, Time and Daylight Saving Time:
•
When “Date: mm/dd/yyyy” is displayed, enter the current date in the indicated
mm/dd/yyyy format (i.e. 10/24/2012 for Oct.24, 2012); press the
(
ENTER
)
key to
confirm and proceed to the next step. Press the
(
ESC
)
key to return to the previous
step.
•
When “Enter Time” is displayed, enter the current local time in 24-hour format. (i.e.
18:30:00 for 6:30 pm). Press the
(
ENTER
)
key to display the entered time in 12-hour
format. Press the
(
ENTER
)
key again to confirm and proceed to the next step. Press
the
(
ESC
)
key to return to the previous step.
•
When “Daylight Saving?” is displayed, use the scroll keys to select “Yes” or “No”.
“YES” indicates the time entered in the previous step is daylight saving time, while
“NO” indicates the time entered is in standard time. Press the
(
ENTER
)
key to
confirm and proceed to the next step. Press the
(
ESC
)
key to return to the previous
step.
6.
Starting Mount Alignment
: t
his is the last step in the hand control’s initialization
process. The screen will display “Begin Alignment? 1) YES 2) NO” to ask the user to
make a choice:
•
Press
(
1
)
to start the alignment process.
•
Press
(
2
)
to skip the alignment process.
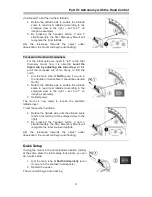
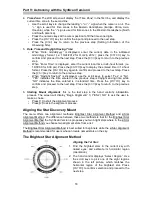
Aligning the Star Discovery Mount
The menu offers two alignment methods: Brightest Star Alignment Method and 2-Star
Alignment Method. The difference between these two methods is that for the Brightest Star
Alignment Method the SynScan Version 4 proposes you two bright stars where in the 2-Star
Alignment Method you choose two alignment stars from a list.
The Brightest Star Alignment Method is best suited for beginners while the 2-Star Alignment
Method is recommended for users who can locate named stars on the sky.
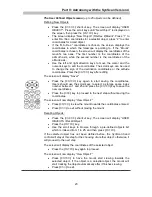
The Brightest Star Alignment Method
Aligning the 1st Star:
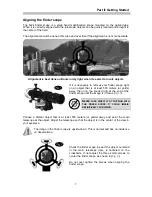
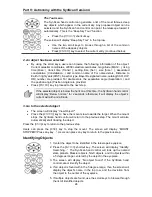
1. Find the brightest stars in the current sky with
naked eyes, and estimate its horizontal region
(orientation).
2.
The hand control displays “Select Region”. Use
the scroll keys to pick one of the eight regions
shown in the left picture, which matches the
horizontal region of the brightest star. Press
(
ENTER
)
to confirm selection and proceed to the
next step.