


Part IV: Terrestrial Photography
12
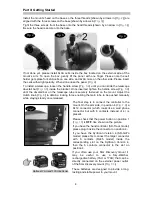
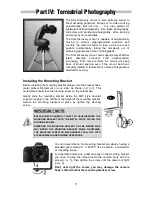
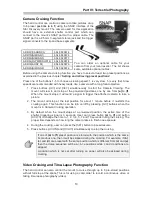
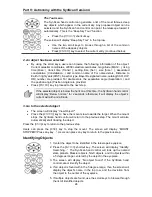
It is also possible to attach two devices on the mounting
bracket by using the secondary accessory plate. You will
find the secondary accessory plate and two screws inside
the box.
To mount the secondary accessory plate: locate two
threads on the internal side of the mounting bracket
(
part
1
)
and use the two screws
(
part 2
)
to assemble the
secondary accessory plate
(
part 3
)
on the mounting
bracket
(
part 1
)
. Take care to mount the secondary
accessory plate with it screw on the same side as the
screw of the mounting bracket.
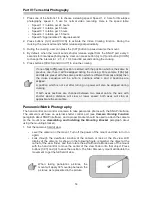
The secondary plate is designed to support light accessories (< 400g).
Please do not install a digital single lens reflex camera (DSLR) or a spotting scope
on the secondary accessory plate. The mounting bracket may break, or the
secondary accessory plate may bend over the accessory installed below.
General Operations
The hand control always activates the celestial object tracking
function after power is turned on. For terrestrial application, user
could press buttons "1" and "2" simultaneously to turn off the
tracking function to prevent the mount moving automatically
.
Please setup your mount and connect all accessories as explained on page 3 and 4 before
using your mount for terrestrial photography or videoing.
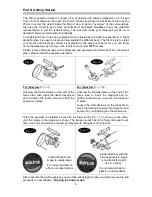
Setting and retrieving preset positions
The hand control can store 6 preset positions and retrieve these positions when required.
Point the mount (with spotting scope, camera etc.) to a spot of interest, and then press
button
(
SET
)
plus one of the buttons
(
a
)
to
(
f
)
. The current position of the mount will be
stored and represented with that
button (
a
to
f
).
Press button
(
GO
)
plus one of the buttons
(
a
)
to
(
f
)
and the mount will slew to the preset
position represented by that button
(
a
to
f
).
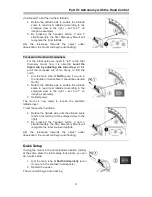
To ensure the best accuracy for your position choices, it is important that you use
the "up" and "right" direction buttons as the final keys before you actually set your
position.