background image

Customer Service 1-888-707-1880 
or email [email protected]                                     Dyaco Canada Inc. ©2013 


13


24

28

27

27

28

52

L

52

R

53

53

54

54

55

55

55

54

1

56

57

57

58

58

61

61

62

63

64

64 6

0

65

66

66

67

68

19

33

59


Summary of Contents for 16117002LUS

Page 1: ...R S MANUAL Model No 16117002LUS Sirius Fitness Elliptical Trainer Assembly Operation Exercise Parts Warranty Retain for Future reference CAUTION You must read and understand this owner s manual before...

Page 2: ...l damages are hereby excluded REPAIR PARTS AND SERVICE All of the parts for the elliptical shown in figure can be ordered from Dyaco Canada Inc 6050 DON MURIE STREET NIAGARA FALLS ONTARIO L2G 0B3 When...

Page 3: ...ight compromise the safety of the equipment 7 It is recommended to have a minimum of 2 safe clearance around the exercise equipment while in use 8 Keep children and pets away from this equipment at al...

Page 4: ...35 or persons with pre existing health problems Read all instructions before using any fitness equipment We assume no responsibility from personal injury or property damage sustained by or through the...

Page 5: ...38 NO 37L R NO 21L R NO 25 PART NO DESCRIPTION Q TY 1 Main frame 1 2 Rear stabilizer 1 3 Front stabilizer 1 9 L R Pedal tube left right 1 1 13 L R Pedal left right 1 1 21 L R Bottom handlebar left ri...

Page 6: ...1 1 11 Wave washer 2 12 Flat washer 2 14 Carriage bolt M10 45 4 15 PVC cap 6 16 Nylon lock nut M10 6 17 Washer 22 10 1 5 6 18 Sleeve 2 20 Hex head bolt M10 65 2 23 Allen screw M8 16 6 29 Hex head bolt...

Page 7: ...stabilizer 3 to the main frame 1 securing with two carriage bolts 6 two washers 7 and two domed nuts 8 Attach the rear stabilizer 2 to the main frame 1 securing with two carriage bolts 6 two washers 7...

Page 8: ...15 21L 29 30 31 32 15 21R 29 31 32 30 1 22 STEP 4 Attach the left pedal tube 9L to the left bottom handlebar 21L Slide the sleeve 18 into the left pedal tube 9L and the left bottom handlebar 21L Secu...

Page 9: ...the monitor 38 to the extension sensor wire 26 Attach the monitor 38 to the top of the upright 22 and secure using four screws 48 which were pre assembly on the computer Note Ensure that the wires ar...

Page 10: ...andlebar 21L and secure using two allen screws 35 and two carriage bolts 36 Repeat for the right top handlebar 37R 37L 36 35 35 36 37R NOW FIRMLY TIGHTEN ALL NUTS AND BOLTS YOUR UNIT IS NOW FULLY ASSE...

Page 11: ...R 1700213R Pedal right 1 14 1700214 Carriage bolt M10 45 4 15 1700215 PVC cap 6 16 1700216 Nylon lock nut M10 6 17 1700217 Washer 22 10 1 5 6 18 1700218 Sleeve 2 19 1700219 Spring 1 20 1700220 Hex hea...

Page 12: ...249 Flat washer 1 50 1700250 Bolt 1 51L 1700251L Nylon lock nut left 1 51R 1700251R Nylon lock nut Right 1 52L 1700252L Chain cover left 1 52R 1700252R Chain cover right 1 53 1700253 Crank cover 2 54...

Page 13: ...DIAGRAM 1 2 3 4 4 5 5 6 6 7 7 7 7 7 7 7 8 8 8 8 9L 9R 10L 10R 11 12 12 13R 13L 14 14 15 15 15 15 15 15 16 16 17 17 18 18 20 20 21L 21R 22 23 23 23 24 25 26 28 27 29 29 30 31 32 31 32 30 34 34 35 35 3...

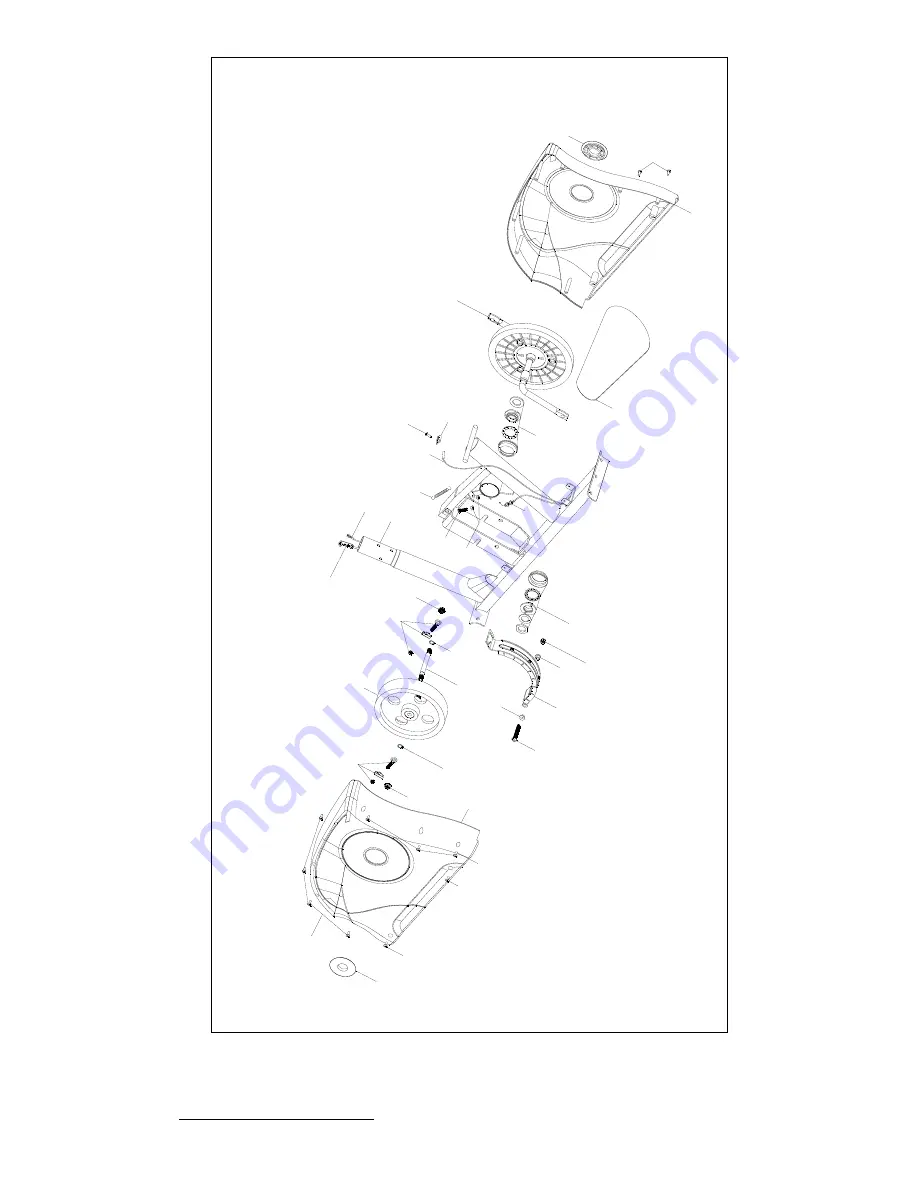
Page 14: ...888 707 1880 or email customerservice dyaco ca Dyaco Canada Inc 2013 13 2 4 2 8 2 7 2 7 2 8 5 2 L 5 2 R 5 3 5 3 5 4 5 4 5 5 5 5 5 5 5 4 1 5 6 5 7 5 7 5 8 5 8 6 1 6 1 6 2 6 3 6 4 6 4 6 0 6 5 6 6 6 6 6...

Page 15: ...out time up to 99 59 Counts down from your preset target time to 00 00 during your workout Speed Displays the current speed up to 99 9 mile Distance Displays the cumulative distance traveled during yo...

Page 16: ...now start to count up If more than one value is preset the first to reach the value will sound the alarm Once you have stopped the alarm the next preset value will sound the alarm until you have reac...

Page 17: ...istance displays on the monitor Monitor not working properly Replace monitor Tension control not connected Securely connect the tension control into the extension tension control wire No tension Magne...

Page 18: ...position for your height and arm length Caution should always be taken when getting on and off any exercise machine Please follow the safety steps below Ensure the left Foot Pedal is in the lowest po...

Page 19: ...experience a surging type feeling there is probably too much tension The elliptical can be used in forward or reverse notion When going in reverse bend your knees slightly more More emphasis is on th...

Page 20: ...ve the Left Hinge Bolt 10L Wave washer 11 Flat Washer 12 and Nylon Lock Nut 51L from the rear of left Pedal Tube 9L Repeat for the right side not shown in the same way Remove the two ST5 x 15 Self tap...

Page 21: ...ng even when the resistance is adjusted to the highest level the drive belt may need to be adjusted To adjust the drive belt the Chain Cover 52 must first be removed Next loosen the France nut 57 and...

Page 22: ...ical fitness It is the efficient functioning of the heart and lungs Aerobic Fitness The largest amount of oxygen that you can use per minute during exercise is called your maximum oxygen uptake MVo2 T...

Page 23: ...h to strain your heart Your initial level of fitness is important in developing an exercise program for you If you are starting off you can get a good training effect with a heart rate of 110 120 beat...

Page 24: ...ts reserves You will enjoy your program more and feel better for it Muscle Soreness For the first week or so this may be the only indication you have that you are on an exercise program This of course...

Page 25: ...right shoulder up toward your ear the stretch up the left side of your neck Next rotate for one count Then lift your left shoulder your head back for one count stretching your chin to up for one coun...

Page 26: ...as you knees towards the floor Hold for 15 counts can and hold for 15 counts HAMSTRING STRETCHES CALF ACHILLES STRETCH Sit with your right leg extended Rest the sole of Lean against a wall with your l...

Reviews: