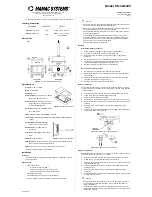
Universal Dimming Transceiver Base
Model US22-40
MANUAL SCENE MODIFICATION
Once the US22-40 has been initially configured, it is possible to make scene
changes (e.g. default scene-link 1 and 2) without configuration software.
1.
To modify a scene-link for one of a transmitting device’s actuators, set
all scene devices to the desired light levels and then place them in
SETUP mode. Tap the scene actuator (e.g. button 1) on the
transmitting device exactly 7 times to create the scene and store the
light levels.
2.
To add a device
other than a US22
to an existing scene, activate the
scene and set the light level on the device to be added. Place the
device in SETUP mode and tap the scene actuator on the transmitting
device exactly 7 times to modify the scene.
3.
To add a US22
to an existing scene, activate the scene and set the
light level of the US22 channel(s) to be added. Place the US22 in
setup mode and then to add specific channel(s)…
add channel 1
by
tapping the US22 1 time – wait 3 seconds and tap 1 more time
(green/blue LED flash) ; or
add channel 2
by tapping the US22 1 time
(blue/green LED); or
add channels 1 and 2
by tapping the US22 2
times – wait 3 seconds and tap 2 more times (green/blue LED); all
followed by tapping the transmitting device’s actuator button 7 times.
4.
To remove a device from an existing scene, place the device to be
removed in SETUP mode. Tap the scene actuator on the transmitting
device exactly 8 times to modify the scene.
5.
To change light levels on an existing scene, set the levels as desired
and tap the scene actuator on the transmitting device exactly 7 times
to modify the scene.
TROUBLESHOOTING
PROBLEM PROBABLE
CAUSE SOLUTION
Push light pipe (LED indicator) back into position flush with faceplate
assembly housing.
Master switch is wired
properly but has no power
(e.g. LED indicator is OFF).
Air gap power disconnect may be disengaged (pulled
out).
Test buttons without faceplate with appropriately-sized non-metallic
object such as a toothpick or golf tee
3-way remote switch actuator may be binding,
causing the switch to be stuck ON or OFF.
Loosen mounting screws on remote switch and/or wallplate to relieve
pressure on housing.
Actuator faceplate may not be seated properly on the
switch body.
Exercise actuator several times to ensure proper seating and operation.
If necessary, remove and replace faceplate to ensure proper seating and
operation.
Master switch actuator doesn’t
turn load ON and/or OFF (e.g.
LED indicator is ON).
Switch faceplate may be incorrectly selected in
UPStart
Select the correct faceplate in UPStart
Mounting screws may be too tight or j-box may be
deformed, causing the switch body to warp.
Loosen mounting screws to relieve pressure on the switch housing.
Buttons and/or rockers stick or
don’t actuate properly when
pressed.
Actuator faceplate may not be seated properly on the
switch body.
Exercise actuator several times to ensure proper seating and operation.
If necessary, remove and replace faceplate to ensure proper seating and
operation.
Switch is overloaded.
Reduce the power load by removing bulbs from the circuit.
Load turns ON and OFF
regularly without actuation or
command.
Switch is dimming a load that is not rated for use
with incandescent dimmers.
Reconfigure the switch for ON/OFF operation with no dimming (using
UPStart, for example).
Communication or switched
links to other UPB devices are
intermittent.
Linked UPB devices are on other phase of the
homes’ 2 phase power.
Install an inverting phase coupler at each breaker panel. Perform
UPStart ‘Communications Test” tool to measure signal strength and
presence of noise.
Simply Automated, Incorporated
6108 Avenida Encinas, Suite B, Carlsbad, CA 92011 USA
Technical Support:
www.simply-automated.com
or
800-630-9234
452-0022-0101 Rev. A Revised: November 22, 2008


