10
11
Operating Instructions
Operating Instructions
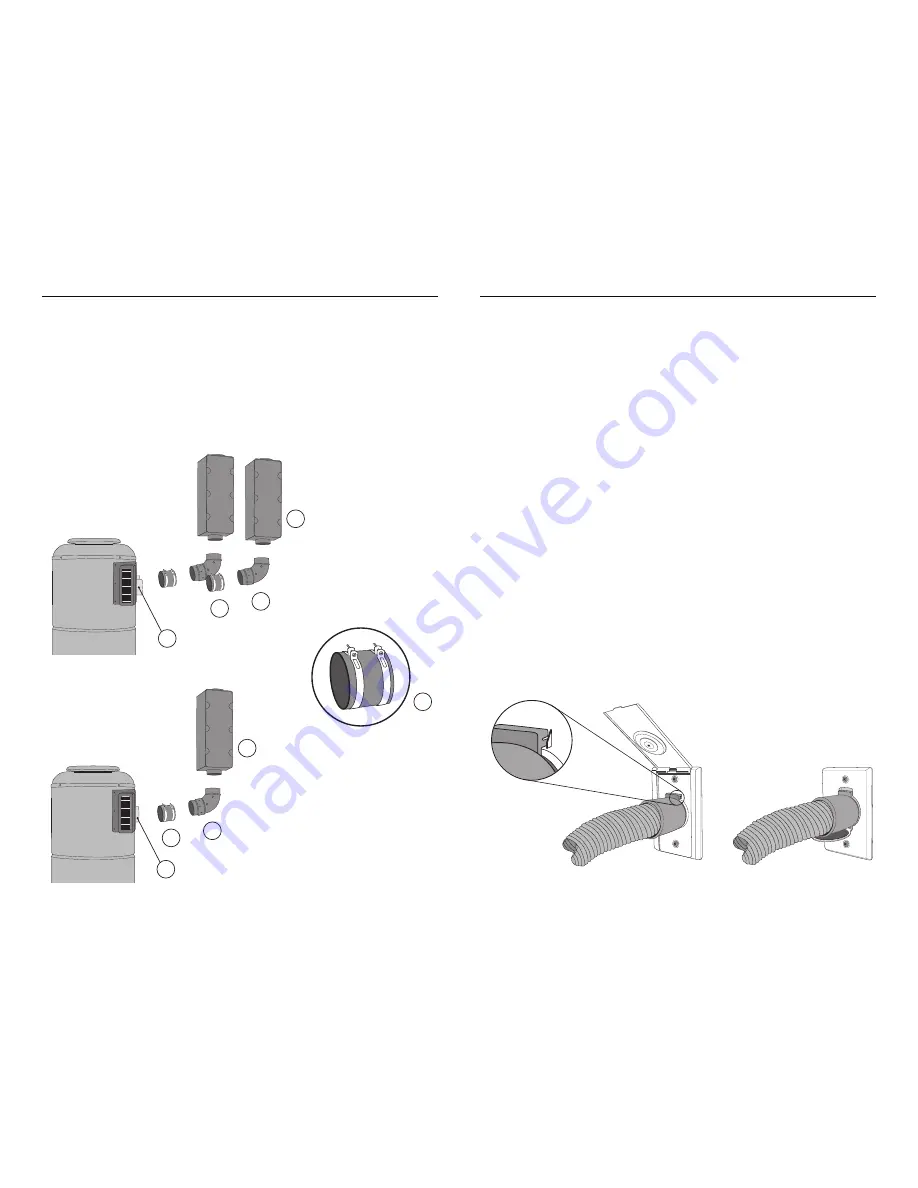
Muffler Installation (optional)
1. Insert the rubber coupling (A) on the air exhaust (D).
2. Using a Phillips (star shape) screwdriver, tighten the clamp collar on the rubber
coupling to ensure adequate sealing.
3. Insert the 90° elbow (B) into the rubber coupling, and tighten the clamp collar.
4. Insert the muffler (C) on the end of the 90° elbow.
BF10 & CI10 models
D
Installation
A
B
C
D
A
A
B
C
Other models
A. Rubber coupling
B. 90° elbow
C. Muffler
D. Air exhaust
Hose Hook-up and Inlets
Before operating your central vacuum…
Please verify that it is properly connected to the piping system, and to a grounded
electrical outlet, and that the low voltage wires are connected to the unit (see
pages 8 to 13). Then read the complete owner’s manual and proceed with a quick
verification of your unit’s installation:
• Check filter and bag to be sure they are properly installed.
• Check rubber seals in each vacuum inlet.
• Plug the hose alternatively into each vacuum inlet to ensure that each
one works properly.
• While the hose is still plugged into one inlet and the system is operational,
check other inlets for leaks.
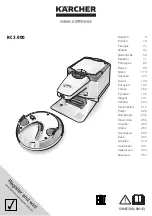
To start your central vacuum, simply insert the hose in the vacuum inlet of your
choice. Please ensure that the tab on the hose end is properly lined up with the
slot in the inlet opening (see below). If your hose handle has an integrated on/off
switch, simply slide the switch to the “on” position.
Do not try to open another inlet while your system is in operation,
as it may damage the inlet’s rubber seal.


