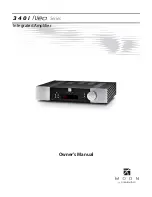
Simaudio Moon 340i Neo D2PX Owner'S Manual Download Page 7

Owner’s Manual 


Unpacking 


The 

Nēo 340i 

integrated amplifier should be removed from its box with care.   

 
The following accessories should be included inside the box with your integrated amplifier: 


9

   AC  power cable 

9

   ‘CRM-2’ remote control with two ‘AA’ batteries 

9

   ‘SimLink™’ cable with 1/8” mini plug terminations on each end 

9

   This owner’s manual 

9

   Warranty and product registration information     (USA and Canada only) 


Once the 

Nēo 340i

 is unpacked, inspect it thoroughly and report any damage to your dealer immediately. We 

suggest that you keep all of the original packaging, storing it in a safe, dry place in case you’re required to 
transport this product. The customized packaging is specially designed to protect the 

340i 

from any potential 

damage during transit. 


Please write the serial number of your new 

Nēo 340i

 in the space provided below for future reference. 


Serial Number


Installation & Placement 

 
The 

Nēo 340i 

Integrated Amplifier is both powerful and 

heavy. It requires reasonable ventilation to maintain an 
optimum and consistent operating temperature, 
especially since it will radiate heat when driven hard. 
Consequently, it should be placed in a location with 
empty space around it for proper heat dissipation. You 
should never place another component on top of this 
integrated amplifier. As well, it should be placed on a 
solid level surface. You should avoid placing it near a 
heat  source  or  inside  a  closed  cabinet  that  is  not  well 
ventilated as this could compromise the amplifier’s 
performance and reliability. The 

340i

 uses a large 

toroidal transformer in its power supply; even though it 
is well shielded, you should not place this integrated 
amplifier too close to source components sensitive to 
EMI, such as turntables, phono preamplifiers and CD 

Players. Finally, y

ou should never place another 

component directly on top of this integrated amplifier.


If you intend to use the Nēo 340i’s USB input 
connection (PCM or DSD) with a Windows-based 
computer, you will need to install our USB HD DSD 
driver, which can be downloaded from the support 
section of our website. 


Note:  Apple-based computers don’t require this 
driver.


Summary of Contents for Moon 340i Neo D2PX

Page 1: ...Integrated Amplifier Owner s Manual 340i Series...

Page 2: ...340i N o Series...

Page 3: ...or pinched particularly at plugs convenience receptacles and the point where they exit from the apparatus Unplug mains cord during transportation 11 Only use attachments and accessories specified by...

Page 4: ...roper voltage Both the shipping box and rear panel serial number label will indicate the correct voltage Use of any other voltage will likely damage the unit and void the warranty 3 AC extension cords...

Page 5: ...el Controls 8 Optional Digital Inputs 9 Optional Phono Section 10 Balanced Inputs 11 Rear Panel Connections 12 SimLink 13 Operating the N o 340i 13 Remote Control Operation 14 Specifications 16 www si...

Page 6: ...rent version of this manual is available on our official website at http www simaudio com Your N o 340i Integrated Amplifier incorporates many significant design features to achieve its world class le...

Page 7: ...requires reasonable ventilation to maintain an optimum and consistent operating temperature especially since it will radiate heat when driven hard Consequently it should be placed in a location with...

Page 8: ...tially scroll either forward or backward through all of the available inputs Depending on the installed options the order of the inputs is as follows going forward Basic Unit CD A1 A2 and A3 With all...

Page 9: ...al Digital Inputs The Digital Input option includes four 4 separate inputs D1 uses an optical Toslink connector D2 and D3 use S PDIF on an female RCA connector and D4 uses a type B USB connector The D...

Page 10: ...capacitance and resisitance loading as well as gain level This flexibility allows you to optimize the 340i for a wide variety of MC and MM cartridges Circuit Board Layout Figure 3 N o 340i Optional Ph...

Page 11: ...is recommended that you leave the jumpers inserted in the factory default setting of 100pF Conversely if you re using a MC cartridge you should use the 0pF jumper settings by simply inserting the supp...

Page 12: ...a balanced signal For N o 340i s equipped with the digital input option you will find 4 digital inputs labeled D1 D2 D3 and D4 The D1 input is on an optical Toslink connector both the D2 and D3 inputs...

Page 13: ...splay begins to flash on and off The connection rules for the SimLink are very basic You must always connect the supplied cable between one component s SimLink Out jack and another component s SimLink...

Page 14: ...front panel display on and off The 2 buttons labelled INPUT allow you to sequentially scroll either backwards or forwards through all six 6 available inputs For example to switch from the CD to the VI...

Page 15: ...h the 340i automatically switching to the MiND assigned input as described previously in the SimLink section To shut down the system press Off for this ZONE in the MiND app Figure 7 Remote Operation w...

Page 16: ...olar Output Power 8 100 Watts per channel Output Power 4 200 Watts per channel Gain 37dB Signal to noise Ratio 110dB full power Frequency Response 2Hz 90kHz 0 3 0dB Crosstalk 1kHz 88dB Intermodulation...

Page 17: ...ilter ESS9018K2M DSD Data Rates 2 8224MHz Double 5 6448MHz Quadruple 11 2896 DSD Sample Rates DSD 64 DSD 128 DSD256 via USB only PCM Bit depth range 16 32 bits 32 bit via USB only PCM Sampling Frequen...

Page 18: ...340i N o Series 18...

Reviews: