background image

MOON 310LP Phono Preamplifier


Internal Settings 


There are four (4) types of input settings available on the MOON 310LP Phono Preamplifier; Capacitance loading, Resistance 
loading, Equalization curve and Gain level. Each setting is adjustable through the use of jumpers.  For each type of setting, 
there are 2 banks of jumpers – one each for the left and right channels. This is the result of the 310LP’s genuine mirror-
image circuit design which yields exceptional stereo separation. 


Always place the preamplifier that your 310LP is connected to, either into mute or stand-by mode prior to changing any of 
the following input settings. Then disconnect the AC power cord from the rear of the 310LP


There are a total of eight (8) screws that you must remove using the included allen-key four each on either side of the 
chassis. Once these screws are removed, carefully lift off the chassis cover. Once the cover is removed, you are ready to 
make all of the necessary internal adjustments to the 310LP to achieve optimal sonic performance. 
 
 
Resistance Loading:   


There are five (5) different settings available for setting the resistive load; 10

Ω

, 100

Ω

, 470

Ω

, 1k

Ω

 and 47k

Ω

 which are 

represented by jumper sockets J9, J10, J11, J12 and J13 respectively for the left channel and jumper sockets J27, J28, J29, 
J30 and J31 for the right channel (refer figure 2 below).  The factory default setting is 47k

Ω

, therefore jumpers will be found 

in sockets J13 & J31. 


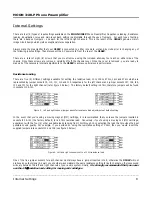
Figure 2:  Left and right channel jumper banks for resistance load adjustments at default setting


In the event that you’re using a moving magnet (MM) cartridge, it is recommended that you leave the jumpers inserted in 
sockets J13 & J31 (the factory default) for a 47k

Ω

  resistive load.  Conversely, if you’re using a moving coil (MC) cartridge, 

experiment with the four (4) other available loads ranging from 10

Ω

 through 1K

Ω

, selecting the load that provides the best 

possible sound quality. For example, if you decided on using the resistance setting of 100

Ω

, then you would insert the 

supplied jumpers into sockets J10 and J28 (see figure 3 below). 


Figure 3:  Left and right channels set to a 100

Ω

 resistance load 


One of the five jumper sockets for each channel must always have a jumper inserted into it, otherwise the 310LP will not 
produce an output signal. As well, you should always maintain the same resistance setting for both channels, otherwise sound 
will vary between the left and right channels of your audio system. Finally, 

it is strongly recommended that you never 

use the 47k

Ω

 resistive load setting for moving coil cartridges.


____________________________________________________________________________________ 


Internal Settings   


                                                     8

Summary of Contents for MOON 310LP

Page 1: ...Owner s Manual MOON Series 310 LP Phono Preamplifier...

Page 2: ...onvenience receptacles and the point where they exit from the apparatus Unplug mains cord during transportation 11 Only use attachments and accessories specified by the manufacturer 12 Use only with t...

Page 3: ...nd rear panel serial number label will indicate the correct voltage Use of any other voltage will likely damage the unit and void the warranty 3 AC extension cords are NOT recommended for use with thi...

Page 4: ...Board Layout 7 Internal Settings 8 Using the 310LP with an External Power Supply 11 Rear Panel Connections 12 Operating the 310LP 13 Specifications 14 www simaudio com Simaudio Ltd 1345 Newton Road B...

Page 5: ...otion of music and build our products with the goal of faithfully capturing these elusive qualities The information contained in this manual is subject to change without notice The most current versio...

Page 6: ...vibrations A symmetrical circuit design with accurate matching of the very finest high quality electronic components Designed to be powered up at all times for optimal performance Low operating tempe...

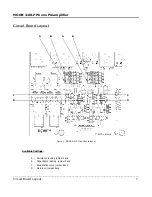
Page 7: ...310LP Circuit Board layout Available Settings A Resistance loading jumper bank B Capacitance loading jumper bank C Equalization curve jumper bank D Gain level jumper bank ____________________________...

Page 8: ...ly for the left channel and jumper sockets J27 J28 J29 J30 and J31 for the right channel refer figure 2 below The factory default setting is 47k therefore jumpers will be found in sockets J13 J31 Figu...

Page 9: ...output signal As well you should always maintain the same capacitance setting for both channels otherwise sound quality may vary between the left and right channels of your audio system Equalization C...

Page 10: ...bank are mounted to the left In the event that you are using a MC cartridge you will need to change the gain setting to either 54dB 60dB or 66dB The basic rule to determine gain for a MC cartridge is...

Page 11: ...OON 310LP in conjunction with the MOON 320S you will need to move these 2 jumpers into sockets STR1 and STR3 positions A in figure 10 For further details please refer to your MOON 320S owner s manual...

Page 12: ...nce of your system Finally on the right side the IEC receptacle labeled AC Power for the included AC power cord Directly above the IEC receptacle is a 4 pin XLR connector labeled DC Power this is for...

Page 13: ...performance from your audio system we strongly recommend that the detachable power cord not come into physical contact with any of the interconnect cables running to and from your 310LP In the event t...

Page 14: ...0dBr Signal to noise Ratio full scale 40dB gain 114dBr with 320S Power Supply Signal to noise Ratio full scale 66dB gain 88dBr Signal to noise Ratio full scale 66dB gain 92dBr with 320S Power Supply M...

Reviews: