Power supply installation (For new system assembly)
Power supply installation (For replacement)
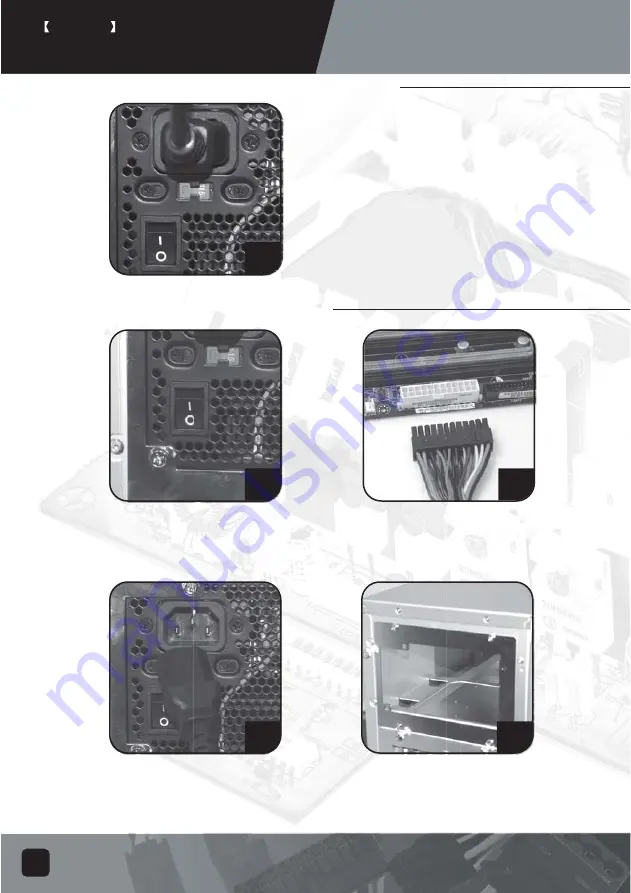
Turn on the power supply by switching to "I" (I/O) mode.
Caution: The power supply is on standby now. System
on and off is controlled by the motherboard.
(Please refer to the motherboard manual)
After turning off the system, switch the
power supply to "O" position to disable
system standby and make sure the system
is no longer drawing any power.
Remove all power supply cables
connected to the motherboard, video
card, hard drive and other device.
PSU product manual
ENGLISH
13
1
2
Remove AC power cable from the
power supply.
Remove power supply from the chassis.
(Please refer to your chassis's installation manual.)
5. Please refer now to Step 1 of "Power supply
installation (for new system assembly)"
3
4
3
Summary of Contents for ST45SF
Page 1: ...ower suppl multilanguage manual Py...
Page 34: ...7 8 9 10 11 12 SATA SATA 4 pin 4 pin IDE 4 pin DC 12V 32 PSU...
Page 35: ...I I O O 13 1 2 3 4 33 5 1 PSU...
Page 36: ...1 2 3 4 5 1 115 230 PFC 2 3 I O I 4 5 I O O 5 I 34 PSU...
Page 38: ...1 O 2 3 5 10 8 EPS 4 1 2 3 4 36 PSU 8 EPS 4 5 10...
Page 39: ...2 2 2 ATX 12V 4 EPS 12V 8 1 2 3 4 5 6 37 257 ATX 20 EPS 24 PCI E 6 8 PCI...
Page 40: ...7 8 9 10 11 12 SATA SATA 8 68 38 257...
Page 41: ...1 1 13 1 2 3 4 39 257...
Page 42: ...1 1 8 QT 8 2 1 1 1 40 257...
Page 44: ...1 1 25 6 1 42 EPS8 ATX4 257 5 10...
Page 51: ...1 2 3 4 5 6 49 PSU...
Page 52: ...7 8 9 10 11 12 50 PSU...
Page 53: ...13 1 2 3 4 51 PSU...
Page 54: ...52 PSU...
Page 56: ...SilverStone 54 PSU EPS 8 pin ATX 4 pin 5 10...
Page 58: ...7 8 9 10 11 12 SATA SATA 4 pin IDE 4 pin IDE IDE 4 pin 12V AC Note 56 PSU...
Page 59: ...I O I I O O AC 13 1 2 5 3 4 57 PSU...
Page 60: ...1 2 3 4 AC AC AC 5 1 115V 230V PFC 2 AC 3 I O I 4 5 I O O 5 I 58 PSU...
Page 62: ...1 I O O 2 3 5 10 EPS 8 pin ATX 4 pin SilverStone 1 2 3 4 60 EPS 8 pin ATX 4 pin PSU 5 10...
Page 63: ...October 2011...


