background image

English

   - 3 -

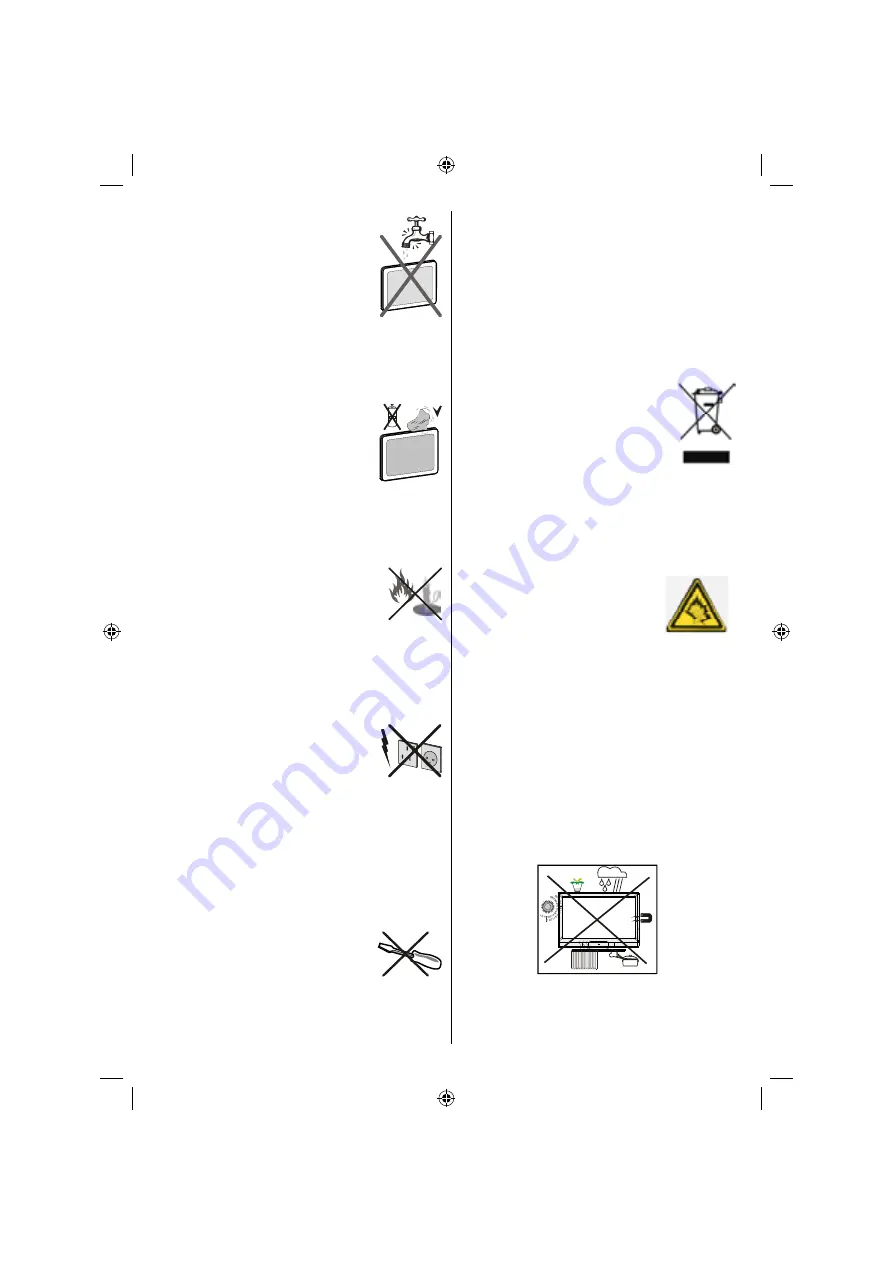
Moisture and Water

Do not use this device in a humid and 
damp  place  (avoid  the  bathroom,  the 
sink in the kitchen, and near the washing 
machine). Do not expose this device to 
rain or water, as this may be dangerous 
and  do  not  place  objects  filled  with 
liquids,  such  as   ower  vases,  on  top. 
Avoid from dripping or splashing.

If any solid object or liquid falls into the cabinet, unplug 
the  TV  and  have  it  checked  by  quali ed  personnel 
before operating it any further. 

Cleaning

Before  cleaning,  unplug  the  TV  set 
from  the  wall  outlet.  Do  not  use  liquid 
or  aerosol  cleaners.  Use  soft  and  dry 
cloth. 

Ventilation

The slots and openings on the TV set are intended for 
ventilation and to ensure reliable operation. To prevent 
overheating, these openings must not be blocked or 
covered in anyway.

Heat and Flames

The set should not be placed near to open 
 ames and sources of intense heat such 
as an electric heater. Candles and other 
open   ames  must  be  kept  away  from 
this product at all times to prevent the spread of  re. 
Ensure that no open  ame sources, such as lighted 
candles, are placed on top of the TV. Batteries should 
not be exposed to excessive heat such as sunshine, 
 re or the like.

Lightning

In case of storm and lightning or when 
going on holiday, disconnect the power 
cord  and  the  antenna  cable  from  the 
wall outlet. 

Replacement Parts

When replacement parts are required, make sure that 
the service technician has used replacement parts, 
which are speci ed by the manufacturer or have the 
same speci cations as the original one. Unauthorized 
substitutions  may  result  in   re,  electrical  shock  or 
other hazards.  

Servicing

Please  refer  all  servicing  to  quali ed 
personnel.  Do  not  remove  the  cover 
yourself as this may result in an electric 
shock.

Waste Disposal

Instructions for waste disposal:

• 

Packaging  and  packaging  aids  are  recyclable  and 
should principally be recycled. Packaging materials, 
such  as  foil  bag,  must  be  kept  away  from  children. 
Batteries, including those which are heavy metal-free, 
should  not  be  disposed  of  with  household  waste. 
Please  dispose  of  used  battery  in  an  environment 
friendly manner. Find out about the legal regulations 
which apply in your area.

This symbol on the product or on its packaging means 
that your electrical and electronic device 
should  be  disposed  at  the  end  of  its 
service  lif e  separately  from  your 
household  wastes.  There  are  separate 
collection  systems  for  recycling  in  EU. 
For more information, please contact the 
local  authority  or  the  dealer  where  you 
purchased the product.

Disconnecting the Device

The  mains  plug  is  used  to  disconnect  TV  set  from 
the  mains  and  therefore  it  must  remain  readily 
operable.

Headphone Volume

Excessive  sound  pressure  from 
earphones  and  headphones  can 
cause hearing loss.

Installation

To  prevent  injury,  this  device  must  be  securely 
attached to the wall in accordance with the installation 
instructions when mounted to the wall (if the option 
is available).

LCD Screen

The  LCD  panel  is  a  high  technology  product  with 
several millions of thin  lm transistors, giving you  ne 
picture details. Occasionally, a few non-active pixels 
may appear on the screen as a  xed blue, green or 
red  point.  Please  note  that  this  does  not  affect  the 
performance of your product.

Warning! Do not leave your TV in standby or operating 
mode when you leave your house.

56966-LCD-TV-32111-DVB_T-GB-1241110_10071112_50179828.indd   3

24.11.2010   14:59:16

Summary of Contents for 32111

Page 1: ...o sound system German Nicam Teletext fastext TOP text Headphone connection Automatic programming system Forward or backward manual tuning Sleep timer Child lock Automatic sound mute when no transmission NTSC playback AVL Automatic Volume Limiting Auto power down PLL Frequency Search PC input Plug Play for Windows 98 ME 2000 XP Vista Windos 7 Game Mode Scope of delivery LCD TV Remote control Batter...

Page 2: ...original packaging in order to ensure the secure transport of the device in the event that you assert the guarantee A short description of your complaint is not only very helpful to us but sup ports the quick repair and return delivery of the device We recommend in advance that you call our hotline 6 You must keep your proof of purchase It is sufficient if you return the original till receipt with...

Page 3: ...urites 13 Button Functions 13 Managing Stations Sorting Channel List 14 On Screen Information 14 Media Playback Using Media Browser 14 Viewing Videos via USB 14 Playing Videos via USB 15 Viewing Photos via USB 15 Media Browser Settings 16 Changing Image Size Picture Formats 16 Con guring Picture Settings 17 Operating Picture Settings Menu Items 17 Picture Settings Menu Items 17 PC Picture Settings...

Page 4: ...ng symbols are used in the manual as a marker for restrictions and precautions and safety instructions Please note such information for security reasons WARNING If you do not pay attention to such a marked warning it can cause serious injury or death Please note these warnings strictly in order to ensure a safe operation CAUTION Such a precaution is marked you should take up or note to avoid injur...

Page 5: ...other hazards Servicing Please refer all servicing to quali ed personnel Do not remove the cover yourself as this may result in an electric shock Waste Disposal Instructions for waste disposal Packaging and packaging aids are recyclable and should principally be recycled Packaging materials such as foil bag must be kept away from children Batteries including those which are heavy metal free should...

Page 6: ...e connected to the protective earthing of the building installation through the mains connection or through other apparatus with a connection to protective earthing and to a television distribution system using coaxial cable may in some circumstances create a re hazard Connection to a cable distribution system has therefore to be provided through a device providing electrical isolation below a cer...

Page 7: ...he TV and audio outputs of your device to enable component audio S PDIF Coaxial Out 5 outputs digital audio signals of the currently watched source Use an SPDIF coaxial cable to trasfer audio signals to a device that has S PDIF input RF Input 6 connects to an aerial antenna system or cable TV connection Note that if you use a decoder or a media recorder you should connect the aerial cable through ...

Page 8: ...Inputs are used for connecting audio signals of external 6 devices Connect the audio cable between the AUDIO INPUTS on the TV and the AUDIO OUTPUT jacks on your device Note If you connect a device to the TV via the VIDEO INPUT you should also connect your device with an audio cable to the AUDIO INPUTS of the TV to enable audio 7 The Power switch is used for turning the TV Off or into Standby Mode ...

Page 9: ... display cable to connect a PC to the LCD TV When the connection is made switch to PC source See Input selection section Set the resolution that suits your viewing requirements Resolution information can be found in the appendix parts Connecting to an external device If you want to connect a external device to your LCD TV you can use connectors of the TV set external devices may have different con...

Page 10: ...umpthrough theoptions To change an option touch theTV AV buttonand select the requested setting by touching the or buttons To exit the menu touch the and buttons simultaneously Side HDMI Connection You can use side HDMI input to connect a device that has an HDMI connector to your TV Use an appropriate HDMI cable to make such a connection Note that you should switch to the HDMI 4 source to view the...

Page 11: ...ons on the remote control to select programmes between 0 and 9 The TV will switch to the selected programme To select programmes directly press the numeric buttons consecutively When the pressing time is due for the second numeric button only the rst digit programme will be displayed Press directly the programme number to reselect single digit programmes First Time Installation IMPORTANT Ensure th...

Page 12: ...ces Menu Operations You can move in the menu screen using the cursor buttons Use Up or Down button to select a line and press Left or Right button to set a menu item To exit a menu screen press M button Changes are stored automatically Viewing Electronic Programme Guide EPG Some but not all channels send information about the current and next events Press EPG button to view the EPG menu EPG appear...

Page 13: ...utton Next day Displays the programmes of the next day Yellow button Zoom Expands programme information Blue button Filter Views ltering options You can lter guide information by TV Radio Free CAS A Z or Sort from channel list by pressing blue button CAS encrypted channels INFO Event Details Displays the programmes in detail Numeric buttons Jump Jumps to the preferred channel directly via numeric ...

Page 14: ...channels After selecting search type as Digital you can enter the frequency number using the numeric buttons and press OK button to search Digital terrestrial TV DTT is broadcast in multiplexes A multiplex is a group of channels that are all broadcast on the same frequency TV broadcasts radio programmes and EPG data are available within the multiplex Analogue Search Analogue After selecting search...

Page 15: ...or button moves to the previous next character Pressing or button toggles the current character i e b character becomes a by and c by When nished press OK button to save Press MENU to cancel Locking a Channel You can press GREEN button to tag untag all channels YELLOW button to tag untag a single channel Select the channel that you want to lock and select Lock option Press OK button to continue Yo...

Page 16: ...he selected channel is locked you must enter the correct four digit numeric code to view the channel default code is 0000 Enter PIN will be displayed on the screen in such a case Media Playback Using Media Browser To display Media Browser window press either MENU button on the remote control and then select Media Browser by pressing or button Press OK button to continue Media Browser menu options ...

Page 17: ... you select Photos from the main options available image les will be ltered and listed on this screen Jump Numeric buttons Jump to selected le using the numeric buttons OK Views the selected picture in full screen Slideshow GREEN button Starts the slideshow using all images Loop Shuf e BLUE button Press once to enable Loop Press again to enable both Loop and Shuf e Press once more to enable only S...

Page 18: ...d use or button to set View Style Sets default browsing mode Sets default browsing mode as folder or at Select Directory to display les in a folder or Normal to view les directly If you select the view style Directory the menu point All will appear in the media browser See the section Media playback using media browser The option All gives you an overview of the directories images music videos Sli...

Page 19: ... 4 3 aspect ratio as this is its original size Panoramic This stretches the left and right sides of a normal picture 4 3 aspect ratio to ll the screen without making the picture appear unnatural The top and bottom of the picture are slightly cut off Cinema This zooms up the wide picture 16 9 aspect ratio to the full screen Con guring Picture Settings You can use different picture settings in detai...

Page 20: ...tivating HDMI True Black mode While in VGA PC mode some items in Picture menu will be unavailable Instead VGAmode settings will be added to the Picture Settings while in PC mode PC Picture Settings For adjusting PC picture items do the following Press or button to select Picture icon Picture menu appears on the screen Contrast Brightness Colour Colour Temp and Picture Zoom settings in this menu ar...

Page 21: ...nd Mode Surround mode can be change as On or Off Digital Out Sets digital out audio type PCM Uncompressed audio Compressed compressed audio DD DD AC3 AC3 HE Con guring Your TV s Settings Detailed settings can be configured to suit your personal preferences Press MENU button and select Settings icon by using or button Press OK button to view Settings menu Operating Settings Menu Items Press or butt...

Page 22: ...cess to special menus not described in this manual If so please follow the instructions from the Service Provider Only free to air channels are available without the Smartcard Smart card is provided by the service provider After inserting the card always keep in the smartcard socket Do not remove by your service provider stated again This is important because the service server to upload new infor...

Page 23: ...De nes a new PIN number Press OK and use numeric buttons to enter a new pin number You will need to enter your new pin a second time for veri cation purposes IMPORTANT The factory default pin number is 0000 if you change the pin number make sure you write it down and keep it safe Timers While in Timer menu you can set Sleep Timer or add Timer to watch the desired channel To view Timers menu press ...

Page 24: ...ed Date Time and Time Zone options will not be available to be set If MANUALoption is selected the Time Zone can be altered By pressing or buttons select Time Zone Use or buttons to change the Time Zone between GMT 12 or GMT 12 Date Time on the top of the menu list will then change according to the selected Time Zone Changes are automatically stored Press MENU to exit Con guring Source Settings Yo...

Page 25: ...s off Broadcast Type This feature is available to be set when there are different broadcast types When you set the desired broadcast type by using or button the TV will display the related channel list If the related source has not stored any channels No channels for this type have been found message will be displayed on the screen Standby Search If the Standby Search is set to On when the TV is i...

Page 26: ...LCD TVs image persistence may disappear after a short time Try turning off the TV for a while To avoid this do not leave the screen in still picture for extended periods No Power If your TV system has no power please check the main power cable and connection to the mains socket outlet Poor Picture Have you selected the correct TV system Is your TV set or house aerial located too close to a non ear...

Page 27: ...put Signal Types Source Supported Signals Available EXT 1 SCART 1 PAL 50 60 O NTSC 60 O RGB 50 O RGB 60 O EXT 2 SCART 2 PAL 50 60 O NTSC 60 O RGB 50 X RGB 60 X YPbPr 480I 60Hz O 480P 60Hz O 576I 50Hz O 576P 50Hz O 720P 50Hz O 720P 60Hz O 1080I 50Hz O 1080I 60Hz O 1080P 50Hz O 1080P 60Hz O HDMI1 HDMI2 HDMI3 HDMI4 480I 60Hz O 480P 60Hz O 576I 50Hz O 576P 50Hz O 720P 50Hz O 720P 60Hz O 1080I 50Hz O 1...

Page 28: ...upgrade and press OK button If a new upgrade is found it starts to download the upgrade Aprogress bar indicates the remaining download progress When download completes with success a message is displayed for reboot to activate new software Press OK to continue with the reboot operation 2 3 AM search and upgrade mode If Automatic scanning in Upgrade Options menu is enabled TV wakes up at 03 00 and ...

Page 29: ...adphones 1 x CI Slot 1 x Video input 1 x YPbPr YUV 2 x Audio L R in 1 x Aerial Digital Reception DVB T Transmission Standards DVB T MPEG2 MPEG4 HD i DEMODULATION Symbol rate COFDM with 2K 8K FFT mode Modulation 16 QAM 64 QAM FEC for all DVB modes automatically found MHEG 5 ENGINE compliant with ISO IEC 13522 5 UK engine Pro le UK only Object carousel support compliant with ISO IEC 135818 6 and UK ...

Page 30: ...his will adjust the range of optical density and tone of the complete picture Component Audio Inputs Used for the standard analog audio for interconnection of components Component Video Inputs Y Pb Pr This video signal consist of colour differences and a luminance signal HDMI High De nition Multimedia Interface This connection provides high quality uncompressed digital video and audio combining bo...

Page 31: ...and yellow The wire which is coloured blue or black must be connected to the terminal which is marked with the letter N or coloured Black The wire which is coloured brown or red must be connected to the terminal which is marked with the letter L or coloured Red For continued protection against risk of re replace only with same type and rating of fuse ASTA approved 5A 250VAC fuse CAUTION TO PREVENT...

Page 32: ...an equivalent devi ce the wages incurred for us the material costs and the transport costs of the device within Northern Ireland and Eire 5 To lodge your complaint please contact us at the following service number We recommend that you keep the original packaging in order to ensure the secure transport of the device in the event that you assert the guarantee A short description of your complaint i...

Page 33: ...alsely observed if the device does not have any technical defects pixel error class II 10 The guarantee does not include any further liability on our part in particular it does not include the liability for damages that have not occurred on the devi ce itself or that occur due to the breakdown of the device until repair e g ship ping costs handling costs etc However our statutory liability in part...

Reviews: