background image


Locating Tab & Hub Clamp screw 


Operation


Pressure Adjustment  


   With the section switches turned Off and the 

Master switch turned On maximum pressure 
can be set by the Manual Pressure Regulating 
Valve. A clockwise rotation increases pressure 
and an anticlockwise rotation reduces 
pressure. If the desired spraying pressure 
cannot be obtained with the Manual Pressure 
Regulating knob then holding up the toggle 
switch on the control box will close the Electric 
Pressure Regulating Valve and increase the 
system pressure and vice versa. 


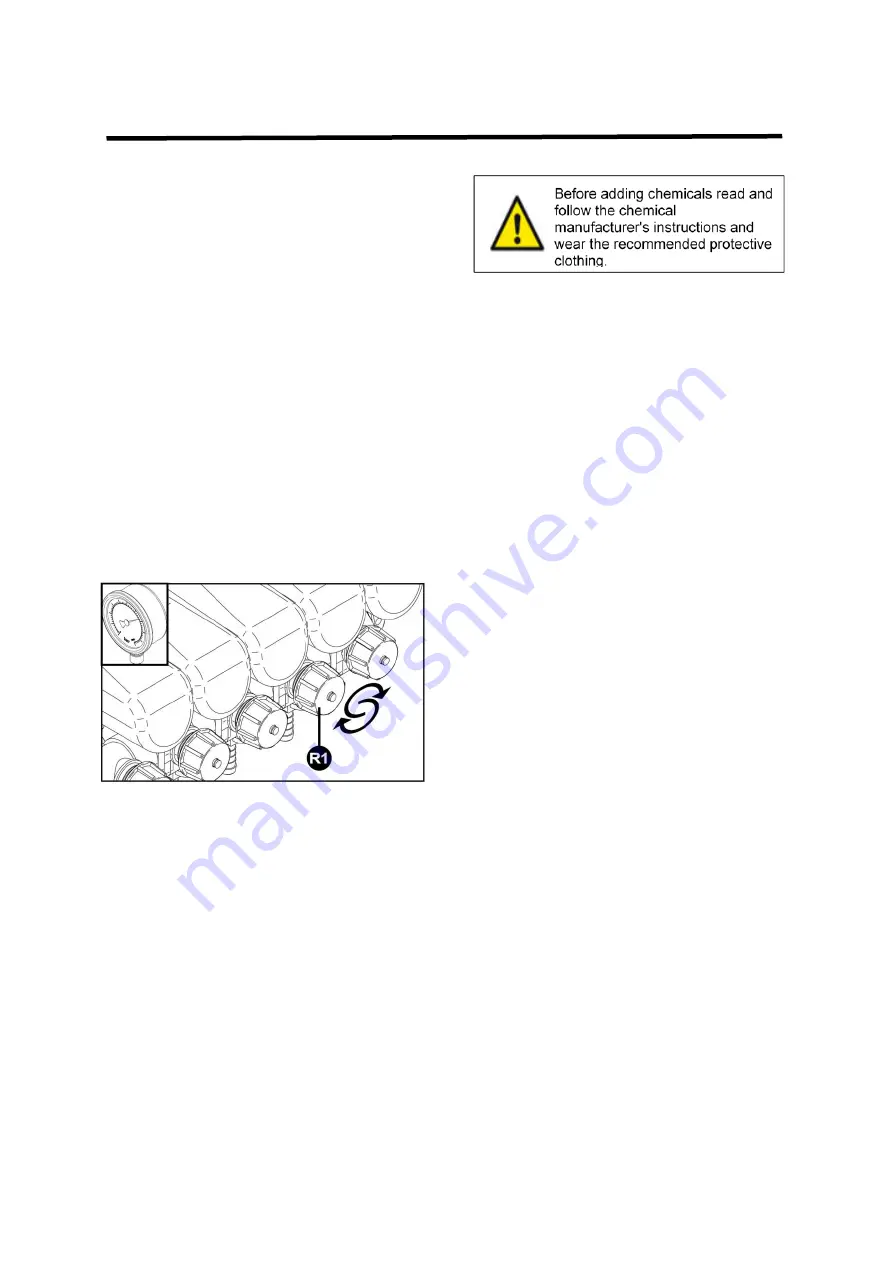
To adjust the compensation ports: 

Start the sprayer and set the spray pressure 
with the master On and all sections On.  
Then turn off the first section and adjust the 
compensation knob R1 until the pressure is 
exactly the same as it was with all sections on.  
Turn the section back on and off to check the 
remains constant. 
Turn all sections on again and repeat for the


remaining sections. 
The sprayer is then adjusted correctly. 


Adding Chemicals 


Chemicals are added to the tank through the 
top lid opening. 
 
Take care to avoid the spillage of chemicals or 
mixed  solution.  Wear  gloves,  eye  protection 
and  the  recommended  protective  clothing 
whilst  filling  with  chemicals.  Wash  your  hands 
after filling  if they have come into contact  with 
concentrate or mixed solution. 

 
Store unused chemicals and dispose of empty 
chemical  containers  as  recommended  by  the 
chemical manufacturer or relevant authority. 
 

Emptying the Sprayer


At  the  end  of  each  day  partly  fill  the  tank  with 
water  and  run  this  through  the  pump,  spray 
lines and nozzles to purge them of chemicals. 
Use a cleaning agent such as Silvan All Clear 
tank cleaner. 

 
Rinse  the  tank  through  the  lid  and  empty  with 
the  drain  valve  to  remove  powdered  material. 
Never  leave  chemicals  in  the  tank  that  could 
settle  to the  bottom  and  break  into  lumps  that 
may block the suction filter.  

  
Dispose  of  unused  chemical  mix,  rinse  water 
and  containers  as  recommended  by  the 
chemical 

manufacturer 

or 

government 

authority. 


Summary of Contents for Oktopus 500L

Page 1: ...Operator s Manual MANSLV 1 Rev C October 2018 500 Litre Linkage Oktopus Sprayer...

Page 2: ...13 14 Lubrication and Maintenance Daily Weekly Monthly and Annual Maintenance 15 Trouble Shooting 16 Trouble Shooting 15 Lubrication and Maintenance 16 Warranty Certificate 19 YOUR SPRAYER DETAILS Rec...

Page 3: ...ranty period begins on the date the product is delivered to the first retail purchaser for a period of 12 months This Warranty Covers Only conditions resulting directly from defects in workmanship or...

Page 4: ...nsion chamber and protective mesh screen Two speed oil bath gearbox with neutral position Max Speed 540 PTO rpm 2 700 rpm Air speed 450 dia fan 80 m sec Capacity 450 dia fan 14 000 m3 hr PTO Drive Qua...

Page 5: ...and power requirement of the sprayer Refer to the tractor operator s manual for safe working loads and relevant tractor safety instructions Exercise extreme care when operating in hilly or uneven ter...

Page 6: ...ead and follow the information on all safety decals before operating the sprayer Failure to comply with these warnings could result in serious injury or death Safety decals should be kept clean and le...

Page 7: ...rding of the safety decals shown on the previous pages is given below Before operating the sprayer read all safety warning decals Failure to comply with these warnings could result in serious injury o...

Page 8: ...ayer it is the selling dealer s responsibility to install and set the PTO shaft to the correct length The following information is provided for reference Set the linkage height so the ends of the two...

Page 9: ...le diffuser nozzle Width Loosen the U bolt 1 and slide the inside RHS 2 to the desired width Re tighten the U bolt Height Loosen the 8mm bolt 3 and slide the tube outlet mount 4 to the desired height...

Page 10: ...centrifugal clutch which protects the gearbox and driveline if the PTO is engaged rapidly The sprayer should always be operated at 540 PTO rpm to ensure correct operation of the centrifugal clutch and...

Page 11: ...t for the remaining sections The sprayer is then adjusted correctly Adding Chemicals Chemicals are added to the tank through the top lid opening Take care to avoid the spillage of chemicals or mixed s...

Page 12: ...laced in the standard positions If their position should be changed make sure that the jet is spraying into the air stream and not fouling on the diffuser as shown below HCC Hollow Cone Ceramic Jets H...

Page 13: ...2 Total Output Required Calculate the total spray output required in litres per minute l min using the following formula Check that the calculated output does not exceed the rated capacity of the pump...

Page 14: ...2 Orange at 10 11 Bar pressure will give the desired output An alternative would be to use HCC025 Red at 7 Bar pressure to give the equivalent output 2 Orchard Fruits Application rate 1200 l ha Travel...

Page 15: ...0 x 5 x 3 600 10 l min Date of Test _______________ Application Rate _______________ litres ha Speed of Travel _______________ km hr Row Spacing _______________ metres No of nozzles _________ Output p...

Page 16: ...run clean water through the pump and lines to purge them of chemicals Rinse out the tank to remove powdered material Never leave chemicals in the tank that may settle to the bottom harden and break in...

Page 17: ...f the pump Air trapped in filter or suction lines Pump does not prime No liquid in tank or not covering suction inlet Suction filter blocked Suction filter stop valve closed Suction filter bowl loose...

Page 18: ...1 SILVAN AUSTRALIA PTY LTD ABN 48 099 851 144 68 Atlantic Drive Keysborough VIC 3173 Australia Telephone 1300 745 826 Facsimilie 1800 745 826 www silvan com au...

Reviews: