


English-6
OSD (On-Screen Display) control buttons on the front of the display function as follows:
To access OSD menu, press any of the control buttons (EXIT, , , –, +).
To change signal input, press the SELECT button.
NOTE:
OSD must be closed in order to change signal input.
Menu
EXIT
Exits the OSD controls.
Exits to the OSD main menu.
/
Moves the highlighted area left/right to select control menus.
Moves the highlighted area up/down to select one of the controls.
-/+
Moves the bar left/right to increase or decrease the adjustment.
SELECT/1
2
Active Auto Adjust function. Enter the OSD controls. Enter the OSD sub menu.
RESET
Resets the highlighted control menu to the factory setting.
NOTE:
When
RESET
is pressed in the main and sub-menu, a warning window will appear allowing you to cancel the
RESET
function by pressing the EXIT button.
Brightness/Contrast Controls
BRIGHTNESS
Adjusts the overall image and background screen brightness.
CONTRAST
Adjusts the image brightness in relation to the background.
AUTO CONTRAST (Analog input only)
Adjusts the image displayed for non-standard video inputs.
Auto Adjust (Analog input only)
Automatically adjusts the Image Position and H. Size settings and Fine settings.
Position Controls
LEFT / RIGHT (Analog input only)
Controls Horizontal Image Position within the display area of the LCD.
DOWN / UP (Analog input only)
Controls Vertical Image Position within the display area of the LCD.
H.SIZE (Analog input only)
Adjusts the horizontal size by increasing or decreasing this setting.
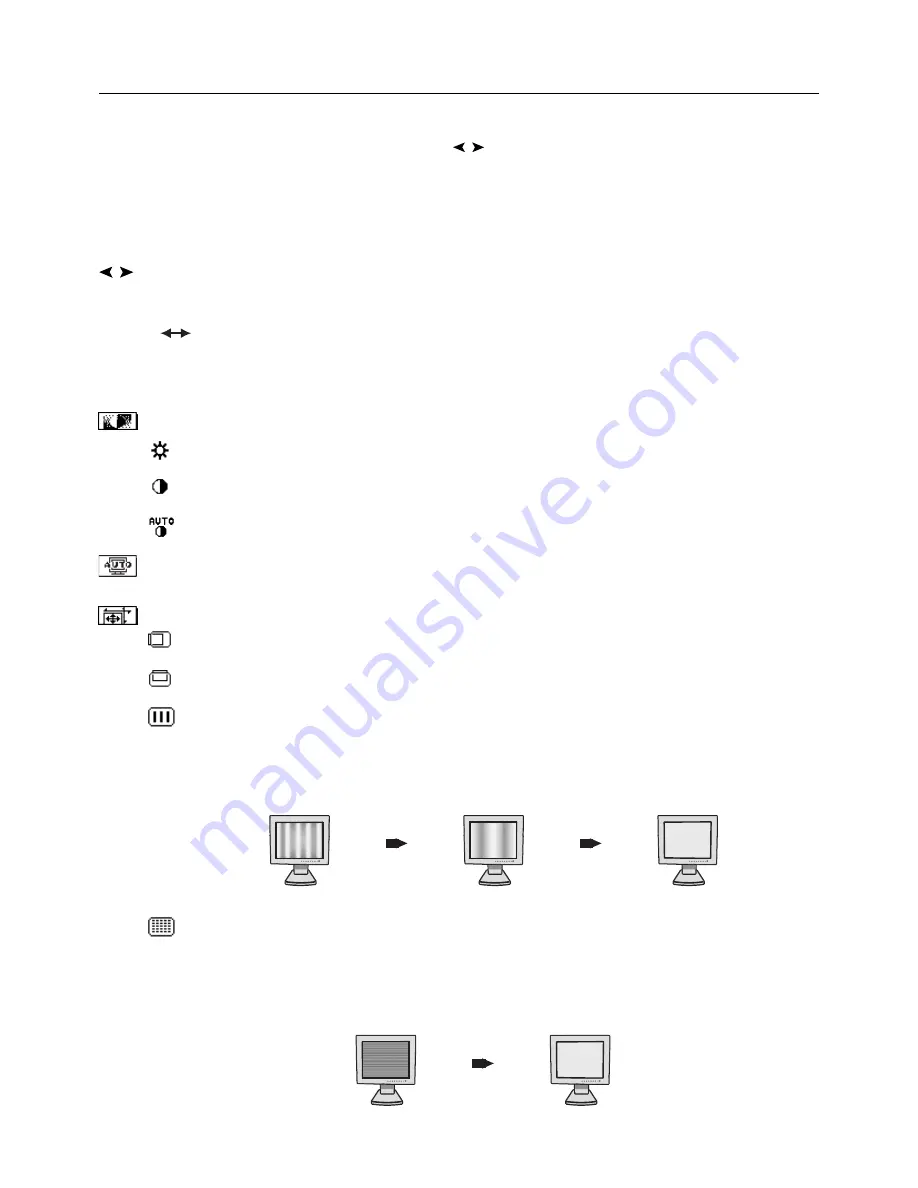
Should the “AUTO Adjust function” do not give you a satisfactory picture setting, a further tuning can be
performed using the “H.Size” function (dot clock). For this a Moiré test pattern could be used. This function
may alter the width of the picture. Use left/Right Menu to center the image on the screen. If the H.Size is
wrongly calibrated, the result would look like on the left drawing. The image should be homogeneous.
FINE (Analog input only)
Improves focus, clarity and image stability by increasing or decreasing this setting.
If the “Auto Adjust function” and the “H.Size” function do not give you a satisfactory picture setting, a fine
tuning can be performed manually using the “Fine” function. It improves focus, clearity and image stability
by increasing or decreasing this setting.
For this a Moiré test pattern could be used. If the Fine value is wrongly calibrated, the result would look like
on the left drawing. The image should be homogeneous.
When FINE value is wrong.
When FINE value is correct.
When H.SIZE value is wrong.
When H.SIZE value is improved.
When H.SIZE value is correct.
Controls
Summary of Contents for Silicon Graphics F190
Page 1: ...Silicon Graphics F190 Flat Panel Display User Guide ...
Page 6: ......


