background image

8

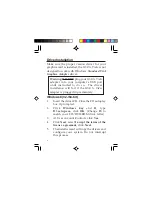
6.

At the Found New Hardware, select 

No,

not this time

, then click 

Next

. Skip this step

if not prompted.

7.

Select 

Install the Software Automatically

,

then click 

Next

.

8.

Click 

Continue Anyway 

at Hardware

Installation. Skip this step if not prompted.

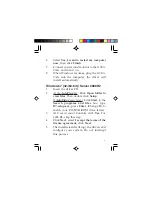
9.

At the Found New Hardware window,

click 

Finish

, then restart the computer to

complete the installation.

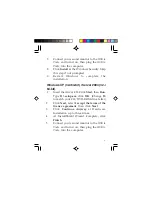
To Verify Windows Installation

1.

From the desktop, right click 

Computer

 or

My Computer

, then click 

Manage

.

For Windows 8 / 7 / XP / Server 2003

: Click

Device Manager

.

For Windows Vista

: Click 

Continue

, then

click 

Device Manager

.

For Windows Server 2008 / 2008 R2

: Double

click 

Diagnostics

, then click 

Device

Manager

.

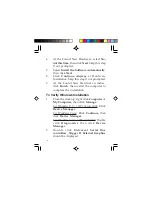
2.

Double click 

Universal Serial Bus

controllers

Trigger II External Graphics

should be displayed.

Summary of Contents for JU-DV0211-S1

Page 1: ...ctor to your desktop or notebook PC and use it as an extended desktop or as an additional larger different display for your main screen Features and Benefits Compliant with Universal Serial Bus 2 0 Specification Display modes primary extended and mirror Supports 60Hz and 75Hz monitor refresh rates Display rotation 0 90 180 270 degrees Userfriendlydisplayconfigurationsoftware ...

Page 2: ...dows 8 32 64 bit 7 32 64 bit XP 32 64 bit Server 2003 2008 32 64 bit Server 2008 R2 Package Contents USB to Video Multi Monitor Adapter DVI to VGA adapter JU DV0211 S1 only Driver CD Quick installation guide Layout Figure 1 USB to VGA Multi Monitor Video Adapter VGA port USB port ...

Page 3: ...3 Figure 2 USB to DVI VGA Multi Monitor Video Adapter Figure 3 USB to DVI VGA with DVI to VGA Adapter USB port DVI to VGA adapter DVI port VGA port ...

Page 4: ...o so The driver installation will fail if the USB to Video adapter is plugged in prematurely Windows 8 32 64 bit 1 Insert the driver CD Close the CD autoplay box if prompted 2 Click Windows key and R type D setup exe click OK Change D to match your CD DVD ROM drive letter 3 At User Account Controls click Yes 4 Click Next select I accept the terms of the license agreement click Next 5 The install w...

Page 5: ...he driver CD 2 At the AutoPlay box Click Open folder to view files then double click Setup If AutoPlay doesn t start Click Start in the Search programs and files box type D setup exe press Enter Change D to match your CD DVD ROM drive letter 3 At User Account Controls click Yes For 2008 R2 skip this step 4 Click Next select I accept the terms of the license agreement click Next 5 The install wizar...

Page 6: ...ista 32 64 bit Server 2008 32 64 bit 1 Insert the driver CD 2 At the AutoPlay box Double click Setup If AutoPlay doesn t start Click Start in the Start Search box type D setup exe press Enter Change D to match your CD DVD ROM drive letter 3 At User Account Controls click Continue For Server 2008 skip this step 4 Click Next select I accept the terms of the license agreement click Next 5 Click Insta...

Page 7: ... bit Server 2003 32 64 bit 1 Insert the driver CD Click Start then Run Type D setup exe click OK Change D to match your CD DVD ROM drive letter 2 Click Next select I accept the terms of the license agreement then click Next 3 Click Continue Anyway at Hardware Installation up to three times 4 At InstallShield Wizard Complete click Finish 5 Connect your second monitor to the USB to Video and turn it...

Page 8: ... window click Finish then restart the computer to complete the installation To Verify Windows Installation 1 From the desktop right click Computer or My Computer then click Manage For Windows 8 7 XP Server 2003 Click Device Manager For Windows Vista Click Continue then click Device Manager For Windows Server 2008 2008 R2 Double click Diagnostics then click Device Manager 2 Double click Universal S...

Page 9: ...er Utility Icon Windows 8 7 Server 2008 R2 Display Settings Duplicate these displays In this setting the USB to Video will mirror your desktop Youwillseethesameimageonbothdisplays Extend these displays This setting extends your desktop for easy viewing of multiple windows Windows will move off the primary display and enter the extended display Note To match the physical arrangement of your display...

Page 10: ...g this option enable Auto Arrange right click anywhere on the desktop click View click Auto Arrange to allow your desktop icons to move to the new main display Note Without this setting you will need to drag n drop your desktop icons to the new main display Show desktop only on 1 This setting turns on display 1 and turns off all other displays ...

Page 11: ...displays Extended This mode extends your desktop for easy viewing of multiple windows Windows will move off the primary display and enter the extended display Note To match the physical arrangement of your displays see Monitor Orientation on page 13 Off This setting turns off the USB to Video adapter Primary This mode makes the USB to Video adapter the main display adapter in the system and the sy...

Page 12: ... desktop onto this monitor Select display Check Extend the desktop onto this monitor Note For systems with the main display turned off go to Display Settings Select the main display 1 and check Extend the desktop onto this monitor ...

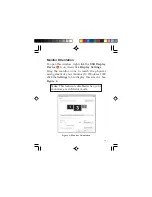
Page 13: ... click the USB Display Device icon then click Display Settings Drag the monitor icons to match the physical arrangement of your monitor In Windows 2000 click the Settings tab to display this screen See Figure 6 Note This feature is disabled when your monitors are in Mirror mode ...

Page 14: ...ate You can change this in Display Properties Settings Advanced Monitor Make sure you select the USB to Video and not set the refresh rate higher than what your monitor can support Q3 Why can t I make the USB to Video the primary display A3 Some video cards ship their product with a utility that prevents other video cards from being set as the primary video card Check the bottom right hand corner ...

Page 15: ...edures below A If it is within the store s return policy period please return the product to the store where you purchased from B If your purchase has passed the store s return policy period please follow the steps below to have the product repaired or replaced Step 1 Submit your RMA request Gotowww siig com click Support thenREQUESTAPRODUCTREPLACEMENT to submit a request to SIIG RMA or fax a requ...

Page 16: ...en Desktop Notebooksystemsandexternalperipherals SIIGcontinuestogrowbyadding A V and Digital Signage connectivity solutions to our extensive portfolio SIIGproductsoffercomprehensiveusermanuals manyuser friendlyfeatures andarebackedbyanextensivemanufacturerwarranty Highqualitycontrol standards are evident by the overall ease of installation and compatibility of ourproducts aswellasoneofthelowestdef...

Reviews: