background image

3

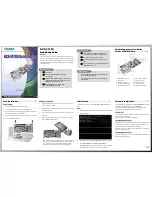
Fan-out Cable

44-pin connector

Serial ports DB9 (9-pin)

Figure 2.  Fan-out cable

Hardware Installation

General instructions for installing the card are provided

below. Since the design of computer cases and

motherboards vary, refer to your computer’s reference

manual for further information, if needed.
Static Electricity Discharge may permanently damage

your system. Discharge any static electricity build up in

your body by touching your computer’s case for a few

seconds.  Avoid any contact with internal parts and

handle cards only by their external edges.
1.

Turn OFF the power to your computer and any

other connected peripheral devices.

2.

Unplug the power cord from the back of the

computer.

3.

Remove your computer’s cover.

4.

Remove the slot bracket from an available PCI slot.

Summary of Contents for CyberPro PCI 4S

Page 1: ...ce dramatically IRQ sharing feature reduces IRQ conflicts High speed serial port 9 pin works with 56K V 90 external modems ISDN terminal adapters PDAs digital cameras label printers and other serial p...

Page 2: ...44 pin connector Figure 1 Layout Note Make this connection only when two or more serial ports are configured for 5V 12V output Depending on the model purchased the bracket size will be either Full or...

Page 3: ...n if needed Static Electricity Discharge may permanently damage your system Discharge any static electricity build up in your body by touching your computer s case for a few seconds Avoid any contact...

Page 4: ...to secure the card 8 Replacethecomputercoverandreconnectthepower cord 9 Connect the 4 port fan out cable to the board s 44 pin connector For more information see Figure 2 on page 3 Driver Installatio...

Page 5: ...mplete the installation Windows Vista 32 64 bit 1 Install the board and boot up Windows 2 At the Found New Hardware window insert the driver CD click Locate and install driver software recommended the...

Page 6: ...t Change D to match your CD DVD ROM drive letter 8 At The sofware for this device has been successfully installed click Close 9 Repeat steps 4 8 to complete the installation To Verify Windows 7 Vista...

Page 7: ...ck Next 4 Check Specify a location uncheck the other boxes then click Next 5 InsertthedriverCD typeinD 2000 thenclickOK Change D to match your CD DVD ROM drive letter 6 Click Next and Finish 7 Repeat...

Page 8: ...he board and boot up Windows 2 At the Add New Hardware Wizard click Next 3 Select Search for the best driver for your device Recommend then click Next 4 Insert the driver CD check Specify a location u...

Page 9: ...ck Multi function adapters SIIG CyberPro 4S PCI board and PCI Function should be displayed Windows NT 4 0 1 Install the board and boot up Windows 2 From the desktop click Start then Run Insert the dri...

Page 10: ...tings tab and click Advanced 3 Click the down arrow that is next to the COM Port numberboxandselectaCOMportthatisnotinuse Click OK 4 Click OK again then close Device Manager to save the changes Window...

Page 11: ...o have the product repaired or replaced Step 1 Submit your RMA request Go to www siig com click Support then RMA to submit a request to SIIG RMA If the product is determined to be defective an RMA num...

Page 12: ...uals manyuser friendly features and are backed by an extensive manufacturer warranty High quality control standards are evident by the overall ease of installation and compatibility of our products as...

Reviews: