


13
Select
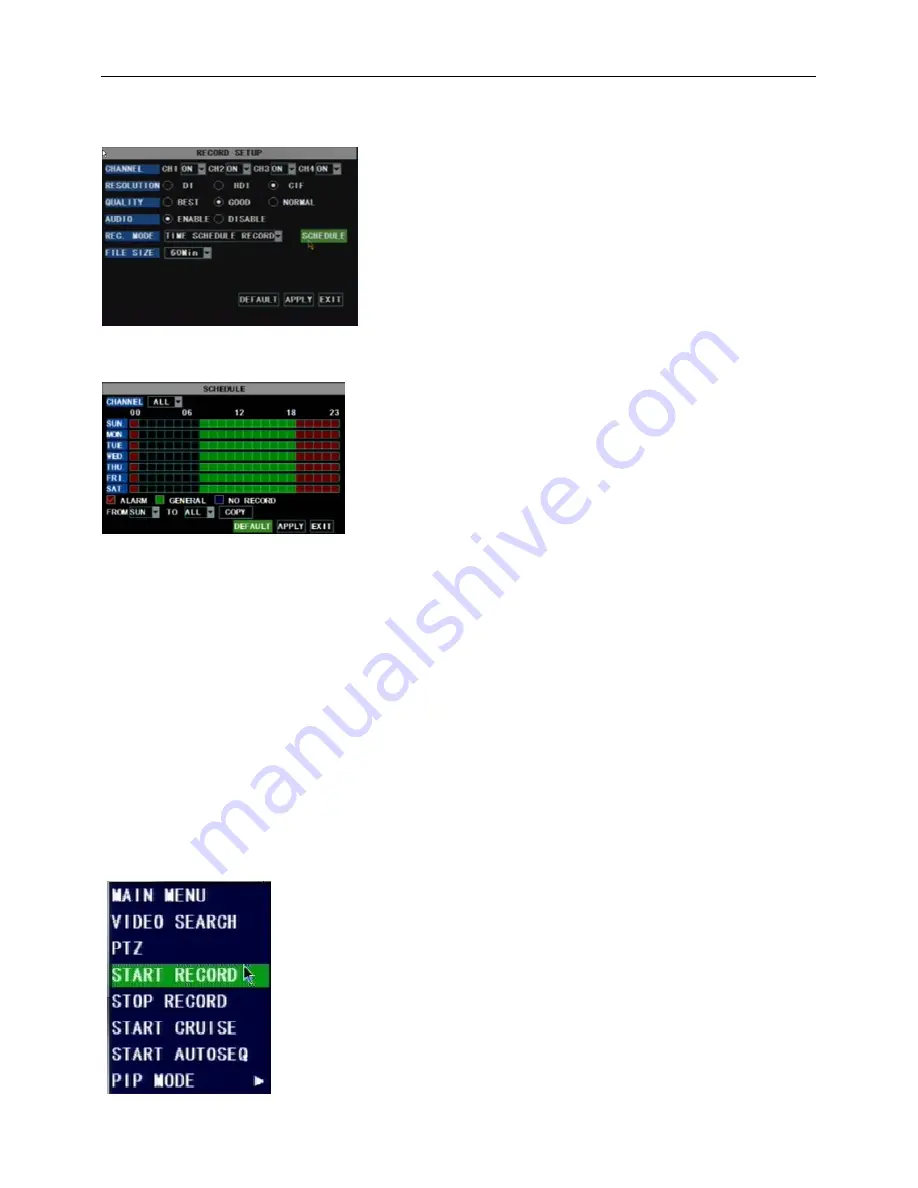
TIME SCHEDULE RECORD
, a
SCHEDULE
button will display.
Click it and enter schedule setup interface.
There are 3 recording status options:
ALARM [RED]:
Motion detection mode
GENERAL [GREEN]:
Continuous record mode
NO RECORD [Transparent]:
Do not record
There are 2 short cut menus listed in the Pop-up menu:
START RECORD
and
STOP RECORD
. They are Manual record & manual stop record buttons and the
START RECORD
function only work when current recording mode is as following
recording status:
1. NO
RECORD
2. ALARM, but the motion is no happening now.
The
STOP RECORD
function can only stop manual recording.
length for every single continuous recording file (15, 30, 45, 60 minutes).
5.2.2.1. Record Mode
5.2.2.2. Record Schedule Setup
You are able to configure 24 hours recording schedule for every channel or all channel from Sunday to
Saturday.
Steps:
1. Select
Channel
2. Select a recording status among
ALARM, GENERAL
and
NO RECORD
3. Move the cursor to the time point you want to set, click on the box in the schedule time line that you want
to apply the selected record type to.
4. If you want to change another recording status, repeat step 2 & step 3.
5. You can use copy function to fast complete your settings.
6. Press
APPLY
button to save your settings.
On the main interface, you will be able to check the recording status:
R: normal recording
M: motion detection recording
5.2.2.3. Manual Recording
There are 2 record modes:
ALWAYS
&
TIME SCHEDULE
RECORD.
When you select
ALWAYS
record mode, DVR will execute
continuous recording without stop.
When you select
TIME SCHEDULE RECORD
mode, DVR will
execute recording according to your schedule.
Picture 5-12
Picture 5-13
Picture 5-14


