4 Installation and Commissioning
House Control and Weather Sensors - LOGO! Set 11
Entry ID: 68585346, V2.1, 09/2018
21
S
iem
e
n
s A
G
2
0
1
8
A
ll r
igh
ts
re
se
rv
e
d
No.
Action/response
WinCC
3.
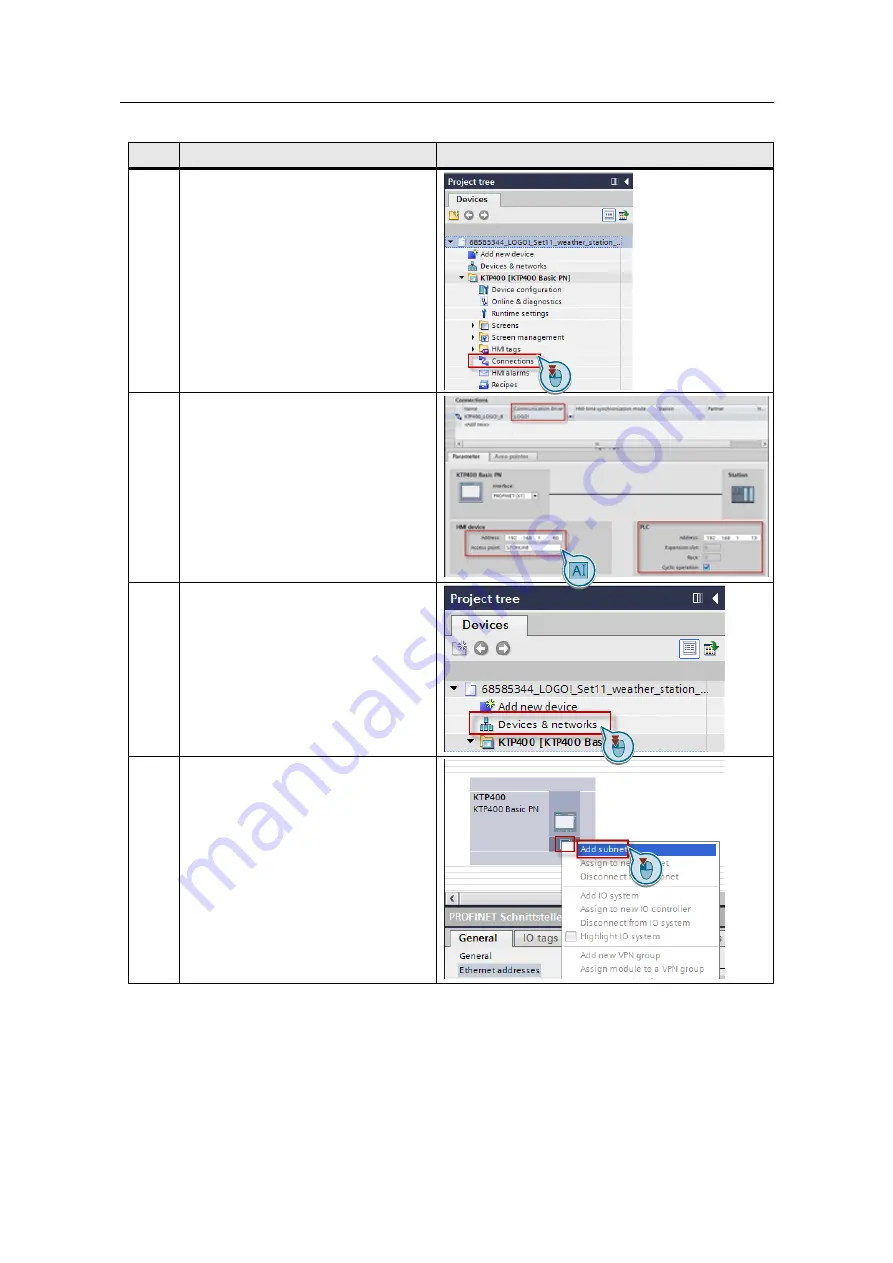
In the project tree under "KTP400
[KTP400 Basic PN]" go to
"Connectio
ns” and select it with a
double click.
4.
In "
HMI device”, enter the IP address of
your Basic Panel (here: 192.168.1.80)
and press Enter to confirm.
Make sure that
"
S7ONLINE” is specified under
"
Access point”.
the master LOGO! IP address
is specified under "PLC
” (here:
192.168.1.13).
the check box "Cyclic
operation” is ticked.
5.
In the project tree, go to "Devices &
networks” and select it with a double
click.
6.
Make sure a subnet has been added to
the network. To create a subnet in the
network, open the context menu with a
right click on the Ethernet interface and
click on "
Add subnet”.
Note:
In this application example, the subnet
has already been added in the WinCC
project.


