background image

24

Using the phone

Gigaset SL785 / GBR / A31008-M2009-L101-2-7619 / starting.fm / 25.03.2009

Ve

rs

io

n 4, 16.0

9.20

05

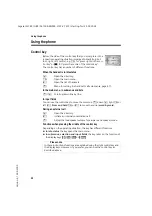
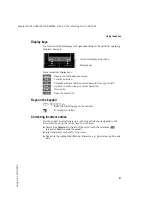
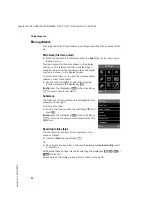
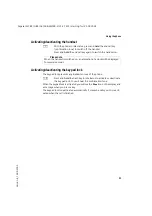
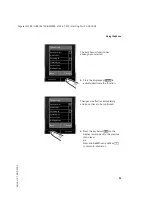
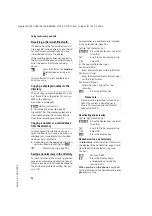
Illustration of operating steps in the user guide

The operating steps are shown in abbreviated form.

Example:

The illustration:

v


¢

Settings 

¢

Telephony 

¢

Auto Answer

 (

³

= on)

means:

¤

Press 

right

 on the control key 

v

 to open the main menu. 

¤

Use the right, left, down and up 

control key 

p

 to navigate to 

the

Settings

 submenu. 

¤

Press the display key 

§OK§

 to confirm 

your selection. 

¤

Press down on the control key 

s


until the 

Telephony 

menu appears 

on the display. 

¤

Press the display key 

§OK§

 to confirm 

your selection. 

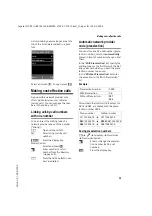
Settings

Date/Time

Audio Settings

Display

Language

Registration

Telephony

Back

OK

Settings

Ç ò

É

Ê Ë Ì

͠ΠÏ

Back

OK

Summary of Contents for Gigaset SL780

Page 1: ...e of the trademark Siemens Gigaset Communications GmbH 2009 All rights reserved Subject to availability Rights of modification reserved www gigaset com Bedienungsanleitung Mittelgrau BA_Phones_C class Orange BA_Broadband Rot BA_Phones_VoIP Hellgrau BA_Phones_Essential Weiß BA_Home Media 20 01 09 V7 Black Cyan Magenta Yellow ...

Page 2: ...sing touch tone dialling press briefly Text input Open table of special characters 12 Key 1 Dial answering machine SL785 only Network mailbox press and hold 13 Talk key Accept a call open redial list press briefly start dialling press and hold When writing an SMS send SMS 14 Speaker key Switch between earpiece and speaker mode Lights up speaker activated Flashes incoming call 15 Control key page 2...

Page 3: ...2 Brief overview Gigaset SL785 GBR A31008 M2009 L101 2 7619 overview fm 25 03 2009 Version 4 16 09 2005 Base Registration Paging key page 58 ...

Page 4: ...29 30 31 ØÜ Appointment page 56 Anniversary page 36 Ø Ú Alarm clock page 58 Signal strength page 18 or ECO Mode symbol page 55 Answering machine switched on SL785 only Bluetooth activated page 63 or ô õ Bluetooth headset data device connected Ring tone switched off page 68 Keypad lock switched on page 23 Battery charging page 18 Battery charge status page 18 Number of new messages u in the list of...

Page 5: ... you like to do next 19 Using the phone 20 Control key 20 Display keys 21 Keys on the keypad 21 Correcting incorrect entries 21 Menu guidance 22 Activating deactivating the handset 23 Activating deactivating the keypad lock 23 Illustration of operating steps in the user guide 24 Menu tree 26 Making calls 29 Making an external call 29 Ending a call 29 Accepting a call 29 Calling Line Identification...

Page 6: ...44 Notification by SMS 44 SMS mailboxes 44 Setting SMS centres 46 SMS on a PABX 46 Activating deactivating first ring tone muting 46 Activating deactivating SMS function 47 SMS troubleshooting 47 Operating the answering machine of the Gigaset SL785 base 49 Operation via the handset 49 Activating deactivating call screening 52 Setting the recording parameters 52 Resetting fast access for the answer...

Page 7: ...ting the display 66 Activating deactivating auto answer 67 Changing the speaker earpiece volume 67 Changing ring tones 67 Resource directory 68 Activating deactivating advisory tones 69 Setting your own area code 70 Restoring the handset default settings 70 Base settings 71 Protecting against unauthorised access 71 Activating deactivating music on hold 71 Repeater support 71 Restoring the base to ...

Page 8: ...M2009 L101 2 7619 SL785IVZ fm 25 03 2009 Version 4 16 09 2005 Appendix 78 Care 78 Contact with liquid 78 Specifications 78 Writing and editing text 79 Additional functions via the PC interface 81 Mounting the base to the wall 85 Index 86 ...

Page 9: ...r particular environment e g doctor s surgery Do not hold the rear of the handset to your ear when it is ringing or when the speaker function is activated Otherwise you risk serious and permanent damage to your hearing The handset may cause an unpleasant humming noise in hearing aids Do not install the base or charging cradle in bathrooms or shower rooms The base and charging cradle are not splash...

Page 10: ... address books on your telephone mobile phone and PC with BluetoothTM or via the USB port using the Gigaset QuickSync software u You can save appointments and anniversaries in your phone and it will remind you of them in advance u You can designate important people as VIPs so you can identify important calls from the ring tone u If you do not wish to be disturbed you can simply set up a time contr...

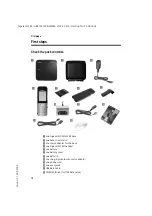
Page 11: ...ck contents 1 one Gigaset SL780 SL785 base 2 one base cover stand 3 one mains adapter for the base 4 one Gigaset SL78H handset 5 one battery 6 one battery cover 7 one belt clip 8 one charging cradle with mains adapter 9 one phone cord J one user guide K USB data cable L CD ROM Driver for USB data cable 2 1 3 5 7 6 8 4 9 K J L ...

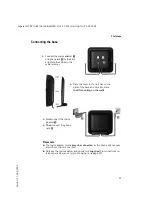
Page 12: ... mains connection u Only use the mains adapter and phone cord supplied Pin connections on telephone cables can vary pin connections page 79 1 3 2 1 1 4 Connect the mains adapter 1 and phone jack 2 to the base and place the cables in the cable recesses Place the cover in the notches on the back of the base and click into place not if mounting on the wall First connect the mains adapter 3 Then conne...

Page 13: ...s feet do not usually leave any marks on surfaces However due to the multitude of different varnishes and polishes used on today s furnishings the occurrence of marks on the surfaces cannot be completely ruled out Please note u Never expose the telephone to the influence of heat sources direct sunlight or other electrical devices u Protect your Gigaset from moisture dust corrosive liquids and vapo...

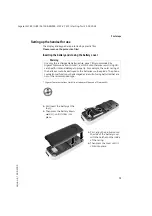
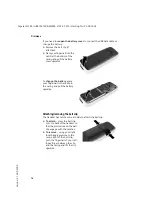
Page 14: ...result in signifi cant health risks and damage to property For example the outer casing of the batteries could be destroyed or the batteries could explode The phone could also malfunction or be damaged as a result of using batteries that are not of the recommended type Gigaset Communications GmbH is a trademark licensee of Siemens AG First insert the battery at the top a Then press the battery dow...

Page 15: ...er upwards To change the battery place your fingernail in the cavity in the casing and pull the battery upwards Attaching removing the belt clip The handset has notches on each side to attach the belt clip To attach press the belt clip onto the back of the handset so that the protrusions on the belt clip engage with the notches To remove using your right thumb apply pressure to the centre right of...

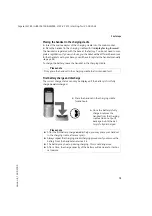
Page 16: ...attery charge and discharge The correct charge status can only be displayed if the battery is first fully charged and discharged Please note Only place the handset in the charging cradle that is intended for it Please note u After the first battery charge and discharge you may place your handset in the charging cradle after every call u Always repeat the charging and discharging procedure if you r...

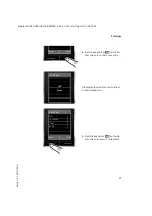
Page 17: ... have already set the time and date open the input field via the menu page 28 The Date Time submenu is shown on the display The active input position flashes Enter day month and year as an 8 digit number via the keypad e g 4 Q2Q QN for 14 10 2008 Date Time Date 14 10 2008 Time 00 00 Back Save Time Press the right or left control key to change the input posi tion and correct an entry Enter the hour...

Page 18: ...n 4 16 09 2005 Press the key below Save on the dis play screen to confirm your entry The display shows Saved You will hear a confirmation tone Press the key below Back on the dis play screen to return to idle status Back Save Date Time Date 14 10 2008 Time 07 15 Back Save Date Time Saved ...

Page 19: ...attery almost empty xy x x charging Your answering machine is set with a pre recorded announcement Your phone is now ready for use Connecting the USB data cable To connect your telephone with a PC page 81 you can connect the sup plied USB data cable to the back panel of your phone Remove the belt clip if attached page 14 Remove the battery cover page 14 Connect the USB data cable to USB socket 1 P...

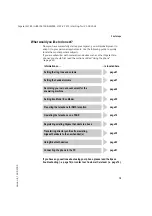
Page 20: ...u have any questions about using your phone please read the tips on troubleshooting page 74 or contact our Customer Care team page 74 Information on is located here Setting the ring tone and volume page 67 Setting the handset volume page 67 Recording your own announcement for the answering machine page 49 Setting Eco Mode Eco Mode page 55 Preparing the telephone for SMS reception page 41 Operating...

Page 21: ...enus and lists t s Scroll up down line by line In input fields You can use the control key to move the cursor up t down s right v or left u Press and hold v or u to move the cursor word by word During an external call s Open the directory u Initiate an internal consultation call t Adjust the loudspeaker volume for earpiece and speaker mode Functions when pressing the middle of the control key Depe...

Page 22: ...ion Store entry Open the redial list Keys on the keypad c Q etc Press the matching key on the handset Enter digits or letters Correcting incorrect entries You can correct incorrect characters in the input fields by navigating to the incorrect entry using the control key You can then u Delete the character to the left of the cursor with the display key Ñ press and hold to delete the word u Insert c...

Page 23: ...OK Briefly press the display key Back or the end call key a to revert back to idle status Submenus The functions in the submenus are displayed as lists example on the right To access a function Scroll to the function with the control key q and press OK Briefly press the display key Back or the end call key a to return to the previous menu level cancel the operation Reverting to idle status You can...

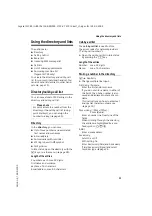
Page 24: ...activating the keypad lock The keypad lock prevents any inadvertent use of the phone Press and hold the hash key in idle status to activate or deactivate the keypad lock You will hear the confirmation tone When the keypad lock is activated you will see the icon on the display and a message when you press a key The keypad lock is deactivated automatically if someone calls you It is reacti vated whe...

Page 25: ...uto Answer on means Press right on the control key v to open the main menu Use the right left down and up control key p to navigate to the Settings submenu Press the display key OK to confirm your selection Press down on the control key s until the Telephony menu appears on the display Press the display key OK to confirm your selection Settings Date Time Audio Settings Display Language Registratio...

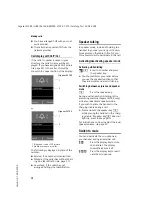
Page 26: ...en selected Press the display key Change to activate deactivate the function Telephony Auto Answer Area Codes Listening In Preselection Access Code Dialling Mode Back Change Telephony Auto Answer Area Codes Listening In Preselection Access Code Dialling Mode Back Change Press the key below Back on the display to jump back to the previous menu level or Press and hold the end call key a to return to...

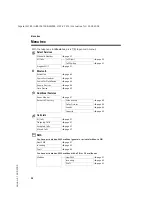
Page 27: ...earch for DataDevice page 64 Known Devices page 64 Own Device page 65 É Additional Features Room Monitor page 61 Resource Directory Screensavers page 69 Caller Pictures page 69 Sounds page 69 Capacity page 69 Ê Call Lists All Calls page 37 Outgoing Calls page 37 Accepted Calls page 37 Missed Calls page 37 Ë SMS You have activated an SMS mailbox general or private without a PIN New SMS page 41 Inco...

Page 28: ...4 Answering Machine page 49 Activation page 49 Announcements Record Announcemnt page 49 Play Announcement page 49 Delete Announcemnt page 49 Record Advisory Msg page 49 Play Advisory Message page 49 Delete Advisory Msg page 49 Recordings page 52 Call Screening page 52 Network Mailbox base without answering machine only page 54 Set Key 1 Network Mailbox page 54 Answering Machine page 49 Only base w...

Page 29: ...e 71 Display Screensaver page 66 Backlight page 67 Language page 66 Registration Register Handset page 58 De register Handset page 59 Select Base page 59 Telephony Auto Answer page 67 Area Codes page 70 Listening In page 60 Preselection page 39 Access Code page 72 Dialling Mode page 72 Recall page 72 System Eco Mode page 55 Eco Mode page 55 Repeater Mode page 71 System PIN page 71 Reset Handset Re...

Page 30: ...he display key Accept Gigaset SL785 Press the display key Ô to divert the call to the answering machine page 51 If the handset is in the charging cradle and the Auto Answer function is activated page 67 the handset will take a call automatically when you lift it out of the cradle To deactivate the ring tone press the Silence display key You can take the call as long as it is displayed on the scree...

Page 31: ...e in front of you This allows others to participate in the call Activating deactivating speaker mode Activating while dialling d Enter the number and press the speaker key You should inform your caller before you use the speaker function so that they know someone else is listening Switching between earpiece and speaker mode d Press the speaker key During a call and when listening to the answering ...

Page 32: ...can initiate ringback As soon as the line of the person you called is free your handset will ring You hear the busy tone Options Ringback a Press the end call key Cancelling ringback You can cancel ringback that has already started v Ç Ringback Off Call waiting during an external call If the function is activated during an external call you will hear a call waiting tone to signal that another exte...

Page 33: ...e first call is placed on hold During an external call Options External Call The previous call is placed on hold The other participant hears an announcement Enter the second participant s telephone number The phone number is dialled You are connected to the second participant If the caller does not answer select the display key End to return to the first participant Ending a consultation call Opti...

Page 34: ... each max 16 characters E mail address max 60 characters Call by call list The call by call list is used to store the access codes for network providers Call by call numbers Open the call by call list in idle status by pressing the C key Length of the entries Number max 32 digits Name max 16 characters Storing a number in the directory s New Entry Change multiple line input First Name Surname Ente...

Page 35: ...l 4 Other characters To get round the alphabetical order of the entries insert a space or a digit in front of the first letter of the surname These entries will then move to the beginning of the directory Selecting entries in the directory and call by call list s C Open the directory or call by call list You have the following options u Use s to scroll through the entries until the required name i...

Page 36: ... page 33 Using quick dial keys Press and hold the required quick dial key page 65 Sending the directory call by call list to another handset Preconditions u The sending and receiving handsets must both be registered to the same base u The other handset and the base can send and receive directory entries s C s Select entry Options Open menu Copy Entry Copy All to Internal s Select the internal numb...

Page 37: ...tory with s or Ó q Select entry page 34 Saving an anniversary in the directory For each number in the directory you can save an anniversary and specify a time at which a reminder call should be made on the anniversary default setting Anniver sary Off Anniversaries are automatically recorded in the calendar page 56 s s Select entry View Edit Press the display keys one after the other s Scroll to th...

Page 38: ...age 33 Display Number as in the directory page 35 Delete Entry as in the directory page 35 Delete All as in the directory page 35 Incoming SMS message list All received SMS messages are saved in the incoming message list page 42 Answering machine list Gigaset SL785 only You can use the answering machine list to listen to the messages that are on the answering machine Call lists Precondition Callin...

Page 39: ...n and the fast access is set for the net work mailbox page 54 u Incoming SMS message list page 42 If several mailboxes are set up page 44 several lists are dis played u List of missed calls u List of missed appointments page 57 An advisory tone sounds as soon as a new message arrives in a list The f key flashes it goes off when the key is pressed In idle status the display shows an icon for the ne...

Page 40: ...k key Both num bers are dialled Automatic network provider code preselection You can store a call by call number prese lection number which is automatically placed in front of numbers when you dial them In the With Preselection list specify the dialling codes or the first digits of the dial ling codes with which you wish the prese lection number to be used In the Without Preselection list enter th...

Page 41: ...l national calls or calls to the mobile network are automatically linked to the preselection number you have saved previously v Ï Telephony Preselection With Preselection Without Preselection s Select entry Enter or edit first digits of number Save Press the display key Temporarily cancelling preselection c press and hold Options Preselection off Select number Permanently deactivating preselection...

Page 42: ...ith area code even if you are in that area from the directory or call by call list or enter number directly For sending SMS to an SMS mailbox add the mailbox ID to the end of the number Send Press the display key The SMS is sent Please note If your phone is connected to a PABX please read page 46 Please note u For instructions on how to enter text and special characters please see page 79 and for ...

Page 43: ... Writing changing an SMS You are reading an SMS in the draft message list Options Open menu You have the following options Send Send stored SMS Edit Edit the text of the saved SMS and then send it page 41 Character Set Display text in the selected character set Deleting draft message list Open the draft message list and then Options Open menu Delete All Select press OK and confirm with Yes The lis...

Page 44: ...en menu Delete All Select press OK and confirm with Yes The list is cleared Reading or deleting SMS messages Open the incoming message list then q Select SMS Read Press the display key The entry will be displayed Scroll line by line using q Or delete the SMS with Options Delete Entry OK After you have read a new SMS it is given the status Old is no longer shown in bold Changing the character set R...

Page 45: ...rd the date is copied to the directory as an anniversary If necessary edit the entry in the direc tory and save it You will return to the vCard automatically Notification by SMS You can be notified about missed calls or new answering machine messages Gigaset SL785 only via SMS Precondition For missed calls the caller s number CLI must have been transmit ted Notification is sent to your mobile phon...

Page 46: ...ct the available numbers Protection Activate deactivate PIN protection SMS PIN If necessary enter 4 digit PIN Save Press the display key Active mailboxes are marked with μ in the mailbox list They are shown in the SMS list and can if necessary be displayed by pressing the message key f Deactivating a mailbox Set Activation to Off Confirm message with Yes if necessary All SMS messages saved in this...

Page 47: ...to be sent via the SMS centre SMS Enter the number of the SMS service and insert a star if your service provider supports personal mailboxes Save Press the display key Sending an SMS via another SMS centre Activate the SMS centre 2 to 4 as the active send service centre Send the SMS SMS on a PABX u You can only receive an SMS when the Calling Line Identification is for warded to the extension of t...

Page 48: ...n not activated FE Error occurred during SMS transfer FD Connection to SMS centre failed see self help You cannot send messages 1 You have not requested the CLIP service Calling Line Identification Presentation Ask your service provider to enable this service 2 SMS transmission has been interrupted e g by a call Re send the SMS 3 The network provider does not support this feature 4 No number or an...

Page 49: ...our fixed line network SMS service provider 3 Your terminal has been recorded by your SMS provider as having no fixed line net work SMS functionality i e you are not reg istered with the provider Send any SMS to automatically register your telephone to receive SMS Messages are only received during the day The terminal is recorded in your SMS pro vider s database as having no fixed network SMS func...

Page 50: ... Edit Press the display key Change multiple line input Activation Select On or Off to activate deactivate the answering machine Mode Select Answer Record Answer only or Alternating If the Alternating mode is selected Record from Enter hours minutes for the start of the period in 4 digit format The time must be set on the phone beforehand Record until Enter hours minutes for the end of the period i...

Page 51: ...ouncemnt Delete Advisory Msg Yes Press the display key to con firm the prompt Once you have deleted your announce ment the relevant pre recorded announcement will be used again Playing back messages The date and time of each message is logged provided this has been set page 16 and displayed during the playback If Calling Line Identification is activated the caller s number is dis played If the cal...

Page 52: ... List OK Press the display key to con firm the prompt Yes Press the display key to con firm the prompt Deleting individual old messages During playback or pause Delete Press the display key Picking up a call from the answering machine You can pick up a call while the answering machine is recording or is being operated via remote operation c Accept Press the talk or display key Recording stops and ...

Page 53: ...line input Length Select maximum recording time 1 Min 2 Min 3 Min or Maximum Quality Select recording quality Long Play High or Excellent If the quality is higher the maximum recording time is reduced Ring Delay Select when the answering machine should accept a call No delay after 10 sec 18 sec 30 sec or Automatic Save Press the display key Information about call acceptance In Automatic mode the f...

Page 54: ...eypad The following keys are used for operation A To return to the start of the current message Press twice to go back to the previous message B Stop playback Press again to resume 3 Go to the next message 0 Delete current message Activating the answering machine Phone home and let the phone ring until you hear Please enter PIN Enter system PIN Your answering machine is activated It tells you how ...

Page 55: ...ead Ask your network provider about this Configuring fast access for the network mailbox and entering the network mailbox number Gigaset SL780 v Ì Set Key 1 Network Mailbox Select and press Select Ø selected Gigaset SL785 Enter the number for the net work mailbox Save Press the display key The setting for fast access applies to all Gigaset SL78H handsets Calling the network mailbox Press and hold ...

Page 56: ...sed with several hand sets Activate deactivate Eco Mode Eco Mode v Settings System Eco Mode Eco Mode Change Press the display key on Status displays Display icon Ð i Ñ Ò flashes Reception strength good to poor no reception Ð white Eco Mode deactivated Ð green Eco Mode enabled white Eco Mode enabled displayedinsteadofthe reception strength icon when in idle status green Eco Mode and Eco Mode activa...

Page 57: ...e The current day is highlighted in white w Press the middle of the control key u If appointments have already been entered this will open the list of existing appointments on that day Select New Entry OK to open the data input window u If no appointments have been entered the data input window will open imme diately to add the new appointment Change multiple line input Appointment Select On or Of...

Page 58: ...ntry Or Options Open the menu for editing deleting and activating deacti vating Deleting all appointments In the monthly view Options Delete all appoint OK Confirm the security prompt with Yes All appointments are deleted Displaying missed appointments anniversaries Missed appointments anniversaries page 36 are displayed in the Missed Alarms list if u You do not accept an appointment anniversary u...

Page 59: ...ing the wake up call repeating after a pause snooze mode Precondition A wake up call is sounding Off Press the display key The wake up call is deactivated or Snooze Press the display key or any key The wake up call is deacti vated and then repeated after 5 minutes After the second repetition the wake up call is deactivated completely Using several handsets Registering handsets You can register up ...

Page 60: ...s Press the display key Locating a handset paging You can locate your handset using the base Briefly press the registration paging key on the base page 2 All handsets will ring simultaneously paging even if the ring tones are deactivated Ending paging Briefly press the registration paging key on the base or press the talk key c on the handset Changing the base If your handset is registered to more...

Page 61: ...ct handset and press OK You are connected to the inter nal participant either End Press the display key You are reconnected with the external subscriber Or Conf Press the display key All 3 participants are con nected with each other Ending a conference call a Press the end call key If an internal participant presses the end call key a the other handset remains connected to the external participant...

Page 62: ...ndicated by f s Select handset Options Open menu Rename Enter name Save Press the display key Changing a handset s internal number A handset is automatically assigned the lowest free number when it is registered If all slots are occupied number 6 is over written if this handset is in idle status You can change the internal number of all reg istered handsets 1 6 u Open the list of handsets Your own...

Page 63: ...played Sensitivity Select noise level sensitivity Low or High Press Save to save the settings When the room monitor function is acti vated the idle display looks as shown below Changing the set destination number v É Room Monitor Enter and save number as described in Activating the room monitor and entering the destination number page 62 Cancel deactivate room monitor Press the end call key a to c...

Page 64: ...ata with the computer page 81 To use the phone numbers dialling codes country and area code must be stored in the directory page 70 You will find a description of how to oper ate your Bluetooth devices in the user guides for these devices Activating deactivating Bluetooth mode v ò Activation Press Change to activate or deactivate Blue tooth mode activated In idle status the ò icon on the handset s...

Page 65: ...elect entry Options Press the display key View Entry Select and press OK Device name and address are displayed Back with OK Deregistering Bluetooth devices Open list s select entry Options Press the display key Delete Entry Select and press OK Changing the name of a Bluetooth device Open list s select entry Options Press the display key Edit Name Select and press OK Change the name Save Press the ...

Page 66: ...ion pre selected by default You can change the assignment page 66 The number is then dialled or the function started by simply pressing a key Assigning digit keys Precondition You have not yet assigned a number or function to the digit key Press and hold the digit key The list of possible key assignments is opened The following can be selected Quick Dial Call by Call Assign key to a number from th...

Page 67: ...ges v Ï Language The current language is indicated by a Ø s Select language and press Select If you accidentally choose a language you do not understand v Ï s s s Press keys in sequence and confirm by selecting OK s Select the correct language and press the right display key Setting the display Setting the screensaver When in idle status a picture a Slideshow all the pictures are displayed one aft...

Page 68: ... line r Set the speaker volume Save Press display key if necessary to save the setting perma nently Setting the volume during a call t Press the control key r Select volume The setting will automatically be saved after approx 3 seconds if not then press the display key Save If t is assigned with another function e g toggling page 32 Options Open menu Volume Select and press OK Configure setting se...

Page 69: ... In place of the ring tone you can activate an alert tone When you get a call you will hear a short tone Beep instead of the ring tone Press and hold the star key and within 3 seconds Beep Press the display key A call will now be signalled by one short alert tone The ñ icon appears in the display Resource directory The resource directory on the handset manages sounds which you can use as ring tone...

Page 70: ...Name Change the name max 16 characters and press Save The entry is stored with the new name Checking the memory You can check how much memory is avail able for sounds and pictures v É Resource Directory Capacity Activating deactivating advisory tones Your handset uses advisory tones to tell you about different activities and statuses The following advisory tones can be acti vated deactivated indep...

Page 71: ...ine input q Select change input field r Navigate in the input field Ñ If necessary delete number press the display key Enter number Save Press the display key Example Restoring the handset default settings You can reset individual settings and changes that you have made The following settings are not affected by a reset u Registration to the base u Date and time u Entries in the calendar u Entries...

Page 72: ...old down the registration paging key on the base while reconnecting the power cable to the base Release the key after a while The base has now been reset and the sys tem PIN 0000 set Activating deactivating music on hold v Ï Audio Settings Music on hold Press Change to activate or deactivate the music on hold on Repeater support With a repeater you can increase the range and reception strength of ...

Page 73: ...alue Possible values are 80 ms 100 ms 120 ms 180 ms 250 ms 300 ms 400 ms 600 ms 800 ms Saving an access code outside line code Precondition You may have to enter an access code for external calls in your PABX e g 0 v Ï Telephony Access Code Enter or change access code max 3 digits Save Press the display key If an access code has been saved u The access code is prefixed automati cally when you sele...

Page 74: ...ve saved an access code page 72 v Open the main menu Q5 Press keys Enter number for the length of the pause 1 1 sec 2 2 sec 3 3 sec 4 6 sec and press OK To insert a dialling pause press and hold S for 2 seconds A P appears in the dis play Switching temporarily to touch tone dialling DTMF If your PABX still operates with dial pulsing DP but you need touch tone dialling DTMF for a connection e g to ...

Page 75: ...ooth headset see the user guide for your headset Delete registration data from the handset when deregistering the device page 64 Repeat the registration process page 63 The display is blank 1 The handset is not switched on Press and hold the end call key a 2 The battery is flat Charge the battery or replace it page 13 No Base flashes in the display 1 The handset is outside the range of the base Mo...

Page 76: ...to release Calling Line Identification CLI You hear an error tone when keying an input a descending tone sequence Action has failed invalid input Repeat the operation Watch the display and refer to the user guide if necessary You cannot listen to messages on the net work mailbox Your PABX is set for dial pulsing Set your PABX to touch tone dialling No time is specified for a message in the call li...

Page 77: ...ta medium shall be excluded from the Guarantee u The purchase receipt together with the date of purchase shall be required as evidence for invoking the Guarantee Claims under the Guarantee must be submitted within two months of the Guarantee default becoming evident u Ownership of devices or components replaced by and returned to Gigaset Communications shall vest in Gigaset Communications u This G...

Page 78: ...007 by TüV SÜD Manage ment Service GmbH ISO 9001 Quality certified since 17 02 1994 by TüV Süd Management Service GmbH Ecological energy consumption The use of ECO DECT page 55 saves energy and is an active contribution towards protecting the environment Disposal Batteries should not be disposed of in gen eral household waste Observe the local waste disposal regulations details of which can be obt...

Page 79: ...ay be used Due to the constant progression in battery development the list of recommended batteries in the FAQ section of the Gigaset Customer Care pages is regularly updated www gigaset com customercare Handset operating times charging times The operating time of your Gigaset depends on the capacity and age of the battery and the way it is used All times are maximum possible times and apply when ...

Page 80: ...ft of the cursor u The first letter of the name of directory entries is automatically capitalised fol lowed by lower case letters Setting predictive text upper lower case or digits Repeatedly press the hash key to change the text input mode The active mode is indicated at the bottom right of the display screen Writing an SMS name without predictive text Predictive text is not activated in Abc abc ...

Page 81: ...ng words repeatedly press the display key Sel Word Press u or v or enter a special char acter e g space comma full stop to confirm the required word If the entry is not saved in the dictionary or the required word cannot be found when scrolling through the highlighting in the text field will switch to an empty character string The note Spell Word will be dis played at the bottom left of the displa...

Page 82: ...ed page 18 Startthe Gigaset QuickSync program on your PC Establish a connection to your handset Select Settings Device proper ties to open the Device tab Click on Firmware update This launches the firmware update The update process can take up to 10 min utes not including the download time Do not interrupt the process or remove the USB data cable The data is initially loaded from the update server...

Page 83: ... 7619 appendix fm 25 03 2009 Version 4 16 09 2005 Remove the battery page 14 Press and hold keys 4 and L with the index and middle finger Replace the battery Release keys 4 and L The mes sage key f and the speaker key d will flash alternately Complete the firmware update as described ...

Page 84: ...or around 500 entries u CLIP picture u SMS precondition CLIP must be enabled u PC interface e g for managing directory entries ring tones and screensavers u Bluetooth u Room monitor www gigaset com gigasetsl78h Gigaset S67H S68H handset u Illuminated graphical colour display 65k colours u Illuminated keypad u Speaker talking u Polyphonic ring tones u Directory for around 250 entries u CLIP picture...

Page 85: ...l colour display 65k colours u Illuminated keypad u Speaker talking u Polyphonic ring tones u Directory for around 250 entries u CLIP picture u SMS precondition CLIP must be enabled u PC interface e g for managing directory entries ring tones and screensavers u Headset socket u Bluetooth u Room monitor u Walky talky function www gigaset com gigasetsl37h ...

Page 86: ...85 Mounting the base to the wall Gigaset SL785 GBR A31008 M2009 L101 2 7619 accessories_SAG fm 25 03 2009 Version 4 16 09 2005 Mounting the base to the wall approx 2 5 mm 48 mm ...

Page 87: ... operation 53 scrolling back 50 scrolling forward 50 Answering machine list 37 38 Answering machine see also Network mailbox Appointment 56 Appointment anniversary display missed 57 Appointments activating deactivating 57 deleting 57 managing 57 Area code setting own area code 70 Assigning a key 65 Assigning a number key 65 Authorisation 75 Automatic call acceptance 29 67 network provider preselec...

Page 88: ... PIN 71 Character set 42 43 80 Charge status display 1 3 CLI CLIP 29 CLIP picture 30 34 68 CLIR 31 Conference internal 60 Confirmation tone 69 Connecting base to PABX 72 Consultation call 32 Consultation call internal 60 Control key 1 20 Correcting incorrect entries 21 Customer Care 74 D Deactivating advisory tones 69 answering machine 49 appointment 56 call acceptance 67 handset 23 internal liste...

Page 89: ...dset activating deactivating 23 advisory tones 69 changing internal number 61 changing name 61 changing the number 61 changing to a different base 59 changing to best reception 59 contact with liquid 78 de registering 58 59 display backlight 67 display language 66 diverting a call 60 earpiece volume 67 idle status 22 list 20 locating 59 muting 30 paging 59 registering 58 registering to a different...

Page 90: ...d lock 23 M Mailbox ID see SMS Mailboxes see SMS Mains adapter 8 Making calls accepting a call 29 cost effective calls 39 external 29 internal 59 Manual last number redial 37 Medical appliances 8 Memory directory call by call 35 resource directory 69 Menu end tone 69 opening 20 overview 26 prompting 22 Message key 1 open list 43 opening lists 38 Messages 49 copy the number to the directory 51 dele...

Page 91: ...cording two way record 51 Recording quality 52 Recording time 52 Redirect see Call divert Registering handset 58 Registering devices Bluetooth 63 Registration key 2 Reminder call 36 Remote operation 53 Repeater 71 Resource directory 68 Ring tone changing 67 muting 46 setting volume 67 Ringback 31 Room monitor 61 S Saving access code 72 Screensaver 66 Searching in directory 34 Sending directory ent...

Page 92: ...ngs 71 T T9 predictive text 80 Talk key 1 29 Telephone jack pin connections 79 Text message see SMS Toggling 32 Touch tone dialling 72 73 Troubleshooting SMS 47 U Unknown 30 Unknown caller 30 Update 81 USB connection 18 V vCard SMS 44 Viewing the network mailbox message 54 VIP directory entry 34 Volume earpiece 67 earpiece volume 67 handset speaker volume 67 loudspeaker 67 ring tone 67 setting 67 ...

Page 93: ...Version 4 16 09 2005 ...

Page 94: ...Version 4 16 09 2005 ...

Page 95: ...Version 4 16 09 2005 ...

Page 96: ...Version 4 16 09 2005 ...

Page 97: ...Version 4 16 09 2005 ...

Reviews: