background image

M O U N T I N G   I N S T R U C T I O N S

microScan3 – PROFINET (RJ45, SCRJ)

Safety laser scanner

de

en

Summary of Contents for 1083009

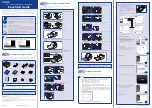
Page 1: ...M O U N T I N G I N S T R U C T I O N S microScan3 PROFINET RJ45 SCRJ Safety laser scanner de en ...

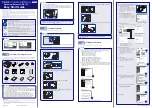
Page 2: ...M O N T A G E A N L E I T U N G microScan3 PROFINET RJ45 SCRJ Sicherheits Laserscanner de en ...

Page 3: ...ichtung Der Gefahr bringende Zustand der Maschine wird bei Nichtbeachtung möglicherweise nicht oder nicht rechtzeitig beendet b Beachten Sie den beiliegenden Sicherheitshinweis Der Sicherheits Laserscanner ist unter anderem für folgende Verwendungen nicht geeignet Im Freien Unter Wasser In explosionsgefährdeten Bereichen Weitere Informationen zur Arbeit mit der Schutzeinrichtung enthält die Maschi...

Page 4: ...erheits Laserscanners abnehmen 5 Systemstecker vorsichtig hinten in den Sicherheits Laserscanner schieben 6 Systemstecker mit den unverlierbaren Schrauben anschrauben Anzugsdrehmo ment 2 25 Nm 2 75 Nm 7 Abdeckplatte auf die Unterseite des Sicherheits Laserscanners stecken und anschrauben Anzugsdrehmoment 2 25 Nm 2 75 Nm 5 Sicherheits Laserscanner direkt montieren Direktmontage C Der Sicherheits La...

Page 5: ...nnung 0 V DC 4 NC Unbeschaltet 5 FE Funktionserde Abschirmung 7 2 Alternativer FE Anschluss Abbildung 1 Alternativer FE Anschluss Verschraubung des alternativen FE Anschlusses Schraube M5 12 Schraubenkopf Sechskant mit Schlitz Schlüsselweite SW 8 Anzugsdrehmoment 3 5 Nm 5 0 Nm Geeignete Kabelschuhe Gabelkabelschuh oder Ringkabelschuh Breite 10 mm Lochdurchmesser für Schraube typ 5 2 mm MONTAGEANLE...

Page 6: ...r Push Pull Stecker Kupfer 4 1 2 3 5 8 6 7 Anschlussbelegung Ethernet Pin Bezeichnung Funktion 1 TX Sendedaten 2 TX Sendedaten 3 RX Empfangsdaten 4 Reserviert 5 Reserviert 6 RX Empfangsdaten 7 Reserviert 8 Reserviert Gehäuse SH Abschirmung Dose SCRJ für Push Pull Stecker Lichtwellenleiter 1 2 Anschlussbelegung Ethernet Pin Bezeichnung Funktion 1 TX Sendedaten 2 RX Empfangsdaten 8 Sicherheits Laser...

Page 7: ...ent für M12 Steckverbinder 0 4 Nm 0 6 Nm Anzugsdrehmoment für M12 Schutzkappen 0 6 Nm 0 7 Nm b Optikhaube montieren WICHTIG Systemstecker vorsichtig aufstecken Keine Gewalt anwenden Bei zu großem Kraftaufwand können die Kontakte abbrechen oder sich verbiegen Benötigtes Werkzeug Schraubenschlüssel Innensechsrund TX20 8 1 Sicherheits Laserscanner ohne Systemstecker tauschen 1 Sicherstellen dass die ...

Page 8: ...en b Jeden M12 RJ45 und SCRJ Steckverbinder des Sicherheits Laserscanners mit einem für IP65 geeigneten Leitungssteckverbinder oder mit einer Schutzkappe verschließen Anzugsdrehmoment für M12 Steckverbinder 0 4 Nm 0 6 Nm Anzugsdrehmoment für M12 Schutzkappen 0 6 Nm 0 7 Nm b Optikhaube montieren WICHTIG Systemstecker vorsichtig aufstecken Keine Gewalt anwenden Bei zu großem Kraftaufwand können die ...

Page 9: ...sdrehmo ment 2 25 Nm 2 75 Nm 7 Anschlussleitungen wieder am Systemstecker anbringen 8 Den Sicherheits Laserscanner konfigurieren 9 Erneute Inbetriebnahme durchführen insbesondere alle beschriebenen Prüfungen durchführen Weitere Informationen siehe Betriebsanleitung A 9 1 2 ß 3 5 4 7 6 8 B C 1 1 2 2 D MONTAGEANLEITUNG 8021229 13IA 2019 05 16 SICK M O N T A G E A N L E I T U N G microScan3 PROFINET ...

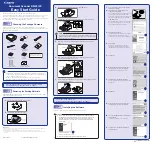
Page 10: ...M O U N T I N G I N S T R U C T I O N S microScan3 PROFINET RJ45 SCRJ Safety laser scanner de en ...

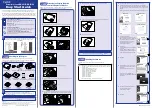
Page 11: ...ompliance it is possible that the dangerous state of the machine may not be stopped or not stopped in a timely manner b Please observe the safety notes provided The safety laser scanner is not suitable for the following applications among others Outdoors Underwater In explosive environments For more information about how to work with the protective device refer to the machin ery documentation or t...

Page 12: ...e safety laser scanner 5 Carefully slide the new system plug into the safety laser scanner at the rear 6 Screw in the system plug using the captive screws Tightening torque 2 25 Nm 2 75 Nm 7 Put the cover plate on the bottom of the safety laser scanner and fasten it Tight ening torque 2 25 Nm 2 75 Nm 5 Mounting the safety laser scanner directly Direct mounting C The safety laser scanner has 4 M5 t...

Page 13: ...NC Not connected 5 FE Functional earth shield 7 2 Alternative FE connection Figure 1 Alternative FE connection Screw connection of the alternative FE connection Screw M5 12 Screw head hexagon with slot width across flats WAF 8 Tightening torque 3 5 Nm to 5 0 Nm Suitable cable lugs Forked cable lug or ring cable lug Width 10 mm Hole diameter for screw typically 5 2 mm MOUNTING INSTRUCTIONS 8021229 ...

Page 14: ... XF2 RJ45 female connector for push pull male connector copper 4 1 2 3 5 8 6 7 Ethernet pin assignment Pin Designation Function 1 TX Send data 2 TX Send data 3 RX Receive data 4 Reserved 5 Reserved 6 RX Receive data 7 Reserved 8 Reserved Housing SH Shielding SCRJ female connector for push pull male connector optical fibers 1 2 Ethernet pin assignment Pin Designation Function 1 TX Send data 2 RX Re...

Page 15: ...or 0 4 Nm 0 6 Nm Tightening torque for M12 protective caps 0 6 Nm 0 7 Nm b Mount the optics cover NOTICE Plug in the system plug carefully Do not force it The contacts may break off or bend if too much force is used Tool required TX20 Torx wrench 8 1 Replacing the safety laser scanner without system plug 1 Make sure that the environment is clean and clear of fog moisture and dust 2 Unscrew screws ...

Page 16: ...h M12 RJ45 and SCRJ plug connector on the safety laser scanner using an IP65 rated male cable connector or a protective cap Tightening torque for M12 plug connector 0 4 Nm 0 6 Nm Tightening torque for M12 protective caps 0 6 Nm 0 7 Nm b Mount the optics cover NOTICE Plug in the system plug carefully Do not force it The contacts may break off or bend if too much force is used Replacing the system p...

Page 17: ...he system plug 8 Configure the safety laser scanner 9 Perform commissioning again taking particular care to conduct all of the thorough checks described For more information see the operating instructions A 9 1 2 ß 3 5 4 7 6 8 B C 1 1 2 2 D MOUNTING INSTRUCTIONS 8021229 13IA 2019 05 16 SICK M O U N T I N G I N S T R U C T I O N S microScan3 PROFINET RJ45 SCRJ 17 Subject to change without notice ...

Page 18: ...80 7425 E Mail enquiry my sick com Mexico Phone 52 472 748 9451 E Mail mexico sick com Netherlands Phone 31 0 30 229 25 44 E Mail info sick nl New Zealand Phone 64 9 415 0459 0800 222 278 tollfree E Mail sales sick co nz Norway Phone 47 67 81 50 00 E Mail sick sick no Poland Phone 48 22 539 41 00 E Mail info sick pl Romania Phone 40 356 17 11 20 E Mail office sick ro Russia Phone 7 495 283 09 90 E...

Reviews: