MAN-059
8 FEB 2017
24
ii.
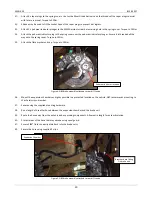
De-pin both the 2 pin connector plug with the red and yellow cables attached and the large 2 pin connector
socket next to it.
c.
Remove the glove box and the panel from in front of the passenger seat.
d.
Route the harness down behind the glove box until it drops out underneath on the floor.
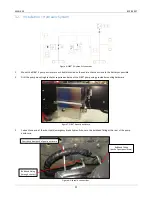
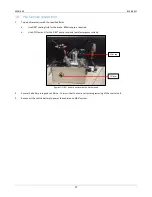
Figure 13: Cabin harness routing.
e.
Push the harness out through an existing rubber boot located at the front of the foot well in front of the passenger
seat.
f.
Secure the harness where necessary using cable ties.
g.
Re-pin the connectors if required.
h.
Route the harness along the underside of the cab towards the chassis rail.
i.
Route the harness back along the chassis rail towards the vehicle battery. Secure with p-clips where necessary.
j.
Use extension harnesses provided if required.
k.
Secure the harnesses where necessary with p-clips or cable ties.
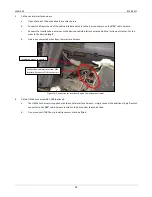
Cabin Harness from control box
Summary of Contents for Fuso Canter
Page 1: ...SIBS 4 WORKSHOP MANUAL FUSO CANTER...
Page 7: ...MAN 059 8 FEB 2017 7 6 Exploded Views Parts Lists Differential Brake Assembly...
Page 11: ...MAN 059 8 FEB 2017 11 10A FUSE 30A FUSE 12V POWER...
Page 13: ...MAN 059 8 FEB 2017 13...
Page 14: ...MAN 059 8 FEB 2017 14 9 Pump Hardware Parts List 12V...
Page 16: ...MAN 059 8 FEB 2017 16 10 Pump Hardware Parts List 24V...


