18
7. Changing the Settings
1)
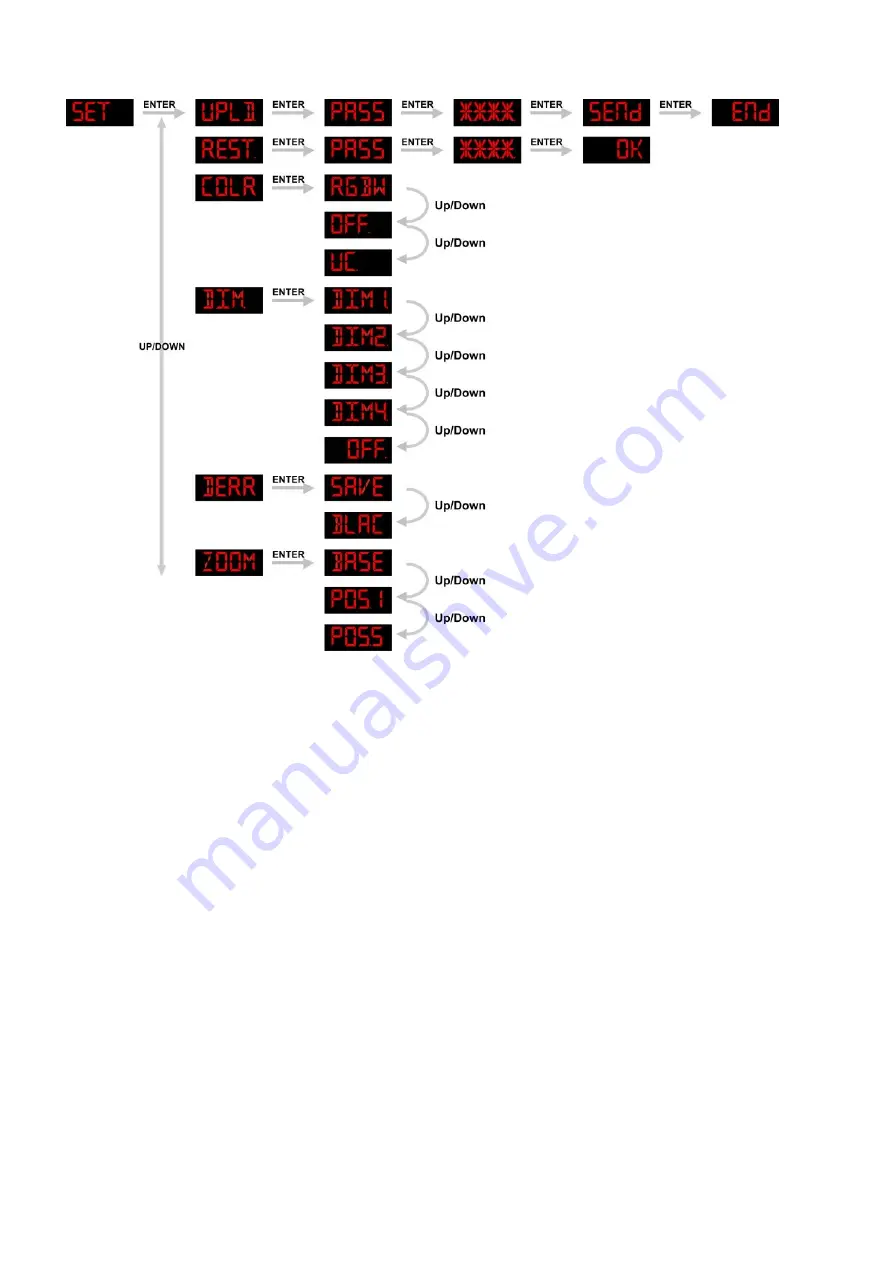
Enter UPLD
to upload the custom programs from the current MASTER device to all SLAVE devices.
In order to activate the upload function the password must be entered.
Password
:
UP
>
DOWN
>
UP
>
DOWN
.
Then press ENTER to confirm your password.
After your confirmation, the display will show SEND. Press ENTER again, the display will show END and
you have completed your upload session.
When uploading, the MASTER and SLAVE units will light up YELLOW.
If an error occurs when uploading, the MASTER and/or SLAVE devices will light up RED.
When uploading one of the custom programs has been successful, the MASTER and SLAVE devices
will light up GREEN
2)
In order to reset the custom modes to its default values, select REST.
In order to activate the RESET function, the password must be entered.
Password
:
UP
>
DOWN
>
UP
>
DOWN
.
Then press ENTER to confirm your password.
After this the display will show OK. Press ENTER and the Spectral will now reset.
3)
The Color settings (COLR) menu enables you to activate/deactivate the color calibration functions
.
When you have selected
RGBW
in menu
COLR
, RGB TO WHITE has been set.
This means RGB = 255, 255, 255.
The color displayed, is the specific color you have calibrated in menu
WT
RGBW
RGBW.
If you have set a lower value for R, G or B (255, 255, 255), the entire output is also lower.
When
COLR
is set to
OFF
, RGB = 255,255,255.
The RGB values are not adjusted and the output is the most powerful.
The
RGB
’
s parameters can be adjusted in
WT
RGBW
RGBW.
When
UC
is selected, the RGB output is adjusted to a standard preset universal color.
This way, different versions of the Spectral are color balanced to match each other.
Summary of Contents for Spectral 2500 Zoom Tour
Page 27: ...25 Beam Angle and illuminance...
Page 31: ......


