12
7.
The wizard will then load the necessary files and you will see the PC recognize the Flashback3 board in
the projector.
8.
To start using Cypher USB, click on the Cypher icon .
9.
When the program opens, it will have an empty workspace.
10.
In the upper left hand corner click “File” then “Open Workspace” or press “Ctr+O” and select the
workspace you wish to use. Then click “Upload” at the top of the CypherLiteUSB
interface.
11.
You can now click on any cue and it will play instantly.
12.
You can change the size, speed, position, color, visible points, fade up and down, etc. all from this
menu. All of these feature are also available via DMX-512.
13.
You can link cues together to create a sequence of effects. Simply right click on the desired first cue,
select “Link” and then click on the cues you wish to follow in order. At any time you can unlink cues by
clicking on the “Link” icon at the top of the page. Select “Unlink all cues” and then click “Upload” to
finalize.
14.
Please note: when programming cues you have the option to select how the cue will play and what
will happen when the cue ends. The cue can loop, stop, or freeze output depending on what you
select. The
default play mode is “Loop”.
15.
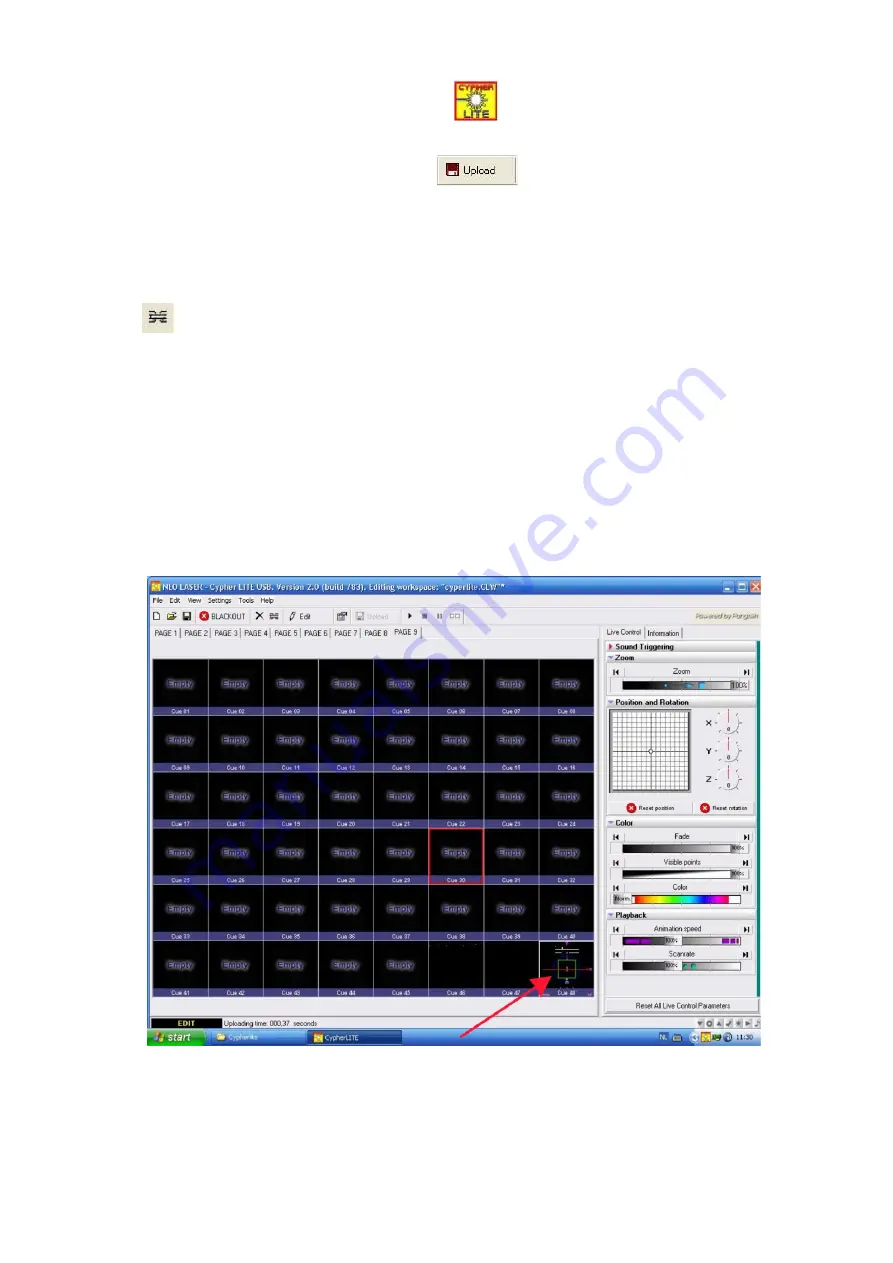
It is advisable to use the test pattern (See picture below, CypherLite Software Page 9, Cue 48) to
check that the projection area is desirable and that the color balance is good. When projected onto
a wall or screen the test pattern should look like the picture below.
At this time adjust your color balance with the three knobs on the back of the unit until the frame of
the test pattern is white and the letters “X” and “Y” are pink. The letters “12K/30K” and “ILDA” should
be orange.
16.
In addition to the controls in CypherLiteUSB you can also change the image size via the “X” and “Y”
knobs on the back of the unit.
17.
Whenever you edit cues or make changes to your workspace file, you should always save them
under a new file name for later use.


