background image

ShoreTel Mobility Router 4000 Installation

Connecting to the Console Port

1

8

ShoreTel Mobility Router 4000 Series Hardware Installation Guide

1.7

Connecting to the Console Port

The Mobility Router uses a serial console port to provide a direct connection to the 
command-line interface (CLI) Wizard for initial configuration the Mobility Router. After 
completing the initial configuration, access to the console port is no longer necessary.

To initially configure the Mobility Router, connect the management PC or laptop to the serial 
console port of the Mobility Router. If there is no serial port, use a 9-pin serial to USB adapter 
to connect to the serial cable. 

To connect the PC or laptop to the serial console port:

1

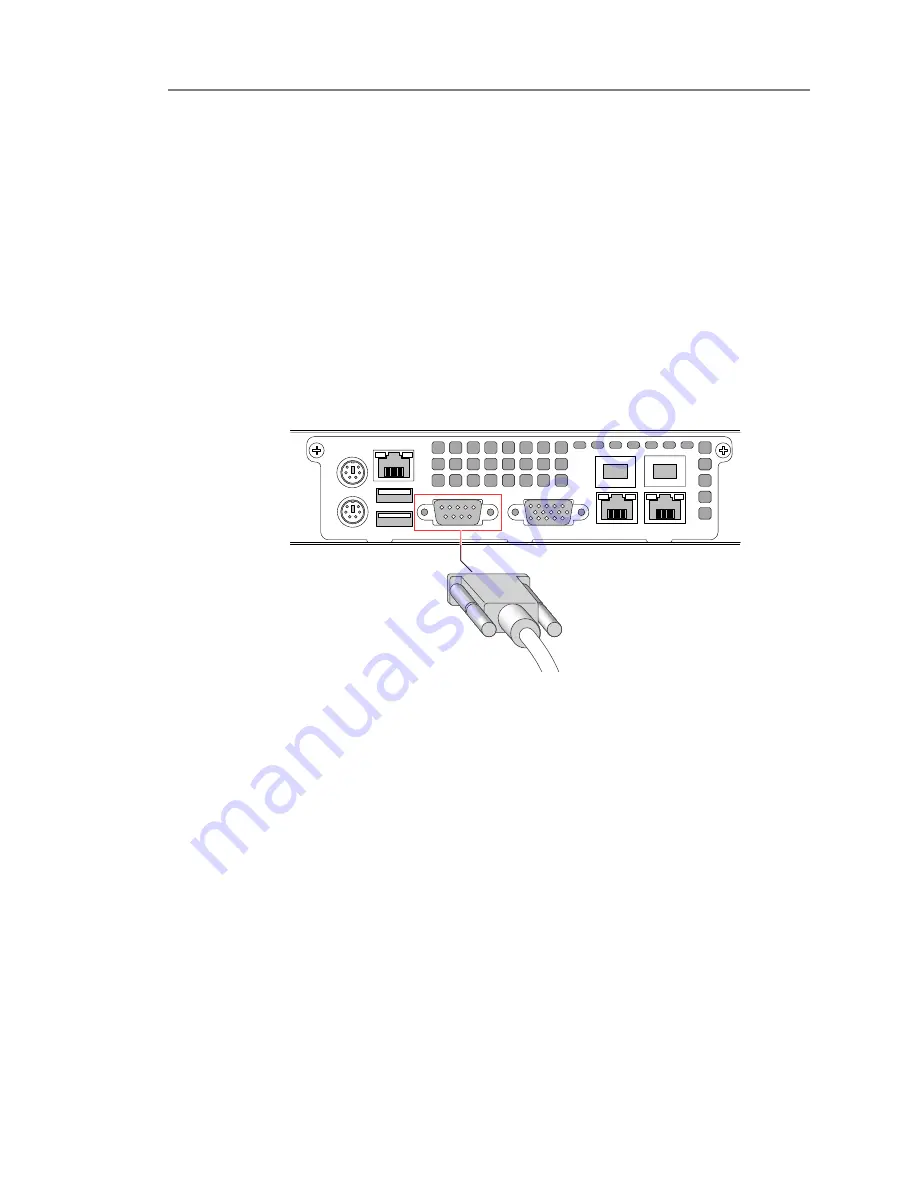
Insert one end of the serial cable into the PC or laptop serial port.

2

Insert the other end of the cable into the serial console port of the Mobility Router.

Figure 1-6. Connecting to the Serial Console Port

3

On the PC or laptop, start terminal emulation software (such as Microsoft 
HyperTerminal) and select the appropriate COM port. 

4

Configure the port using the following settings:

Baud rate: 9600 bps

Data bits: 8

Parity: None

Stop bits: 1

Flow control: None

Summary of Contents for Mobility Router 4000

Page 1: ...ShoreTel Mobility Router 4000 Series Hardware Installation Guide...

Page 2: ...ShoreTel and logo ControlPoint Brilliantly Simple Brilliantly Simple Communication ShoreCare ShoreGear ShorePhone and ShoreWare are registered trademarks of ShoreTel Inc in the United States and or ot...

Page 3: ...ring the ShoreTel Mobility Router 4000 This document is intended for network administrators who install and manage network equipment and contains the following sections Specifications on page 2 Unpack...

Page 4: ...er Power Specifications Table 1 3 Mobility Router Physical Specifications Table 1 4 Mobility Router Operating Environment Model Port Connection ShoreTel Mobility Router 4000 Series Ethernet Console 1...

Page 5: ...CSA EN IEC UL 60950 1 Compliant UL or CSA Listed USA and Canada CE Marking Europe LED Appearance Meaning Power On continuously Indicates that power is supplied to power supply unit Hard drive activit...

Page 6: ...ing One Mobility Router End user license agreement EULA One power cord One serial cable for serial console connection One straight through Ethernet cable A copy of this document Before starting the in...

Page 7: ...stalled in an area that does not exceed the following humidity range 8 90 non condensing 1 4 2 Rack Requirements The Mobility Router must be installed in a standard 19 inch rack Make sure that the Mob...

Page 8: ...cluded To connect the Mobility Router to the rack 1 Snap the mounting nuts into the rack at the desired mounting point Figure 1 3 Insert Mounting Nuts into Rack 2 Lift the Mobility Router to the desir...

Page 9: ...ht through Ethernet cable provided with the Mobility Router To connect the Mobility Router to the network 1 Insert one end of the Ethernet cable to the network device 2 Insert the other end of the Eth...

Page 10: ...ect the management PC or laptop to the serial console port of the Mobility Router If there is no serial port use a 9 pin serial to USB adapter to connect to the serial cable To connect the PC or lapto...

Page 11: ...to the back of the Mobility Router 2 Connect the other end of the power cord into an appropriate AC power source Figure 1 7 Connecting Power 3 The Mobility Router automatically powers on As the Mobili...

Page 12: ...configuration wizard 1 At the login prompt type admin and press Enter 2 When prompted to accept the End User License Agreement enter YES to accept The initial configuration wizard starts 3 Enter Y to...

Page 13: ...changed Verify the information and press Enter to save the configuration 14 At the prompt enter enable 15 Enter reload to restart the Mobility Router Wait for the login prompt in the terminal emulati...

Page 14: ...ShoreTel Mobility Router 4000 Installation Using the Initial Configuration Wizard 1 12 ShoreTel Mobility Router 4000 Series Hardware Installation Guide...

Reviews: