4
4.2
Printer Setup
Install the Printer
(There are four positioning slot)
5
Put clean resin tank into the position.
Lock the buckles for platform.
6
Bolt the resin tank to the printer temporarily
for operating, if the buckle is damaged
and the replacement is not available at
the moment.
5
6
DO NOT remove the screen protector.
Screen Protector
1
3
n i
m .
m in t
1
3
Installation Procedure
Unpacking
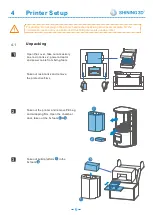
emove steel clasps on the wooden case
R
to open it. Cut the straps and open the
Open the cover, take out accessory box,resin tank x 2, power adaptor and power
cable from
fi
xing foam.
Take out resin tanks and remove the protective
fi
lms.
m & .
1
2
T
ake out the printer and remove PE bag.
Open the chamber
door, take out the
fi
x
foa
Take out build platfor
he
fi
x foa
Power Port
STEP
1
STEP 2
1 )
3)
4)
2)
inner box.
1
2
4
5
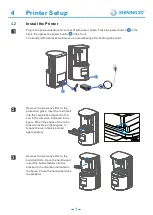
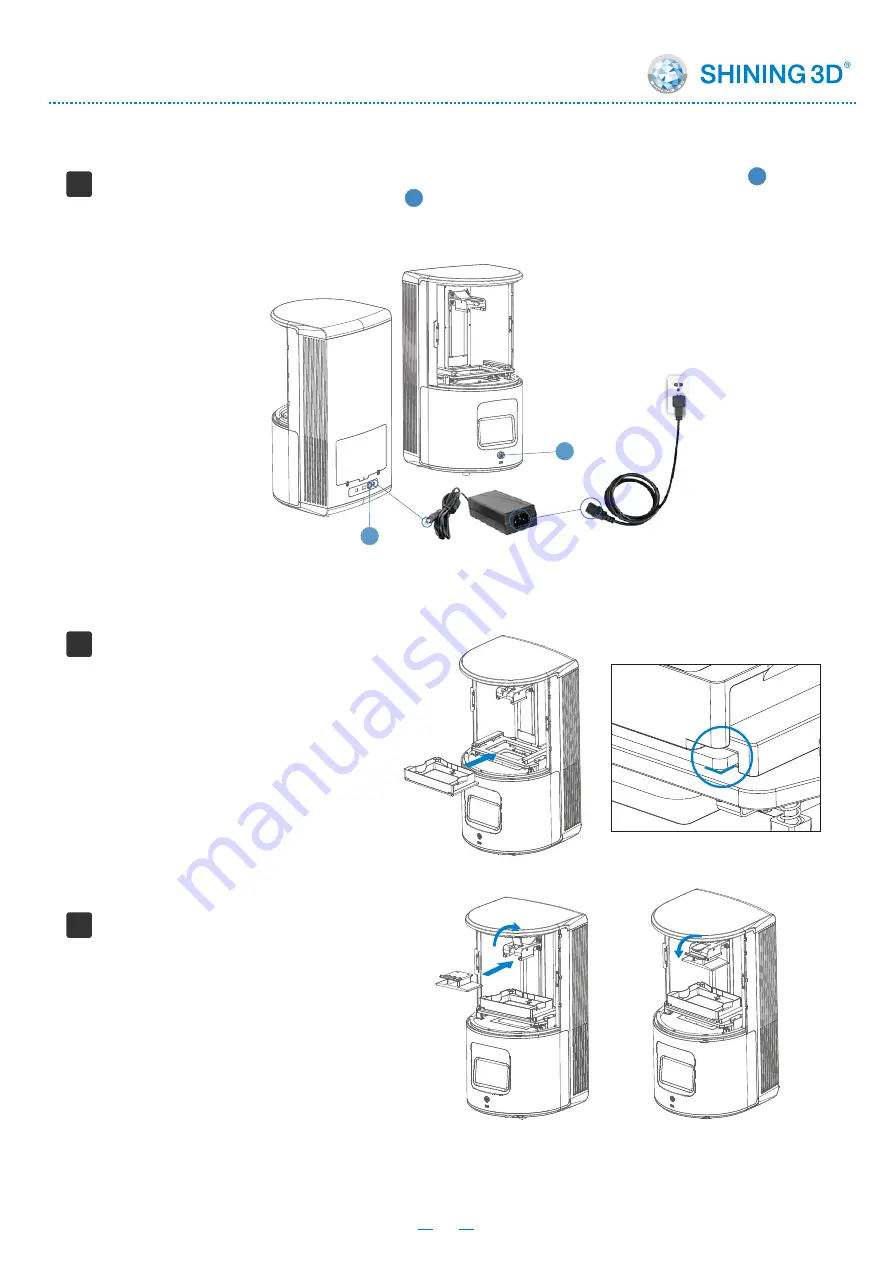
Plug in the power adaptor and connectit with power cable. Press the power button in the
back, then press the power button in the front.
4
5
1
2
3
The build platform bracket will move up automatically after booting the printer.
Remove the protective film on the
protection glass. Inset the resin tank
into the card slot and push it to the
end in the direction indicated in the
figure. When the edges of the resin
tank are inside at right angles, it
means the resin tank is placed
appropriately.
Remove the protective film on the
build platform. Open the handle and
insert the build platform into the
bracket in the direction indicated in
the figure. Close the handle and lock
the platform.
7


