background image


117(178) 

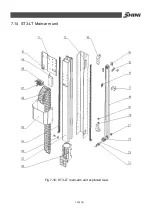
7.7 ST5-D Sub-Arm unit (Single-stage arm) 


Fig.7-9: ST5 Sub-arm unit (single-stage arm) exploded view 

Summary of Contents for ST3 Series

Page 1: ...ST3 5 Fully Servo Driven Robot User Manual Date Jun 2016 Version V1 5 English ...

Page 2: ...2 178 ...

Page 3: ...scopic Model Robot Stationary Beam Type 27 2 2 4 ST3 MT Medium Telescopic Model Robot Movable Beam Type 28 2 2 5 ST3 LT Large Telescopic Model Robot Movable Beam Type 30 2 2 6 ST5 Small Model Robot Single Stage Arm 31 2 2 7 ST5 T Small Telescopic Model Robot 32 2 2 8 ST5 Medium Telescopic Model Robot 33 2 2 9 Pneumatic Source Requirement 34 2 3 Electrical Connection 34 2 3 1 Main Power Supply 34 2...

Page 4: ...m Monitor 57 4 3 1 2 Program Editor 58 4 3 1 3 Variables 71 4 3 2 Standby Setup 72 4 3 3 Palletise Setup 72 4 3 4 Safety Setup 74 4 3 5 Check Setup 75 4 3 6 Produce Setup 76 4 3 7 System Setup 77 4 3 7 1 System Settings 77 4 3 7 2 Time and Language 78 4 3 8 Servo Setup 79 4 3 8 1 Servo Axis Assignment 80 4 3 8 2 Axis Configuration 81 4 3 8 3 Servo operating parameter setup 82 4 3 9 Files manager 8...

Page 5: ...132 8 Pneumatic Schematic Diagram 134 8 1 ST3 ST3 T pneumatic schematic diagram 134 8 2 ST5 pneumatic schematic diagram 135 9 ST3 Electrical Pneumatic Control Diagram 136 9 1 ST3 Power supply wiring diagram 136 9 2 ST3 Each I O module electrical wiring diagram 137 9 3 ST3 Traverse unit I O signal wiring diagram 138 9 4 ST3 Main arm unit input signal wiring diagram 139 9 5 ST3 Main arm unit output ...

Page 6: ...ring diagram 172 10 18 ST5 Axis Y2 servo motor wiring diagram 173 10 19 ST5 SIGMATEK module board 174 10 20 ST5 Traverse unit board 176 10 21 ST5 Main arm unit board 177 10 22 ST5 Sub arm unit board 178 Table Index Table 2 1 ST3 small model specifications 1 23 Table 2 2 ST3 small model specifications 2 24 Table 2 3 ST3 T small model telescopic arm specifications 1 25 Table 2 4 ST3 small model tele...

Page 7: ...5 Parts BOM for ST3 LT crosswise unit 131 Table 7 16 Parts BOM for ST3 LT main arm unit 133 Picture Index Fig 1 1 Packing of ST3 T and ST5 T 16 Fig 1 2 Packing of ST3 LT 17 Fig 1 3 Hanging transportation of ST3 T 17 Fig 1 4 Hanging transportation of ST3 LT 17 Fig 2 1 Drilling for ST3 5 small model traverse stroke 1100mm 21 Fig 2 2 Drilling for ST3 5 small Model traverse stroke 1100mm 21 Fig 2 3 Dr...

Page 8: ...d program command 1 65 Fig 4 11 Standard program command 2 65 Fig 4 12 Standard program command 3 65 Fig 4 13 Standard program command 4 66 Fig 4 14 Standard program command 5 66 Fig 4 15 Standard program command 6 66 Fig 4 16 Standard program command 7 66 Fig 4 17 Standard program command 8 67 Fig 4 18 Standard program command 9 67 Fig 4 19 Standard program command 10 67 Fig 4 20 Standard program...

Page 9: ... inputs page 90 Fig 4 60 EM67 signal outputs page 91 Fig 4 61 Jog page 91 Fig 4 62 Rotational axis bar page 92 Fig 4 63 Input page 93 Fig 4 64 Output page 93 Fig 4 65 Time settings page 94 Fig 4 66 Alarm page 95 Fig 4 67 Protocol page 97 Fig 4 68 Scroll the horizontal bar to the right side 97 Fig 4 69 Alert for requiring higher level password 98 Fig 7 1 ST3 ST3 T traverse unit small model exploded...

Page 10: ...ng diagram 149 Fig 9 15 ST3 SIGMATEK Module board 1 150 Fig 9 16 ST3 SIGMATEK Module board 2 151 Fig 9 17 ST3 Traverse unit board 152 Fig 9 18 ST3 Main arm unit board 153 Fig 10 1 ST5 Power supply wiring diagram 154 Fig 10 2 ST5 Each I O module electrical wiring diagram 155 Fig 10 3 ST5 Traverse unit I O signal wiring diagram 156 Fig 10 4 ST5 Main arm unit input signal wiring diagram 157 Fig 10 5 ...

Page 11: ...1 178 Fig 10 21 ST5 SIGMATEK module board 1 174 Fig 10 22 ST5 SIGMATEK module board 2 175 Fig 10 23 ST5 Traverse unit board 176 Fig 10 24 ST5 Main arm unit board 177 Fig 10 25 ST5 Sub arm unit board 178 ...

Page 12: ...12 178 ...

Page 13: ...acturer any damage or lost caused by the modification or use beyond the user manual the manufacturer will not have any responsibility 1 2 Safety Concerns l The maintenance repair etc must be executed by professionally trained personnel l Any unrelated personnel should keep away from robot working area while it is operating All electrical wiring must be completed by professionals and in accordance ...

Page 14: ...ns to robot should obtain the written consent from the manufacturer for safety purpose Electrical System As a result of non compliance with safety recommendations electrical system symbols described will lead to risk of electric shock persons in the event The safeguarding required for operation of the robot is not including in our standard scope of supply except special equipment since adaptation ...

Page 15: ...sibility for injuries or damage if the customers remove robots themselves 1 4 1 Transportation 1 ST3 5 S series robot is fix on a steel structure base and packaged with crate 2 Before transporting fasten the sliding base to prevent any collision 3 The arms are free to slide when electric power and pneumatic supply are off Push the arms upwards to lock them 4 During the transporting please keep the...

Page 16: ...otating beams and arm slowly so that the arm and the beam was vertical iii Lock the arm connecting plate and the sliding seat by the 6 screws on the supporting plate Note i Remove the packing support plate should be careful to prevent the arm wrist and the machine damage or personal injury ii Lock the arm connecting plate and the sliding seat ensure that the arm in vertical state There is a ring i...

Page 17: ...17 178 Fig 1 2 Packing of ST3 LT Fig 1 3 Hanging transportation of ST3 T Fig 1 4 Hanging transportation of ST3 LT ...

Page 18: ...wing occurs i Power cable is damaged ii Air tube is damaged iii Machine breaks down or dissembled by unauthorized personnel iv There are organic solvent acidic phospholipids sulfurous acid and chlorine flammable and explosive dangerous matter in compressed air v Air pressure is not enough or too high 1 4 5 Retirement When the robot goes to its end of service life it should be demolished according ...

Page 19: ...l prior to machine using Any incidents beyond human reasonable controls which include man made vicious or deliberate damages or abnormal power and machine faults caused by irresistible natural disasters including fire flood storm and earthquake Any operational actions that are not authorized by Shini upon machine including adding or replacing accessories dismantling delivering or repairing Employi...

Page 20: ...een the air source and the filter Note Before connecting hoses clean the hoses by compressed air To ensure that there is no cuttings sealing tapes in it 2 Check the air connection of control box in good conditions without bending conditions 3 Check the air connection of control box in good conditions without bending conditions 2 1 3 Electric Power Connection 1 The electrical connection should be p...

Page 21: ... hand controller should be fixed outside of the safety fence 3 Stick the warning sign on an obvious spot of the fence 2 1 5 Mounting Preparation Fig 2 1 Drilling for ST3 5 small model traverse stroke 1100mm Fig 2 2 Drilling for ST3 5 small Model traverse stroke 1100mm Fig 2 3 Drilling for ST3 5 medium model traverse stroke 1500mm ...

Page 22: ...er punch to assist drilling Place the magnetic drill on the fixing plate use drill bits Ф14 to drill 6 holes about 30mm depth Tapping Use M16 tap to produce internal 6 screws threads about 25mm depth 2 1 6 Mounting Instructions Should avoid vibration collision and falling when transfer the top of IMM Alignment holes using the 8mm torque wrench turn to 77Nm tightens the M16 30 hex socket screws Not...

Page 23: ...00 1600 Crosswise Stroke mm 470 470 470 560 Vertical Stroke mm 700 700 800 900 Max Load kg 3 3 3 5 Min Pick out Time sec 1 3 1 3 1 3 1 4 Min Cycle Time sec 5 2 5 2 5 2 5 8 Air Pressure Range bar 4 6 4 6 4 6 4 6 Max Air Consumption NL cycle 4 4 4 4 Net Weight kg 240 240 250 270 Base Type Base C Base C Base C Base C A 2680 2680 2880 2880 B 1350 1350 1450 1450 C 1490 1590 1690 1690 D max 700 800 900 ...

Page 24: ...ir Consumption NL cycle 4 4 4 Net Weight kg 280 300 310 Base Type Base C Base D Base D A 2880 3120 3120 B 1490 1570 1570 C 1800 1900 2000 D max 1000 1100 1200 E max 775 855 855 F max 1600 1800 1800 G 165 165 165 Dimensions mm H 180 180 180 Note 1 M stands for middle mold detector Suitable for three plate mold EM12 stands for EUROMAP 12 communication interface EM67 stands for EUROMAP 67 communicati...

Page 25: ...1200 1400 1400 1400 Crosswise Stroke mm 425 425 425 425 Vertical Stroke mm 700 700 700 800 Max Load kg 3 3 3 3 Min Pick out Time sec 1 2 1 2 0 8 1 2 Min Cycle Time sec 5 5 4 5 5 Air Pressure Range bar 4 6 4 6 4 6 4 6 Max Air Consumption NL cycle 4 4 4 4 Net Weight kg 240 240 245 250 Base Type Base C Base C Base C Base C A 2480 2680 2680 2680 B 1365 1365 1365 1365 C 1220 1220 1220 1270 D 700 700 70...

Page 26: ... 4 6 4 6 Max Air Consumption NL cycle 4 4 4 4 4 4 Net Weight kg 270 275 280 300 300 310 Base Type Base C Base C Base C Base D Base D Base D A 2880 2880 2940 3120 3120 3120 B 1465 1465 1550 1610 1610 1610 C 1330 1330 1380 1440 1440 1490 D 900 900 1000 1100 1100 1200 E 720 720 805 865 865 865 F 1600 1600 1600 1800 1800 1800 G 155 155 155 155 155 155 Dimensions mm H 180 180 200 200 200 200 Note 1 M s...

Page 27: ...sec 3 3 3 2 3 3 3 4 Min Cycle Time sec 12 5 13 13 5 14 15 Air Pressure Range bar 4 6 4 6 4 6 4 6 4 6 Max Air Consumption NL cycle 6 6 6 6 6 Net Weight kg 500 530 550 580 600 Base Type Base D Base D Base D Base B Base B A 2800 2800 3000 3000 3000 B 2000 2100 2100 2250 2350 C 1700 1750 1800 2050 2150 D max 1300 1400 1500 1600 1700 E max 1050 1150 1150 1250 1250 Dimensions mm F max 2000 2000 2200 220...

Page 28: ...0 2200 Crosswise Stroke mm 800 800 900 900 1000 1000 Vertical Stroke mm 1200 1300 1400 1500 1600 1700 Max Load kg 10 15 10 15 10 15 10 15 20 30 20 30 Min Pick out Time sec 2 8 3 3 3 2 3 3 3 4 Min Cycle Time sec 12 12 5 13 13 5 14 15 Air Pressure Range bar 4 6 4 6 4 6 4 6 4 6 4 6 Max Air Consumption NL cycle 6 6 6 6 6 6 Net Weight kg 480 500 530 550 580 600 Base Type Base D BaseD BaseD Base B Base ...

Page 29: ... 18 19 Air Pressure Range bar 4 6 4 6 4 6 4 6 4 6 Max Air Consumption NL cycle 6 6 6 6 6 Net Weight kg 650 670 690 720 750 Base Type Base B Base B Base B Base B Base B A 3447 3447 3847 3847 4047 B 2017 2017 2017 2270 2270 C 2120 2170 2220 2270 2320 D max 1800 1900 2000 2100 2200 E max 1555 1555 1555 1755 1755 Dimensions mm F max 2400 2400 2800 2800 3000 Note 1 M stands for middle mold detector Sui...

Page 30: ...Min Pick out Time sec 3 8 4 0 4 2 4 5 5 0 Min Cycle Time sec 20 22 24 26 28 Air Pressure Range bar 4 6 4 6 4 6 4 6 4 6 Max Air Consumption NL cycle 8 8 8 8 8 Net Weight kg 920 950 990 1010 1080 A 3800 4200 4400 4600 4800 B 2500 2650 2650 2820 2980 C 2400 2500 2600 2800 3000 D max 1800 2000 2200 2600 3000 E max 1750 1900 1900 2050 2250 Dimensions mm F max 2400 2800 3000 3200 3400 Note 1 M stands fo...

Page 31: ...6 8 Air Pressure bar 4 6 4 6 4 6 4 6 4 6 4 6 4 6 Max Air Consumption NL cycle 4 4 4 4 4 4 4 Net Weight kg 260 280 290 310 320 340 350 Base Type Base C Base C Base C Base C Base C Base D Base D A 2540 2740 2740 2960 2960 3160 3160 B 1390 1390 1390 1410 1600 1660 1660 C 1630 1630 1730 1830 1930 2030 2130 D max 700 700 800 900 1000 1100 1200 E max 750 750 850 950 1050 1150 1250 F max 1200 1400 1400 1...

Page 32: ... Air Pressure bar 4 6 4 6 4 6 4 6 4 6 4 6 4 6 Max Air Consumption NL cycle 4 4 4 4 4 4 4 Net Weight kg 280 280 290 310 320 340 350 Base Type Base C Base C Base C Base C Base C Base D Base D A 2535 2735 2735 2955 2955 3155 3155 B 1430 1430 1430 1490 1610 1670 1670 C 1220 1220 1270 1340 1400 1460 1520 D 700 700 800 900 1000 1100 1200 E 750 750 850 950 1050 1150 1250 F 1200 1400 1400 1600 1600 1800 1...

Page 33: ... 3 2 3 5 Min Cycle Time sec 9 9 5 Air Pressure Range bar 4 6 4 6 Max Air Consumption NL cycle 5 5 Net Weight kg 810 930 A 2800 3000 B 2020 2140 C 1650 1750 D max 1300 1500 E max 1350 1550 F max 2000 2200 G min 245 245 H min 170 170 Dimensions mm I max 1100 1220 Note 1 M stands for middle mold detector Suitable for three plate mold EM12 stands for EUROMAP 12 communication interface EM67 stands for ...

Page 34: ...d values from the following table 2 3 Electrical Connection 2 3 1 Main Power Supply The power requirements are given on the serial plate of the robot the power connection is provided through cable conductor and CEE plug The power connection should be performed only by an authorized electrician and according to applicable electric utility regulations 2 3 2 Interface with The Injection Moulding Mach...

Page 35: ...will stop operating and alarm 2 4 2 Pressure Switch Settings The default pressure setting is 4bar it can be adjusted according to the actual needs Digital pressure switch marked with scale the internal of the digital pressure switch has a red ruler which connected with the adjustment screw when the rotation adjustments screw the red ruler will move too Need to adjust the pressure the user can rota...

Page 36: ... LOCK ON This operation is preventing error change pressure value 4 Remove lock button Press Mode and down keys together till screen display LOCK OFF 2 5 Robot and IMM Interface ST3 5 series robots are available with 2 different interface versions to communicate with the injection moulding machine o Euromap67 o Euromap12 Both versions are described in the following chapters 2 5 1 Euromap67 Interfa...

Page 37: ... contact No A6 ZA7 mould open position HIGH signal when the mould opening position is equal or more than the required position Inadvertent alteration to mould opening stroke smaller than that required for the handling robot approach must be impossible ZA8 Optional Intermediate mould opening position HIGH signal when mould opening reaches a set position than mould opening position The signal remain...

Page 38: ...when the core pullers are in position for removal of the injection moulding see pin contact No B6 ZB7 Optional Core pullers 2 free for robot to approach HIGH signal when the ejector is back regardless of the position of the movable tool plate are in position for the robot to approach see pin contact No B7 ZB8 Optional Core pullers 2 in position to remove moulding HIGH signal when the core pullers ...

Page 39: ... interrupted A7 Optional Enable full mould opening HIGH signal when the robot has taken the part and allows to continue mould opening The signal must remain HIGH until mould open signal is given by the IMM see pin contact No ZA7 A8 Reserved for future use by EUROMAP A9 Supply from IMM 24V DC 2A Reference potential B2 Robot operation mode LOW signal when the robot mode switch is Operation with inje...

Page 40: ... to enable movement for robot to approach freely It is recommended that the signal remains high at least until Core pullers 2 free for robot to approach signal is given by IMM see pin contact No ZB7 B8 Optional Enable core pullers 2 to remove the moulding HIGH signal when the robot is in position to enable core pullers 2 to remove the moulding It is recommended that the signal remains HIGH at leas...

Page 41: ...losed when mould opening position is equal or more than required position Inadvertent alteration to mould opening stroke smaller than that required for the robot to approach must be impossible 3 11 Safety devices of machine The switch contact is closed when safety devices e g safety guard footboard safety etc on the injection moulding machine are operative so that dangerous movements of the handin...

Page 42: ...ble mould closure see pin contact No 17 10 Enable operation with robot Automatic The switch contact see pin contact No 16 is closed when the IMM is set to semi automatic or Automatic mode 12 Mould closed The switch contact see pin contact No 16 is closed when the mould closing is completed the signal Enable mould closure is then no longer required see pin contact No 17 13 Optional Not fixed by EUR...

Page 43: ... at least until Ejector back signal is given by injection moulding machine see contact No 4 22 Enable ejector forward The switch contact see pin contact No 32 is closed when the handing device enable the movement for ejector forward The switch contact must remain closed at least until Ejector forward signal is given by the injection moulding machine see contact No 5 23 optional Enable core pullers...

Page 44: ...gned for rapid and precise removal of products from injection moulding machine and place them at desired locations ST3 robots are suitable for hot runner system ST5 robots are suitable for 2 plate mold 3 plate mold and hot runner system Fig 3 1 ST3 robot appearance Fig 3 2 ST5 robot appearance ...

Page 45: ...ns with safety switches high security o With stack function o Quickly pick up slowly put down Maintain the speed and ensure that goods will not get bump o Humanization control system easy to operate o Wrist packaging designs save the packaging room avoid damage during transportation 3 4 Functions 3 4 1 Introduction ST3 5 series robots are mainly used to remove injection moulding product and sprue ...

Page 46: ...nsor switch is at 4bar when air pressure is less than 4bar the machine will stop working and alarm 3 The filter valve is at 6bar 4 The vacuum pressure sensor is at 60 3 6 ST3 5 Robot Reversing The following paragraph is the instruction for reversing ST3 5 robot dropping side Operation side to non operation side For safety please turn off the electrical power and pneumatic supply before operating 1...

Page 47: ...e at the position of 100mm distance from the limit position 2 sensor plate see Fig 3 6 Fig 3 5 Sensor plate position before modifying Fig 3 6 Sensor plate position after modifying 3 Move the in mold safety sensor plate from the left side of traverse beam to the right side at the position of 180mm distance from the synchronous belt fixing frame as shown in Fig 3 7 Fig 3 7 Outside IMM safety zone bl...

Page 48: ... X103 5 Unscrew the bolts on the traverse beam except the base rotate the machine 180 or rotate the base 180 then fixed the machine on the base 6 Set the servo motor direction in the controller Click Function Servo Setup Axis to enter the page as shown in Fig 3 10 and change the motor direction from CW to CCW if default setting is CCW then change to CW If the controller does not have the function ...

Page 49: ... to 0 For ST3 MT and ST3 LT models set its parameter Pr 002 and Pr 012 from value 0 to 1 If traverse servo driver is A4 then set its parameter Pr 041 and Pr 046 from value 1 to 0 See Fig 3 11 for the traverse servo location See Fig 3 12 for the Panasonic servo driver setting instructions Fig 3 11 Traverse servo driver location ...

Page 50: ...ual mode axis Z traverse in or out direction is reversed after changing ii Press Homing move at short key page to check whether the robot go back to home position and the Axis Z home position sensor X103 light is on iii During robot normal operation limit position sensor X101 X104 light is off ...

Page 51: ...51 178 4 Operating Instructions 4 1 Hand Controller Fig 4 1 Hand controller front view Fig 4 2 Hand controller rear view ...

Page 52: ...the bottom of the page there are five buttons divided into 5 major functional fields Enter function page Including teach settings system setting servo setting Alarming page Current and recent alarm detailed information to facilitate analysis the cause of the malfunction Manual operation page Including manual function and the additional components of manual functions Return Exit the current screen ...

Page 53: ...reen function 1 Operation mode marks The initial state manual mode is turned off this model motor enable closed The initial state manual mode this model motor enable opened Run automatically Single step move STOP Single step running 2 Reference points Robot with no reference points Decided reference points of robot ...

Page 54: ... By input the different levels of passwords to get different levels of permission 8 SRV ON start button Turn on or turn off SRV ON 9 Working speed setting Equivalently setting the speed ratio can be set from 0 100 Click here to see a dialog box for setting rates the rate be set from 0 to 100 10 Short key function Click here to see a dialog box as shown in below figure Fig 4 5 Main screen short key...

Page 55: ...ot In automation mode press this button to switch to manual mode iv Start auto mode In the auto mode press this button to start run the Robotautomatic i e After pressed Robot will run in auto mode v Stop auto mode help During the auto mode press this button to stop auto mode Otherwise press this button to show the help message Note The LED light indicates there is a help message vi Input output si...

Page 56: ...ction page 1 Enter into sub function of teach page 2 Set stand by points and status 3 Stack setting Can set five groups All the parameters only can make changes in the program editing mode as the parameters of the stack depends on the mould and products 4 Enter the input control output screen 5 Setting the scope of security protection 6 Set the feedback signal or whether the other function signal ...

Page 57: ...e as shown in Fig 4 7 Fig 4 7 Teach mode page 1 Enter the program monitor page 2 Enter the program editor page 3 Enter the variables page 4 3 1 1 Program Monitor Click Function Teach Program Monitor to enter the page as shown in Fig 4 8 Fig 4 8 Program monitor page ...

Page 58: ...se desired program Use the bar to switch different programs 2 Program movement sequence number Edit the orders of program actions 3 The current instruction Set the parameters of the current action 4 Current action 4 3 1 2 Program Editor Click return and back to teach page Click Program Editor to enter the page as shown in Fig 4 9 Fig 4 9 Program editor page 1 Exit the program edit 2 Enter palletis...

Page 59: ...e to max speed acceleration relative to max acceleration deceleration relative to max deceleration Interval position mm Inch S linkage All linear axes achieve S linkage Safety time S moving monitor time Final position mm Inch speed relative to max speed acceleration relative to max acceleration deceleration relative to max deceleration Z axis operation Z axis run to absolute position Safety time S...

Page 60: ...gle speed relative to max speed acceleration relative to max acceleration deceleration relative to max deceleration 4th axis operation 4th axis run to absolute position Safety time S moving monitor time Final position angle speed relative to max speed acceleration relative to max acceleration deceleration relative to max deceleration 5th axis operation 5th axis run to absolute position Safety time...

Page 61: ...select gripper Gripper 1 5 Gripper setting Gripper ON OFF state setting ON OFF Select Vacuum Vacuum 1 4 blow 1 4 Vacuum setting Vacuum ON OFF state setting ON OFF Select output Output 1 96 Output setting Output setting state setting ON OFF Select auxiliary signal Signal options conveyor belt fuel injection lift Select auxiliary signal output Select auxiliary signal output state setting ON OFF Sele...

Page 62: ... Wait for clamp until conditions satisfied State setting ON OFF Select vacuum Wait vacuum signal Wait for vacuum until conditions satisfied State setting ON OFF User signal selection Wait input signal Wait for input signal until conditions satisfied State setting ON OFF Auxiliary input selection Wait other function input Waiting for auxiliary signal until conditions satisfied State setting ON OFF ...

Page 63: ...satisfied position setting Label mark Insert jump Logo position insert the jump logo the jump label automatically increase Jump to label mark Unconditional jump to jump logo Jump logo selection Selecting Sync program Sync program 2 10 Sync program Using Sync program State setting Precise positioning smooth movement clamp selection Clamp 1 5 State setting ON OFF Jump to gripper signal After the cla...

Page 64: ...logo Select jump logo Input selection State setting ON OFF Jump to EM12 signal Selected EM 12 to meet the input conditions settings turn to the jump logo Select jump logo Input selection State setting ON OFF Jump to EM67 signal Selected EM 67 to meet the input conditions settings turn to the jump logo Select jump logo Servo selection Conditions selection Position settings Jump to axis position sig...

Page 65: ...ert the new order Delete the current order complete insert delete 3 Standard Program a Program starts Fig 4 10 Standard program command 1 b Axis Y and Axis Y2 run to absolute position 0mm Fig 4 11 Standard program command 2 c Label mark 1 Fig 4 12 Standard program command 3 d Robot moves to standby position and waits for IMM open mold ...

Page 66: ...is Y2 move to absolute position 600mm after IMM open mold Fig 4 14 Standard program command 5 f Axis X and axis X2 move to absolute position 0mm Fig 4 15 Standard program command 6 g Enable ejector forward Fig 4 16 Standard program command 7 h Turn on vacuum 1 ...

Page 67: ... on gripper 1 Fig 4 18 Standard program command 9 j Delay 0 50sec Fig 4 19 Standard program command 10 k Axis X and axis X2 move to the absolute position 200mm Fig 4 20 Standard program command 11 l Axis Y and axis Y2 move to the absolute position 0mm ...

Page 68: ...21 Standard program command 12 m Disable ejector forward Fig 4 22 Standard program command 13 n Enable mold close Fig 4 23 Standard program command 14 o Enable mold area forward Fig 4 24 Standard program command 15 ...

Page 69: ...ard program command 16 q Axis Z moves to the absolute position 1600mm Fig 4 26 Standard program command 17 r Turn off gripper 1 Fig 4 27 Standard program command 18 s Axis Z moves to the absolute position 1800mm Fig 4 28 Standard program command 19 ...

Page 70: ...ion 800mm Fig 4 29 Standard program command 20 u Turn off vacuum 1 Fig 4 30 Standard program command 21 v Axis Y moves to the absolute position 0mm Fig 4 31 Standard program command 22 w Jump to label mark 1 Fig 4 32 Standard program command 23 ...

Page 71: ...71 178 x Program ends Fig 4 33 Standard program command 24 4 3 1 3 Variables Click Function Teach Variables to enter the page as shown in Fig 4 34 Fig 4 34 Variables page ...

Page 72: ...can only modified and saved during editing the program Rotatoric Position Set rotate axis C degree Arm standby position Set the position of three coordinate axes Z X Y or five axes Z X Y X2 Y2 4 3 3 Palletise Setup In the program editor page click Palletise Setup on the right hand side to enter the page as shown in Fig 4 36 or click Function Palletise Setup Fig 4 36 Palletise program setup page ...

Page 73: ...o program is editing at the moment Fig 4 38 Start position Put Z X Y position of the first product 1 Palletise parameter a Order setting Set the Z X Y stack in the order the first increase which direction b Direction setting Set the Z X Y direction including forward and reverse c Stacking amount setting Set the number of three directions placement d Product size The spacing between the adjacent tw...

Page 74: ...800 point Example2 Start position Z 1000 00 X 400 00 Y 800 00 Sequence Z second X first Y third Direction Z positive X reverse Y positive Number of parts Z 4 X 4 Y 3 Part space Z 50 00 X 40 00 Y 30 00 Total parts 48 The first parts placed on Z X Y 1000 400 800 point The second parts placed on Z X Y 1000 360 800 point 3 Set speed and acceleration speed for palletise 4 Set main arm or sub arm to pal...

Page 75: ...etup all axes maximum and minimum safety value to form a 3D safety space as shown in Fig 4 40 Fig 4 40 Safety space 4 3 5 Check Setup Click Function Check Setup to enter the page as shown in Fig 4 41 Fig 4 41 Check Setup page Set whether to check corresponding signal If choose to check then system will alarm if the set time does not detect any signal during the automatic operation As shown in abov...

Page 76: ... Produce setup details Total Quantity Display of total circulation modulus Good Part Display the number of finished products Reject Part Display the number of reject part Quantity Setup Setup the quantity for this modulus Reject Alarm Setup Setup the number of reject products to alarm Operation monitor time Setup operation cycle time if the cycle time is exceeded then alarm ...

Page 77: ...rther operation after alarm Gripper reset when move standby On Off On à After troubleshooting gripper restore to position automatically Off à After troubleshooting gripper need to restore to position manually Vacuum reset when move standby On Off On à After troubleshooting vacuum restore to the position automatically Off à After troubleshooting vacuum need to restore to the position manually Safet...

Page 78: ...ck the bar to select the language 2 Switch Unit SI system or English system 3 Time a Screensaver Delay Time b Low Brightness Delay If no operation within this value the screen brightness will be lower c Password Protect Delay 4 Parameters automatic save setup 5 Set Date time 6 Change Password ...

Page 79: ...ctricity only available to Sigmatek servo Set operating parameters position speed Check motor origin angle only available to Sigmatek servo Set each axis gain maximum speed maximum position and etc Reset parameters Set driver parameters only available to Sigmatek servo Long press this button and reset parameters Set axis X and axis X2 servos output torque monitoring Long press this button to reboo...

Page 80: ...g 4 46 Axis assignment page 1 Servo axis assignment window 2 Reference Setup window 3 Current axis name Can choose from X Y Z C B A Y1 Y2 Z1 Z2 C1 C2 4 Axis type setup Can choose from servo axis pneumatic axis or no axis Click Reference Setup bar and enter the page as shown in Fig 4 47 Fig 4 47 Reference Setup bar details ...

Page 81: ...tion to enter the page as shown in Fig 4 48 Fig 4 48 Axis configuration page 1 In Position Rotate It is set as the minimum deviation angle to determine whether the axis is in the position the operation unit is degree For example to rotate 30 we set the minimum deviation angle as 0 10 then when the servo axis rotate to 29 90 the system will consider the axis is in the position 2 In Position Linear ...

Page 82: ...wo crosswise arms 8 Duo crosswise protection offset For example set this value as 30mm the minimum distance between two crosswise arms the robot will stop and alarm if the distance are below the setting Only ST5 is available to this setting 9 Duo crosswise protection sensitive The safety distance will be detected while the arm movement larger than this set value 4 3 8 3 Servo operating parameter s...

Page 83: ... between command speed and actual speed If the value exceed the maximum deviation system will alarm servo position overrun Servo parameter configuration Software minimum position mm Minimum position allowed recommend to set at 1 00 Software maximum position mm Maximum position allowed depend on machine dimensions Motor speed RPM Set motor rated rotation speed Please set the value on the motor name...

Page 84: ...e pneumatic axis completed an action but system haven t detected any feedback signal then alarm Check Inpos Type Set position detection type set switch signal time 4 3 9 Files manager Click Function Files Manager to enter the page as shown in Fig 4 51 Fig 4 51 File manager page In this page teach file can be saved loaded deleted and created Servo parameters input output system parameters also can ...

Page 85: ...er Vacuum Air Blow page 3 Enter EM12 input monitor page 4 Enter EM12 manual output page 5 Enter Function input monitor page 6 Enter Function output monitor page 7 Enter EM67 input monitor page 8 Enter EM67 manual output page 9 Enter Jog operation page 10 Enter Data Analyzer page 11 Enter spare input monitor page 12 Enter spare output monitor page ...

Page 86: ... Connect gripper button click to open gripper During gripper open the corresponding signal does not feedback This signal indicate gripper disconnected Indicate gripper has gripped a product if gripper does not grip any product its status will not change Noted During assembly the signal may connect to wrong port Disconnect gripper button click to close gripper ...

Page 87: ...ed Connect vacuum air blower click to open vacuum During vacuum open the corresponding signal does not feedback This signal indicate vacuum disconnected Indicate vacuum has suck a product if vacuum does not suck any product its status will not change Noted During assembly the signal may connect to wrong port Disconnect vacuum air blower button click to open vacuum disconnected signal re click to c...

Page 88: ... Inputs page Input Check each EM12 input signal status signal available or no signal 4 3 14 EM12 Outputs Click Manual EM12 Outputs to enter the page as shown in Fig 4 56 Fig 4 56 EM12 Outputs page Output Display and test EM12 output signal status Force to output position Force to output restore position ...

Page 89: ...t In to enter the page as shown in Fig 4 57 Fig 4 57 Robot In page Input Check each function input signal status Signal available No signal 4 3 16 Robot Out Click Manual Robot Out to enter the page as shown in Fig 4 58 Fig 4 58 Robot out page ...

Page 90: ...nal status Force to output position Force to output restore position 4 3 17 EM67 inputs Click Manual E67 Inputs to enter the page as shown in Fig 4 59 Fig 4 59 EM67 signal inputs page Input Check each EM67 input signal status Signal available No signal ...

Page 91: ... the page as shown in Fig 4 60 Fig 4 60 EM67 signal outputs page Output Display and test each EM67 output signal status Force to output position Force to output restore position 4 3 19 Jog Click Manual JOG to enter the page as shown in Fig 4 61 Fig 4 61 Jog page ...

Page 92: ...ow speed 3 Horizontal in tuning 4 Horizontal out tuning 5 Position column to set distance tuning speed column to set current speed count by percent full speed is 100 6 Actual speed count by percent Click rotational axis bar example axis C to enter the page as shown in Fig 4 62 Fig 4 62 Rotational axis bar page Only have two motion vertical or horizontal ...

Page 93: ...al Input to enter the page as shown in Fig 4 63 Fig 4 63 Input page Input Check each spare input signals status Signal available No signal 4 3 21 Output Click Manual Output to enter the page as shown in Fig 4 64 Fig 4 64 Output page ...

Page 94: ...tion Force to output restore position 4 4 Time Click Time to enter the page as shown in Fig 4 65 Fig 4 65 Time settings page 1 Set ejector front back enable delay period cycle monitor period mold open interval time air blow delay period and conveyor belt run time 2 Monitor other time ...

Page 95: ...is X Y Z A B C Y2 Z2 total 8 axes Current axis s actual position smaller than set minimum position In the manual page move the axis to the range of minimum position Function Servo Setup Servo operation parameter configuration Servo parameter configuration software minimum position actual position need to greater than this value recommend to set at 1 00mm A 012 to A 019 Servo Axis internal maximum ...

Page 96: ...he emergency button Function System setup page Stop then reboot Function Open this alarm will only disappear by reboot If choose Close the alarm will disappear automatically A 053 Pressure error Air pressure error Check air source pressure A 054 Pressed IMM emergency stop button Detected IMM emergency stop button has been pressed Check IMM emergency stop button Check the wiring A 055 Safety facili...

Page 97: ...g record type alarm operating instruction operation number alarm number alarm trigger times last recorded trigger record last record responded time and alarm operation s detail description Scroll the horizontal bar to the right side as shown in Fig 4 68 to check the alarm text 2 Go back to Alarm page Fig 4 68 Scroll the horizontal bar to the right side ...

Page 98: ...98 178 4 5 2 Message When the user input the password which do not meet the access level the page will pop an alert as shown in Fig 4 69 Fig 4 69 Alert for requiring higher level password ...

Page 99: ...Position 1 9 9 CEZ181 00 EM Core Puller 1 Position 2 10 10 EM Core Puller 2 Position 1 11 1 X1 1 EM Core Puller 2 Position 2 12 2 X1 2 Emergency Stop 13 3 X1 3 Mould Area Free 14 4 X1 4 Middle Mould Input 15 5 X2 1 Air Source Pressure Input 16 6 X2 2 Sensor Input 17 7 X2 3 Weigh Up Input 18 8 X2 4 Spare Input1 19 9 X3 1 Spare Input2 20 10 X3 2 Spare Input3 21 11 X3 3 Spare Input4 22 12 X3 4 Spare ...

Page 100: ... Mouldopen 4 4 EM Supply From Machine 24V EM Robot On Enable operating 5 5 EM enable Ejector back 6 6 CEZ181 00 EM enable Ejector front 7 7 EM enable Core1 Position1 13 1 X1 1 EM enable Core1 Position2 14 2 X1 2 EM enable Core2 Position1 15 3 X1 3 EM enable Core2 Position2 16 4 X1 4 Vacuum1 17 5 X2 1 Vacuum2 18 6 X2 2 Vacuum3 19 7 X2 3 Gripper1 20 8 X2 4 Gripper2 21 9 X3 1 Axle4 go Forward only if...

Page 101: ...ition 2 10 10 EM Core Puller 2 Position 1 11 1 X1 1 EM Core Puller 2 Position 2 12 2 X1 2 Axle2 Limit min 13 3 X1 3 Axle2 Limit max 14 4 X1 4 Axle2 Reference 15 5 X2 1 Axle3 Limit min 16 6 X2 2 Axle3 Limit max 17 7 X2 3 Axle3 Reference 18 8 X2 4 Vacuum1 19 9 X3 1 Vacuum2 20 10 X3 2 Gripper1 21 11 X3 3 Gripper2 22 12 X3 4 Axle4 Limit min 23 13 X4 1 Axle4 Limit max 24 14 X4 2 Spare Input1 25 15 X4 3...

Page 102: ... 49 7 X2 3 CDM163 03 Spare Input5 50 8 X2 4 EM Emergency Stop 1 EM Emergency Stop 2 1 1 EM Mould Area Free 2 2 EM enable Mouldclose 3 3 EM enable Mouldopen 4 4 EM Supply From Machine 24V EM Robot On Enable operating 5 5 EM enable Ejector back 6 6 CEZ181 00 EM enable Ejector front 7 7 EM enable Core1 Position1 13 1 X1 1 EM enable Core1 Position2 14 2 X1 2 EM enable Core2 Position1 15 3 X1 3 EM enab...

Page 103: ...X4 1 Vacuum4 26 14 X4 2 Gripper3 27 15 X4 3 Gripper4 28 16 X4 4 Conveyor Belt Output 29 1 X3 1 Lubrication Output 30 2 X3 2 Elevator Output 31 3 X3 3 Arms Break 32 4 X3 4 Alarm Lamp out 33 5 X4 1 Spare Output1 34 6 X4 2 Spare Output2 35 7 X4 3 CDM163 03 Spare Output3 36 8 X4 4 ...

Page 104: ... the air pressure system Especially for the air pressure robot the valve and compressed air must be clean 6 2 Lubrication Requirement Use cloth to remove the old grease from the guide shafts and the bearing scraper rings Then use brush to apply new grease to the guide shafts All roller bearing grease should compliance with DIN 51825 standard 6 3 Maintenance Maintenance the robot according to the c...

Page 105: ...105 178 7 Assembly Diagram 7 1 ST3 ST3 T traverse Unit Fig 7 1 ST3 ST3 T traverse unit small model exploded view ...

Page 106: ...W31232000000 15 Home position sensor plate BL69363000020 16 In mold safety sensor plate BL69002200020 17 Mounting plate for proximity switch BL73032802720 18 Mounting plate for in mold sensor BL77051002220 19 Drag chain connector BL74030706120 20 Sliding seat part 01 BH74051515010 21 Motor supporting frame BL71051000020 22 Pulley BH91030000010 23 Cover of motor supporting frame BL21000100520 24 Wa...

Page 107: ...107 178 7 2 ST3 ST3 T Crosswise Unit Fig 7 2 ST3 Crosswise unit single stage arm exploded view Fig 7 3 ST3 T Crosswise unit telescopic arm exploded view ...

Page 108: ...5 Synchronous belt cover BL77052602220 6 Crosswise beam BH79570001610 BH73160003410 BH74110014810 7 Sensor plate of crosswise BH70405000040 8 Limit block of crosswise BH81020500010 9 Cover of crosswise beam 2 BL81021100020 10 Linear guide rail YW31519000000 YW3100159400 0 YW3100156200 0 11 Driven wheel YW08513800200 12 Shaft BH79052101510 13 Bearing YW11160300000 Indicate a potential damage item i...

Page 109: ...109 178 7 3 ST3 ST5 D Main arm Unit single stage arm Fig 7 4 ST3 Main arm unit single stage arm exploded view ...

Page 110: ...nting plate BL77054800020 16 Spare air tube frame BL73034505520 17 Limit block BH91051500040 18 Spare air tube frame BL73034505520 19 Belt pressure plate 2 BH73032800040 20 Arm limit sensor plate BH70263600040 21 Mounting plate BL71014700020 22 Home position sensor plate BL76050206220 23 Main arm motor YM10040000600 24 Arm limit sensor plate BH70263600040 25 Main arm gearbox YM50040000000 26 Main ...

Page 111: ...111 178 7 4 ST3 T ST5 DT Main arm unit Telescopic arm Fig 7 5 ST3 T Main arm unit telescopic arm exploded view ...

Page 112: ...0 BH79590001610 BH73110001810 15 Limit sensor plate BL81000201020 16 Home position sensor plate BL81000200920 17 Slider limit block BL70300000020 18 Safety sensor plate BL81000200820 19 Main arm telescopic beam BH74140017410 BH79590001510 BH73110001710 20 Synchronous belt YR00052500100 21 Belt splint pressure plate BH81022200010 22 Belt splint fixing plate BL81024700620 23 Tension pulley BH8102110...

Page 113: ...000 42 Belt splint pressure plate BH81022300010 43 Belt splint fixing plate BH81021500010 44 Limit sensor mounting plate BL81022000220 45 Main arm beam cover 2 BL81000200020 Indicate a potential damage item indicate likely to damage item recommend to spare Please check the manual version number first before procurement to make sure the BOM tally with actual part 7 5 ST5 D ST5 DT Traverse Unit Fig ...

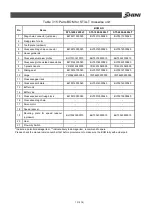
Page 114: ...00000 ST5 D YW31232000800 ST5 DT 15 Home position sensor plate BL69363000020 16 In mold safety sensor plate BL69002200020 17 Mounting plate for proximity switch BL73032802720 18 Mounting plate for in mold sensor BL77051002220 19 Drag chain connector BL74030706120 20 Sliding seat part 01 BH74051515010 21 Motor supporting frame BL71051000020 22 Pulley BH91030000010 23 Cover of motor supporting frame...

Page 115: ...115 178 7 6 ST5 D ST5 DT Crosswise Unit Fig 7 7 ST5 crosswise unit single stage arm exploded view Fig 7 8 ST5 T Crosswise unit telescopic arm exploded view ...

Page 116: ...k the manual version number first before procurement to make sure the BOM tally with actual part Table 7 7 Parts BOM for ST5 T crosswise unit telescopic arm BOM NO No Name ST5 700 1400DT ST5 900 1600DT 1 Main arm crosswise drag chain 2 Crosswise drag chain cover BL70507000020 BL70507000020 3 Sub arm crosswise drag chain 4 Left cover of crosswise arm BL70107000020 BL70107000020 5 Crosswise aluminiu...

Page 117: ...117 178 7 7 ST5 D Sub Arm unit Single stage arm Fig 7 9 ST5 Sub arm unit single stage arm exploded view ...

Page 118: ...1600300000 16 Gripper BH70401200040 17 Gripper mounting plate YW09103000000 18 Sub arm belt pressure plate BH79054912510 19 Anti collision mounting plate BH79056112610 20 Buffer piece BH91181200010 21 Wago terminal block YE60260301000 22 Pulley BH91050700010 23 Driven wheel YW08533200100 24 Sub arm mounting plate 1 BH79054100040 25 Motor YM10040000600 26 Gearbox YM50540000000 27 Limit block BH9105...

Page 119: ...us belt YR00320000000 2 Driving Wheel YW08033600000 3 Gearbox YM50040000000 4 Motor YM10040000600 5 Sub arm mounting plate BH79051201540 6 Tension shaft 1 BH78050800010 7 Synchronous belt fixing plate 2 BL77002130040 8 Synchronous belt fixing plate 1 BL77052300020 9 Linear guide rail YW31001572000 YW31007600000 YW31001594000 10 Limit sensor plate BH70263600040 11 Belt pressure plate 2 BH7405481561...

Page 120: ...Proximity sensor wiring cover BL73034100020 30 Limit sensor mounting plate BL77055617720 31 Drag chain YE60154800000 32 Guide block YW31151100000 33 Limit block BL70300000020 34 Sub arm beam BH74140016710 BH74160016810 BH79110000310 35 Drag chain connector BL77054616920 36 Synchronous belt YR00052500100 37 Sub arm telescopic beam BH74160017710 38 Belt pressure plate 2 BH74054815610 39 Tension whee...

Page 121: ...121 178 7 9 ST3 MT Traverse unit Fig 7 11 ST3 MT traverse unit exploded view ...

Page 122: ...late BL74032508520 18 Sensors mounting frame BL74032908120 19 Sliding seat BH73032200540 20 Eccentric wheel to belt BL74031710140 21 Eccentric wheel of crosswise 1 BH73317000010 22 Traverse unit switch mounting frame BL74032108720 23 Home position sensor plate BL69363000020 24 Eccentric wheel of crosswise 2 BH73317000010 25 Traverse unit switch mounting frame BL74032108720 26 Wiring frame BL730338...

Page 123: ...123 178 7 10 ST3 MT Crosswise Unit Fig 7 12 ST3 MT crosswise Unit exploded view ...

Page 124: ...Position limit plate BL74031210440 12 Traverse beam cover BL74033710420 13 Buffer piece BH73328000010 14 Vacuum generator mounting plate BL75187500020 15 Vacuum generator YE30130800000 16 Limit pressure switch YE15010806000 17 Position limit piece BL73031706520 18 Crosswise beam cover BL75183200020 19 Drag chain supporting plate 2 BL73032000620 20 Circuit board YE64351400000 21 Distribution plate ...

Page 125: ...125 178 7 11ST3 MT Main arm unit Fig 7 13 ST3 MT Main arm unit telescopic arm exploded view ...

Page 126: ...g chain supporting plate BL73038100620 20 Transitional plate 1 BH73038300510 21 Flip cylinder BH73035001540 22 Home position sensor plate BL75187700020 23 Limit sensor plate BL75187000020 24 Transitional plate 2 BH73038400510 25 Main arm fixing tooth plate BH73039500510 26 Spares air tube frame BL73001230220 27 Quick connector φ6 YW80020606000 28 Belt splint 2 BL73039200640 29 Guide block YW310020...

Page 127: ...400020 BL75318400020 BL75318400020 5 Limit frame 6 Traverse beam BH73162200010 BH73182400010 BH73323100010 7 Traverse beam end cover BL75131800020 BL75131800020 BL75131800020 8 Home position sensor plate BL69363000020 BL69363000020 BL69363000020 9 Limit sensor plate BL75035300020 BL75035300020 BH73321900010 10 Proximity switch 11 Main frame cover 2 BL75321000220 BL75321000220 BL75321000220 12 Moun...

Page 128: ...20 26 Linear guide rail 27 Traverse gear rack YW30031600000 YW08280900000 YW30220000000 28 Buffer unit BH73328000010 BH73328000010 BH73328000010 29 Buffer cap 30 Mounting frame for control box 31 Breaker YW80562100000 YW80562100000 YW80562100000 32 Breaker mounting frame BL75334000020 BL70512000020 BH73322700050 33 Exhaust fan 34 Mounting frame for wave filter 35 Cover of wave filter 36 Control bo...

Page 129: ...tric wheel 21 Speed reducer 22 Servo motor 23 Main frame cover 1 24 Mold area sensor plate 25 ST3 L T control box cover welded assemblies 26 Linear guide rail 27 Traverse gear rack 28 Buffer unit 29 Buffer cap 30 Mounting frame for control box 31 Breaker 32 Breaker mounting frame 33 Exhaust fan 34 Mounting frame for wave filter 35 Cover of wave filter 36 Control box welded assemblies 37 Power supp...

Page 130: ...130 178 7 13 ST3 LT Crosswise Unit Fig 7 15 ST3 LT crosswise unit exploded view ...

Page 131: ...YR40914040000 YR40914040000 YR40914040000 9 Sliding seat BL70012700020 BL70012700020 BL70012700020 10 Hinge YW06253200000 YW06253200000 YW06253200000 11 Crosswise gear rack 12 Crosswise limit plate BL75314000040 BL75314000040 BL75314000040 13 Buffer unit 14 Buffer cap 15 Crosswise sensor fixing block BL75310000040 BL75310000040 BL75310000040 16 Crosswise drag chain 17 Servo motor 18 Speed reducer ...

Page 132: ...132 178 7 14 ST3 LT Main arm unit Fig 7 16 ST3 LT main arm unit exploded view ...

Page 133: ...316000020 BL75321600020 10 Digital pressure switch 11 Distribution mounting plate 12 ST3 L T transition profile 13 Vertical limit plate BL75033100040 BL75033100040 BL75033100040 14 Pulley fixing part 1 15 Pulley tuning plate 16 Vertical tooth plate 2 BH73323130040 BH73323130040 BH73323130040 17 Synchronous belt pressure plate BH73323140040 BH73323140040 BH73323140040 18 Synchronous belt 19 Buffer ...

Page 134: ...134 178 8 Pneumatic Schematic Diagram 8 1 ST3 ST3 T pneumatic schematic diagram spare spare flip cylinder suction Fig 8 1 ST3 ST3 T pneumatic schematic diagram ...

Page 135: ...135 178 8 2 ST5 pneumatic schematic diagram gripper cylinder spare spare spare flip cylinder suction Fig 8 2 ST5 ST5 T pneumatic schematic diagram ...

Page 136: ...136 178 9 ST3 Electrical Pneumatic Control Diagram 9 1 ST3 Power supply wiring diagram 棕 蓝 黄绿 棕 蓝 输入电源 1P 230V 50HZ 60HZ 伺服驱动器电源 控制和I O电源 手控器 灰 屏蔽 手控器 棕 粉 Fig 9 1 ST3 power supply wiring diagram ...

Page 137: ...137 178 9 2 ST3 Each I O module electrical wiring diagram Fig 9 2 ST3 Each I O module wiring diagram ...

Page 138: ...138 178 9 3 ST3 Traverse unit I O signal wiring diagram FM 报警灯 散热风扇 预留2 预留1 气源压力限 Z轴终点极限 Z轴型外安全 Z轴原点 Z轴起点极限 Fig 9 3 ST3 Traverse unit I O module wiring diagram ...

Page 139: ...139 178 9 4 ST3 Main arm unit input signal wiring diagram X轴起点极限 X轴原点 X轴终点极限 Y轴起点极限 Y轴原点 Y轴终点极限 垂直限 水平限 吸着1限 吸着2限 夹限1 夹限2 电眼输入限 称重输入限 预留3 预留4 Fig 9 4 ST3 Main arm unit input signal wiring diagram ...

Page 140: ...140 178 9 5 ST3 Main arm unit output signal wiring diagram 吸盘1电磁阀 吸盘2电磁阀 夹具1电磁阀 夹具2电磁阀 垂直电磁阀 水平电磁阀 喷油输出 Fig 9 5 ST3 Main arm unit output signal wiring diagram ...

Page 141: ...141 178 9 6 ST3 Axis Z servo driver I O signal wiring diagram 黄棕 红蓝 粉 粉灰 黑 绿 黄白 白 红 灰白 黄 棕 棕绿 灰 Fig 9 6 ST3 Axis Z servo driver I O signal wiring diagram ...

Page 142: ...142 178 9 7 ST3 Axis X servo driver I O signal wiring diagram 黄棕 红蓝 粉 粉灰 黑 绿 黄白 白 红 灰白 黄 棕 棕绿 灰 Fig 9 7 ST3 Axis X servo driver I O signal wiring diagram ...

Page 143: ...143 178 9 8 ST3 Axis Y servo driver I O signal wiring diagram 黄棕 红蓝 粉 粉灰 蓝 黑 绿 黄白 白 红 灰白 黄 棕 棕绿 灰 Fig 9 8 ST3 Axis Y servo driver I O signal wiring diagram ...

Page 144: ...144 178 9 9 ST3 Intermediate relay wiring diagram Fig 9 9 ST3 Intermediate relay wiring diagram ...

Page 145: ...145 178 9 10 ST3 Axis Z servo motor wring diagram 白 黄 绿 棕 屏蔽线 白 黑 淡蓝 紫 屏蔽线 伺服编码器 M1 3 红 伺服电机 3P 129V 750W 白 黑 黄绿 Fig 9 10 ST3 Axis Z servo motor wiring diagram ...

Page 146: ...146 178 9 11 ST3 Axis X servo motor wiring diagram 白 黄 绿 棕 屏蔽线 白 黑 淡蓝 紫 屏蔽线 伺服编码器 M1 3 红 伺服电机 3P 106V 400W 白 黑 黄绿 Fig 9 11 ST3 Axis X servo motor wiring diagram ...

Page 147: ...147 178 9 12 ST3 Axis Y servo motor wiring diagram 白 黄 绿 棕 屏蔽线 白 黑 淡蓝 紫 屏蔽线 伺服编码器 伺服电机 3P 106V 400W M1 3 红 白 黑 黄绿 Fig 9 12 ST3 Axis Y servo motor wiring diagram ...

Page 148: ...148 178 9 13 ST3 EM67 input signal wiring diagram Fig 9 13 ST3 EM67 input signal wiring diagram ...

Page 149: ...149 178 9 14 ST3 EM67 output signal wiring diagram Fig 9 14 ST3 EM67 output signal wiring diagram ...

Page 150: ...150 178 9 15 ST3 SIGMATEK module board Fig 9 15 ST3 SIGMATEK Module board 1 ...

Page 151: ...151 178 Fig 9 16 ST3 SIGMATEK Module board 2 ...

Page 152: ...rse unit board X101 X102 X103 X104 X105 24V Z轴原点 Z轴起点极限 Z轴型外安全 Z轴终点极限 气源压力限 预留1 X102 X104 X106 X101 X103 X105 Y101 X107 Y102 蜂鸣器 备用1 0V X100 0V 24V F100 Y103 报警灯 X106 X107 Y101 Y102 Y103 预留2 Fig 9 17 ST3 Traverse unit board ...

Page 153: ...X208 X210 X212 X214 X201 X203 X205 X207 X209 X211 X213 2 X215 X216 吸盘2电磁阀 吸盘1电磁阀 夹具1电磁阀 夹具2电磁阀 垂直电磁阀 水平电磁阀 喷油输出 备用2 备用3 备用4 X211 X212 X209 X213 X208 X214 X207 X215 X206 X216 X205 X204 X203 X202 Y210 Y209 Y208 Y207 Y206 Y205 Y204 Y203 Y202 X210 X200 Y200 X201 Y201 Y202 Y204 Y201 Y203 Y208 Y207 Y209 Y205 Y206 Y210 Fig 9 18 ST3 Main arm unit board ...

Page 154: ...154 178 10 ST5 Electrical Pneumatic Control Diagram 10 1 ST5 Power supply wiring diagram 棕 蓝 棕 蓝 输入电源 1P 230V 50HZ 60HZ 伺服驱动器电源 控制和I O电源 Fig 10 1 ST5 Power supply wiring diagram ...

Page 155: ...155 178 10 2 ST5 Each I O module electrical wiring diagram Fig 10 2 ST5 Each I O module electrical wiring diagram ...

Page 156: ...156 178 10 3 ST5 Traverse unit I O signal wiring diagram FM 备用 报警灯 山热风扇 气源压力限 Z轴型外安全 预留1 Z轴终点极限 Z轴原点 Z轴起点极限 Fig 10 3 ST5 Traverse unit I O signal wiring diagram ...

Page 157: ...157 178 10 4 ST5 Main arm unit input signal wiring diagram X轴起点极限 X轴原点 X轴终点极限 Y轴起点极限 Y轴原点 Y轴终点极限 水平限 垂直限 吸着1限 吸着2限 夹限1 夹限2 预留1 预留2 电眼输入限 称重输入限 Fig 10 4 ST5 Main arm unit input signal wiring diagram ...

Page 158: ...158 178 10 5 ST5 Main arm unit output signal wiring diagram 吸盘1电磁阀 吸盘2电磁阀 夹具1电磁阀 夹具2电磁阀 垂直电磁阀 水平电磁阀 喷油输出 备用1 Fig 10 5 ST5 Main arm unit output signal wiring diagram ...

Page 159: ...159 178 10 6 ST5 Sub arm unit input signal wiring diagram X2轴起点极限 X2轴原点 X2轴终点极限 Y2轴起点极限 Y2轴原点 Y2轴终点极限 水平限 垂直限 吸着3限 吸着4限 夹限3 夹限4 预留1 预留2 Fig 10 6 ST5 Sub arm unit output signal wiring diagram ...

Page 160: ...160 178 吸盘3电磁阀 吸盘4电磁阀 夹具3电磁阀 夹具4电磁阀 垂直电磁阀 水平电磁阀 备用3 Fig 10 7 ST5 Sub arm unit output signal wiring diagram ...

Page 161: ...161 178 黄棕 红蓝 粉 粉灰 黑 绿 黄白 白 红 灰白 黄 棕 棕绿 灰 Fig 10 8 ST5 Axis Z servo driver I O signal wiring diagram ...

Page 162: ...162 178 10 7 ST5 Axis X servo driver I O signal wiring diagram 黄棕 红蓝 粉 粉灰 黑 绿 黄白 白 红 灰白 黄 棕 棕绿 灰 Fig 10 9 ST5 Axis X servo driver I O signal wiring diagram ...

Page 163: ...163 178 10 8 ST5 Axis Y servo driver I O signal wiring diagram 黄棕 红蓝 粉 粉灰 蓝 黑 绿 黄白 白 红 灰白 黄 棕 棕绿 灰 Fig 10 10 ST5 Axis Y servo driver I O signal wiring diagram ...

Page 164: ...164 178 10 9 ST5 Axis X2 servo driver I O signal wiring diagram 黄棕 红蓝 粉 粉灰 黑 绿 黄白 白 红 灰白 黄 棕 棕绿 灰 Fig 10 11 ST5 Axis X2 servo driver I O signal wiring diagram ...

Page 165: ...165 178 10 10ST5 Axis Y2 servo driver I O signal wiring diagram 黄棕 红蓝 粉 粉灰 蓝 黑 绿 黄白 白 红 灰白 黄 棕 棕绿 灰 Fig 10 12 ST5 Axis Y2 servo driver I O signal wiring diagram ...

Page 166: ...166 178 10 11ST5 Intermediate relay wiring diagram Fig 10 13 ST5 Intermediate relay wiring diagram ...

Page 167: ...167 178 10 12ST5 EM67 input signal wiring diagram Fig 10 14 ST5 EM67 input signal wiring diagram ...

Page 168: ...168 178 10 13ST5 EM67 output signal wiring diagram Fig 10 15 ST5 EM67 output signal wiring diagram ...

Page 169: ...169 178 10 14ST5 Axis Z servo motor wiring diagram 白 黄 绿 棕 屏蔽线 白 黑 淡蓝 紫 屏蔽线 伺服编码器 M1 3 红 伺服电机 3P 129V 750W 白 黑 黄绿 Fig 10 16 ST5 Axis Z servo motor wiring diagram ...

Page 170: ...170 178 10 15ST5 Axis X servo motor wiring diagram 白 黄 绿 棕 屏蔽线 白 黑 淡蓝 紫 屏蔽线 伺服编码器 M1 3 红 伺服电机 3P 106V 400W 白 黑 黄绿 Fig 10 17 ST5 Axis X servo motor wiring diagram ...

Page 171: ...171 178 10 16 ST5 Axis Y servo motor wiring diagram 白 黄 绿 棕 屏蔽线 白 黑 淡蓝 紫 屏蔽线 伺服编码器 M1 3 红 白 黑 黄绿 伺服电机 3P 106V 400W Fig 10 18 ST5 Axis Y servo motor wiring diagram ...

Page 172: ...172 178 10 17 ST5 Axis X2 servo motor wiring diagram 白 黄 绿 棕 屏蔽线 白 黑 淡蓝 紫 屏蔽线 伺服编码器 M1 3 红 白 黑 黄绿 伺 服电 机 3P 106V 400W Fig 10 19 ST5 Axis X2 servo motor wiring diagram ...

Page 173: ...173 178 10 18 ST5 Axis Y2 servo motor wiring diagram 白 黄 绿 棕 屏蔽线 白 黑 淡蓝 紫 屏蔽线 伺服编码器 M1 3 红 白 黑 黄绿 伺服电机 3P 106V 400W Fig 10 20 ST5 Axis Y2 servo motor wiring diagram ...

Page 174: ...174 178 10 19 ST5 SIGMATEK module board Fig 10 21 ST5 SIGMATEK module board 1 ...

Page 175: ...175 178 Fig 10 22 ST5 SIGMATEK module board 2 ...

Page 176: ...erse unit board X101 X102 X103 X104 X105 24V Z轴原点 Z轴起点极限 Z轴型外安全 Z轴终点极限 气源压力限 预留1 X102 X104 X106 X101 X103 X105 Y101 X107 Y102 蜂鸣器 备用 0V X100 0V 24V F100 Y103 报警灯 X106 X107 Y101 Y102 Y103 预留2 Fig 10 23 ST5 Traverse unit board ...

Page 177: ...X208 X210 X212 X214 X201 X203 X205 X207 X209 X211 X213 2 X215 X216 吸盘2电磁阀 吸盘1电磁阀 夹具1电磁阀 夹具2电磁阀 垂直电磁阀 水平电磁阀 喷油输出 备用1 备用2 备用3 X211 X212 X209 X213 X208 X214 X207 X215 X206 X216 X205 X204 X203 X202 Y210 Y209 Y208 Y207 Y206 Y205 Y204 Y203 Y202 X210 X200 Y200 X201 Y201 Y202 Y204 Y201 Y203 Y208 Y207 Y209 Y205 Y206 Y210 Fig 10 24 ST5 Main arm unit board ...

Page 178: ...302 X310 X301 Y301 吸盘4电磁阀 吸盘3电磁阀 夹具3电磁阀 夹具4电磁阀 垂直电磁阀 水平电磁阀 喷油输出 备用1 备用2 备用3 Y300 Y302 Y304 Y301 Y303 Y308 Y307 Y309 Y305 Y306 Y310 1 24V X2轴起点极限 X2轴终点极限 X2轴原点 Y2轴起点极限 Y2轴原点 Y2轴终点极限 垂直限 水平限 吸着3限 吸着4限 夹限3 夹限4 预留1 预留2 0V 电眼输入限 称重输入限 X302 X304 X306 X308 X310 X312 X314 X301 X303 X305 X307 X309 X311 X313 2 X315 X316 X300 Fig 10 25 ST5 Sub arm unit board ...

Reviews: