100
Message Programming
Use the following procedure to select any option included in the message group:
Procedure
1.
In the SETTING window, select “10 MESSAGE.”
• The MESSAGE window will appear.
2.
Select any option from the following options list:
1
RECEIPT LOGO
Receipt logo
The following illustration shows those options included in this programming group.
10 MESSAGE
1 RECEIPT LOGO
l
See “Receipt logo” this page.
■
Receipt logo
Your register can print programmed messages for customers on every receipt.
The logo text is printed in a centering form on the receipt.
Procedure
Program each item as follows:
• RECEIPT LOGO (Use the character entry)
Logo text for the receipt (max. 30 characters x 6 lines)
NOTE
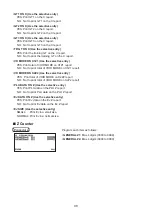
The programmable number of lines for a message varies according to the following message
types:
PATTERN 1: 3 line text header
PATTERN 2: Image logo header
PATTERN 3: Image logo 3 line text footer
PATTERN 4: 6 line text header
PATTERN 5: Image logo 3 line text header
PATTERN 6: 3 line text 3 line text footer
Summary of Contents for XE-A177
Page 9: ...9 Rear view XE A207W XE A207B XE A217W XE A217B Customer display RS232 ...
Page 12: ...12 Keyboard XE A217W XE A217B Keyboard layout Programing keyboard layout ...
Page 109: ...109 Function Text PGM mode Report type Function Text ...
Page 111: ...111 Optional PGM mode Item Setting Report type ...
Page 112: ...112 Report PGM mode Report type Setting Item Message PGM mode Report type Receipt logo text ...
Page 132: ...132 ...
Page 134: ......


