background image

02/12/18     MD_MT290H_UK_6.fm

47

MD-MT290H

1

2

3

4

5

6

Re

fe

re

nc

es

-T

rouble

s

hoo

ting/M

a

inte

na

nc

e

-


„

If trouble occurs

When this product is subjected to strong external interfer-
ence (mechanical shock, excessive static electricity,
abnormal supply voltage due to lightning, etc.) or if it is
operated incorrectly, it may malfunction.

If such a problem occurs, do the following:

„

Moisture condensation

When the unit has condensation inside, the disc signals
cannot be read, and the unit may not function properly.

In the following cases, condensation may form inside the
unit.

z

Shortly after turning on a heater.

z

When the unit is placed in a room where there is
excessive steam or moisture.

z

When the unit is moved from a cool place to a warm
place.

To remove condensation:

Remove the MiniDisc and leave the unit for approxi-
mately 1 hour. The condensation should evaporate and
the unit will work properly.

Maintenance

„

Cleaning

When the unit becomes dirty

Clean it with a soft cloth. When the unit is excessively
dirty, use a soft cloth dampened in water (external sur-
faces only).

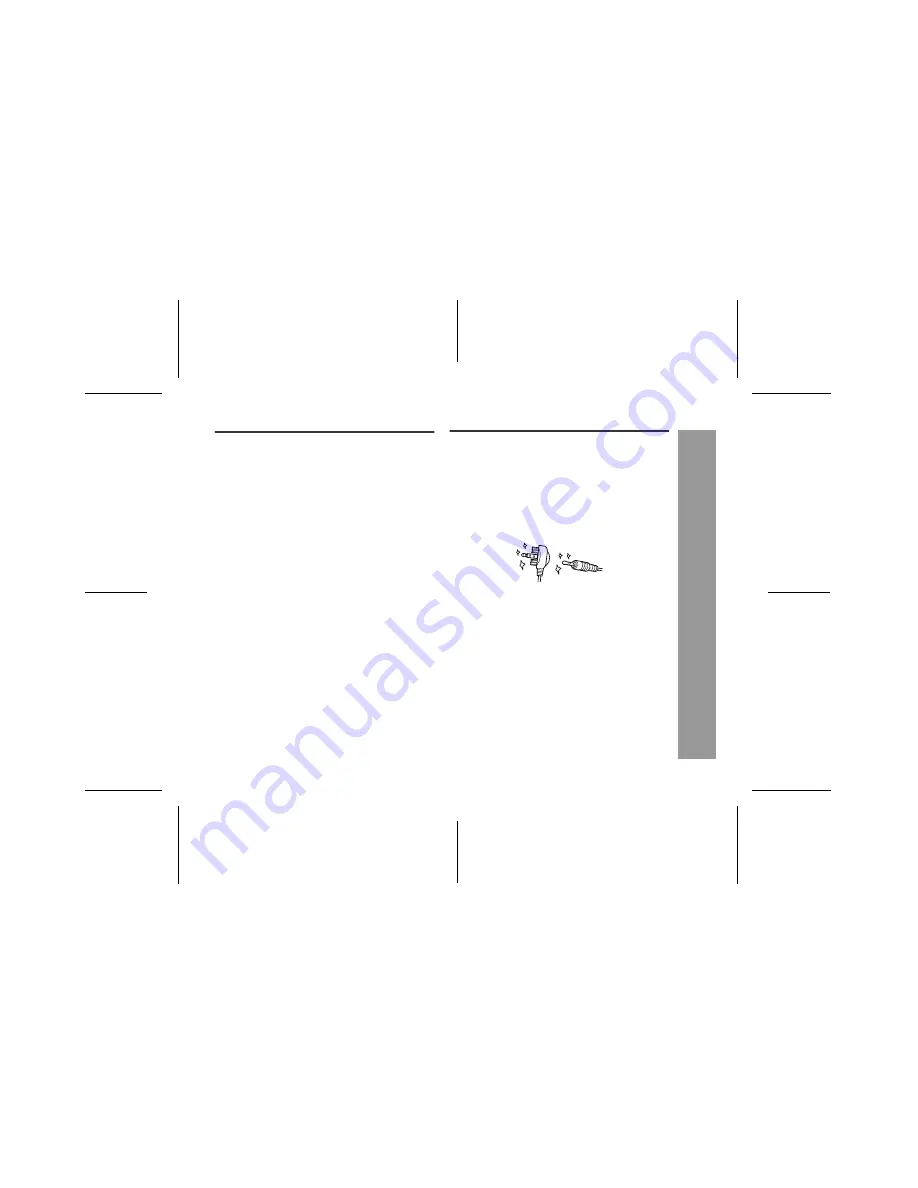
Clean the plugs and the connecting sockets.

If the plugs or sockets are dirty, noise may be heard.
Cleaning will prevent noise.

Caution:

z

Do not use chemicals for cleaning (petrol, paint thin-
ner, etc.). It may damage the cabinet finish.

z

Do not apply oil to the inside of the unit. It may cause
malfunctions.

1. Unplug the AC adaptor from the wall socket.

2. Remove the battery.

3. Leave the unit completely unpowered for approximately 

30 seconds.

4. Plug the AC adaptor back into the wall socket and re-

operate the unit.

Summary of Contents for MD-MT290H

Page 1: ...g your SHARP product MODEL MD MT290H OPERATION MANUAL If you require any advice or assistance regarding your Sharp product please visit our web site www sharp co uk customersupport Customers without Internet access may telephone 08705 274277 during office hours or 01 676 0648 if telephoning from Ireland 0101 PL UG IN PO W ER TINSE0504AWZZ 02M N AO 1 E ...

Page 2: ... 1 Earphones x 1 AC Adaptor RADPA8058AWZZ x 1 Rechargeable Nickel Met al Hydride battery AD N70BT x 1 Battery Carrying Case x 1 Connection Cable for digital record ing x 1 Connection Cable for analogue re cording x 1 Connection Cable for PC analogue re cording x 1 Carrying Bag x 1 Parts and equipment mentioned in this operation manual other than those detailed above are not included The AC adaptor...

Page 3: ...ections 12 13 Hold Function 14 Before Recording 15 Basic Operation Recording 16 17 Playback 18 19 Page Useful Features Advanced Playback 20 21 Advanced Recording 22 27 Recording from a Microphone 28 30 Changing Default Settings 31 Checking Displays 32 33 Advanced Features Titling a MiniDisc 34 37 Editing a Recorded MiniDisc 38 40 Listening through Another System 41 References Other Features and Ca...

Page 4: ...l is prop erly recorded SHARP is not liable for damage or loss of your record ing arising from malfunction of this unit NOTES FOR USERS IN THE U K AND IRELAND SERVICE INFORMATION In the unlikely event of your equipment requiring re pair please use the supplied postage paid label to send your unit to the Sharp repair centre or contact the dealer or supplier from whom it was purchased Where this is ...

Page 5: ...sult in expo sure to hazardous radiation Laser Diode Properties Material GaAIAs Wavelength 785 nm Pulse time Read mode 0 8 mW Continuous Write mode max 10 mW 0 5S min cycle 1 5S Repetition Notes Recording and playback of any material may require consent which SHARP is unable to give Please refer particularly to the provisions of the Copyright Act 1956 the Dramatic and Musical Performers Protection...

Page 6: ... 14 17 18 5 Play Pause Button 17 18 25 6 Volume Cursor Buttons 18 35 7 Remote Control Earphones Line Output Socket 18 41 8 Microphone Input Socket 28 9 Optical Line Input Socket 12 10 Record Track Mark Button 16 24 26 11 5 V DC Input Socket 9 41 12 Fast Forward Fast Reverse Recording Level Menu Select Name Select Buttons 16 20 34 PL UG IN PO W ER 1 3 6 7 8 9 10 11 12 4 5 2 Note When the battery co...

Page 7: ... Disc Name Indicator 10 Record Indicator 11 Synchro Recording Indicator 12 Character Time Information Indicator 13 TOC Indicator 14 Track Number Indicator Remote control unit Reference page 1 Earphones Socket 18 41 2 Bass Delete Track Mark Button 19 26 35 3 Volume Cursor Buttons 18 35 4 Hold Switch 14 5 Play Pause Button 17 18 25 6 Fast Forward Fast Reverse Recording Level Menu Select Name Select ...

Page 8: ... fields such as TVs or loudspeakers Places exposed to vibration Places where sand can easily enter the inside of the unit beaches etc If the unit is used near radio tuners or TVs noise and or picture interference may result If you experience these problems move the unit away from such devices Do not wear your earphones when you are crossing streets or near traffic Do not use your earphones whilst ...

Page 9: ...rtable MD is turned on or operating the battery will not be charged z For information about the battery life see the battery item in the Specifications on page 49 4 3 2 1 AC 230V 50 60 Hz To the DC IN 5V socket 1 Insert the rechargeable battery according to the direction indicated in the battery compartment A rechargeable battery other than the one supplied or the optional one AD N70BT cannot be c...

Page 10: ... not in use for extended periods remove the AC adaptor from the wall socket Notes z If power failure occurs whilst playing a disc using the AC adaptor disconnect it from the wall socket Other wise playback may start automatically when electric ity resumes z This unit can be used with the AC adaptor when the rechargeable or an alkaline battery is in the unit z Carry the battery in the supplied case...

Page 11: ...ntial damage due to battery leakage z Installing the battery incorrectly may cause the unit to malfunction Inserting a MiniDisc 1 Slide the OPEN lever to release the com partment door 2 Lift up the compartment door 3 Insert a MiniDisc 4 Close the compartment door Notes z Do not place the MiniDisc under the holder z If any resistance is felt do not force the MiniDisc into the unit as it may cause d...

Page 12: ...To connect to the PC with AUDIO OUT socket analogue connection Supplied connection cable for PC analogue recording RIGHT LEFT RIGHT LEFT AUDIO OUT AC 230V 50 60 Hz To the wall socket Red to right White to left Supplied connection cable To the DC IN 5V socket To the OPTICAL LINE IN socket To connect to a stereo system with LINE OUT or AUDIO OUT sockets analogue connection If the audio system has on...

Page 13: ...to a stereo system with a DIGITAL OUT or OPTICAL OUT socket digital connection When compared with an analogue connection recording using a digital connection will give higher quality Some audio systems do not have a DIGITAL OUT socket Check before connecting AC 230V 50 60 Hz To the wall socket Supplied connection cable Separately available connection cable AD M2DC ...

Page 14: ...on even when the power is turned off To cancel the hold mode Press and hold down the HOLD button for 2 seconds or more whilst the unit is in the hold mode HOLD OFF will be shown Remote control unit Move the HOLD switch to the safety position direc tion indicated by the arrow To cancel the hold mode Move the HOLD switch away from the safety position the opposite direction of the arrow Hold Release ...

Page 15: ...the instructions below Otherwise tracks may not be recorded properly To prevent recorded MiniDiscs from being erased accidentally Slide the accidental erase prevention tab located on the side of the MiniDisc in the direction indicated by the arrow The MiniDisc will then be protected against accidental erasure To add a recording to such a MiniDisc slide the acciden tal erase prevention tab back to ...

Page 16: ...so that the maximum sound vol ume from the source makes the reading swing somewhere be tween 4 dB and 0 dB Digital recording connecting with digital cable You can adjust the level in 1 dB increments between 10 dB and 10 dB Once you adjust the recording level the setting is re tained even after the recording stops For cancella tion instructions for the digital recording level see page 31 The sound ...

Page 17: ...ove the MiniDisc whilst TOC is displayed to prevent the new recording from being lost To update the recorded contents of the MiniDisc Press the OFF HOLD button whilst in the stop mode The power turns off after recorded contents have been updated on the MiniDisc 5 Press the MENU ENTER button 6 Press the or button repeatedly to se lect REC MODE 7 Press the MENU ENTER button 8 Press the or button rep...

Page 18: ... usual expectations of noise high volume may damage your hearing The sound escaping from your earphones may annoy people around you In particularly crowded places such as on trains or buses reduce the volume Volume control 1 Insert the earphones plug firmly into the earphones socket on the remote control unit 2 Plug the remote control into the REMOTE PHONES socket on the unit 3 Insert a MiniDisc p...

Page 19: ...els with the volume level set to 23 or more the volume level will be reduced to 22 automatically BASS 1 Emphasised slightly BASS 2 Emphasised more BASS 3 Emphasised fully BASS OFF Cancelled Default setting Lo3 Default BASS 3 Lo Frequency Sound level Hi Hi3 Lo5 Hi5 Lo Frequency Sound level Hi BASS 3 1 During playback press the MENU ENTER button 2 Press the or button repeatedly to se lect SOUND ADJ ...

Page 20: ...rack To skip a number of tracks at one time press the or button repeatedly until the desired track number is shown When you press the button playback starts from the beginning of the track For audible fast forward Press and hold down the button during playback For audible fast reverse Press and hold down the button during playback To move to the beginning of the next track Press the button during ...

Page 21: ...andom repeat or single track repeat play you can forward or reverse the MiniDisc only within the track being played During random play the unit cannot find the beginning of any track which has been played Repeat play lasts until you stop the unit 1 During playback press the MENU ENTER button 2 Press the or but ton repeatedly to select PLAY MODE 3 Press the MENU ENTER button 4 Press the or button r...

Page 22: ...lst select ing the menus The recording mode remains unchanged until a new mode is selected 1 When recording is paused press the MENU ENTER button 2 Press the or button repeatedly to se lect REC MODE 3 Press the MENU ENTER button 4 Press the or button repeatedly to se lect the desired recording mode 5 Press the MENU ENTER button The mode will be set automatically after 7 seconds even if the MENU EN...

Page 23: ...ased on psychoacoustics masking the sound quality is not impaired This unit is equipped with the ATRAC3 com pressing system that can reduce the sound data to 1 10 or 1 20 of its original size By employing this system 2 times and 4 times long recordings are enabled in stereo mode About the recording mode You can select the recording mode from stereo recording 2 times long recording 4 times long rec...

Page 24: ...cording resumes 1 Press the REC button 2 Begin playback on the stereo system con nected to this portable MD 3 Press the or button to adjust the re cording level see page 16 4 Press the PAUSE button on the stereo sys tem to enter the playback pause mode Select the starting point for your recording and press the PAUSE button 5 Press the MENU ENTER button 6 Press the or button repeatedly to se lect R...

Page 25: ...e track and then make recording after that point See Editing a Recorded MiniDisc page 40 1 During playback press the button at the point where you want to begin recording 2 Press the REC button To cancel the operation press the OFF HOLD but ton 3 Press the MENU ENTER button All of the tracks and track names will be erased fol lowing the point where the playback is paused 4 Press the MENU ENTER but...

Page 26: ...hat case wait until the next operation can be resumed Recording tracks as a single track You can record several pieces of music as a single track by disabling the auto marker function When recording is paused or whilst recording Notes Complete the operation within 7 seconds whilst select ing the menus When making digital recordings using a CD player or an MiniDisc player track numbers will be crea...

Page 27: ...igital recording You cannot copy a MiniDisc that you recorded from digital inputs to another MiniDisc or DAT It is prevented by the SCMS Serial Copy Management System Recording from analogue inputs is not affected 1 Track numbers are created automatically during re cording via the analogue connection when a silence of 1 second or more is detected auto marker function A series of tracks can be reco...

Page 28: ...s on the MiniDisc Press the OFF HOLD button whilst in the stop mode 1 Connect a stereo microphone to the MIC IN socket 2 Insert a recordable MiniDisc page 11 To the MIC IN socket PLUG IN POWER Stereo microphone commercially available 3 Press the REC button 4 Press the REC LEVEL or button to adjust the recording level Adjust the recording level so that the maximum sound vol ume from the source make...

Page 29: ...often from low unwanted noises set the microphone input to MIC SYNC L Recording sensitivity can be changed whilst recording 1 Press the REC button 2 Press the REC LEVEL or button to ad just the recording level 3 Select the recording mode steps 5 9 page 17 4 Press the MENU ENTER button 5 Press the or button repeatedly to se lect SYNC ON 6 Press the MENU ENTER button 7 Press the or button to select ...

Page 30: ...ntrol can also be used to add track numbers 1 Press the MENU ENTER button 2 Press the or button repeatedly to se lect MARK 3 Press the MENU ENTER button 4 Press the or button The interval between marks may vary slightly com pared with the actual recording time A new track number is created every 3 minutes No automatic track numbers are created A new track number is created every 5 minutes A new tr...

Page 31: ...elled the storage time cannot be adjusted If this unit is used with the AC adaptor the storage time will be 40 seconds regardless of the settings The storage time varies depending on the recording mode Digital recording level D L MODE 1 The digital recording level you set will be kept even after cancelling recording D L MODE 2 Every time you cancel recording the level will return to D L 0dB Whilst...

Page 32: ...During playback press the MENU ENTER button 2 Press the or button repeatedly to se lect DISPLAY 3 Press the MENU ENTER button 4 Press the or button Each time the or button is pressed the display will change as follows Track number Track name Elapsed playback time Remaining playback time A B C D 1 Whilst in the stop mode press the MENU ENTER button 2 Press the or button repeatedly to se lect DISPLA...

Page 33: ...he battery is completely charged The battery indicator will not correctly display the remaining capacity for approximately 10 seconds after the power has been turned on When the AC adaptor or a separately available car adaptor is used the battery indicator will not be shown The number of bars shown in the battery indicator may increase or decrease depending on the operation being performed This is...

Page 34: ...lect EDIT 3 Press the MENU ENTER button 4 Disc name Track name Press the or but ton repeatedly to select DISC NAME Press the or but ton repeatedly to select TRACK NAME 5 Press the MENU ENTER button The unit will enter the character input mode To cancel the operation press the OFF HOLD button Cursor 6 Press the button repeatedly to select the type of characters The first 3 characters in the group o...

Page 35: ... name and a total of about 1 700 characters can be entered If you enter LP at the beginning of a name LP may not be displayed 9 To enter more letters repeat steps 6 8 10When the name is completely entered press and hold down the MENU ENTER but ton for 2 seconds or more TOC will be displayed To write the updated con tents to the MiniDisc press the OFF HOLD but ton You cannot remove the MiniDisc whi...

Page 36: ...haracter 3 Select the character to add Perform steps 6 8 on page 34 4 Press and hold down the MENU ENTER but ton for 2 seconds or more TOC will be displayed To write the updated con tents to the MiniDisc press the OFF HOLD but ton You cannot remove the MiniDisc whilst TOC is displayed TOC will not disappear until the re corded contents have been updated 1 What is a master MiniDisc A recordable Min...

Page 37: ...sc Do not mistake the master MiniDisc for the target one 2 Whilst in the stop mode press the MENU ENTER button 3 Press the or button repeatedly to se lect EDIT 4 Press the MENU ENTER button 5 Press the or but ton repeatedly to se lect NAME STAMP 6 Press the MENU EN TER button To cancel the operation press the OFF HOLD but ton 7 Press the MENU ENTER button 8 When the unit displays CHANGE MD re move...

Page 38: ...Press the or button repeatedly to se lect EDIT 4 Press the MENU ENTER button 5 Press the or button repeatedly to se lect ERASE 6 Press the MENU ENTER button To cancel the operation press the OFF HOLD but ton 7 Press the MENU ENTER button again The track will be erased 8 To erase other tracks repeat steps 1 7 1 Whilst in the stop mode press the MENU ENTER button 2 Press the or button repeatedly to ...

Page 39: ...operation press the OFF HOLD but ton 7 Press the MENU ENTER button again The track will be divided into two tracks and the unit will be paused at the beginning of the second of the two new tracks 1 Start playing the latter of the two tracks to be combined and press the button 2 Press the MENU ENTER button 3 Press the or button repeatedly to se lect EDIT 4 Press the MENU ENTER button 5 Press the or...

Page 40: ... name The first track name will be used However when the first track does not have a name the second track name will be used In the following cases tracks may not be combined 1 Play the track to be moved and press the button 2 Press the MENU ENTER button 3 Press the or button repeatedly to se lect EDIT 4 Press the MENU ENTER button 5 Press the or button repeatedly to se lect MOVE 6 Press the MENU ...

Page 41: ...the analogue mode Character information will not be recorded Listening through a car stereo Notes Adjust the volume of both this portable MD and a car stereo Do not operate this portable MD whilst you drive a car It may distract your attention and cause a traffic acci dent Do not use any car adaptor except for the separately available AD CA20X Remove the battery when you power the unit from the ca...

Page 42: ...ging z To avoid shortening the service life of the battery only recharge the battery after it has been completely dis charged z If the rechargeable battery is used in a cold environ ment the operating time will be reduced z Do not carry the battery in your pocket or a bag together with metal objects keys coins jewelry etc The battery may short out and generate significant amounts of heat z Do not ...

Page 43: ...non recorded portions that last 12 or fewer seconds to display the remaining recording time The time may not increase even if you erase short tracks The total of the recorded time and the remaining time does not match the max imum recordable time One cluster approximately 2 seconds is the minimum unit for re cording For example a 3 second track uses 2 clusters approximate ly 4 seconds Therefore th...

Page 44: ...an t READ z The disc data cannot be read be cause the disc is damaged Reload the Minidisc or replace it with another one Can t REC z Recording cannot be performed cor rectly due to vibration or shock ERROR MESSAGES MEANING Can tSTAMP z Stamp function does not work Check the number of tracks Can tWRITE z Cannot save the TOC information correctly to a MiniDisc DEFECT z The disc is scratched If the r...

Page 45: ... Since a track number is currently be ing located or updated the unit can not accept your command Wait a while and try the operation again ERROR MESSAGES MEANING TEMP OVER z The temperature is too high Turn off the power and wait a while TOC FORM z There is an error in the recording sig nal Erase all of the tracks and then record again TOC FULL z There is no space left for recording character info...

Page 46: ...MiniDisc with data on it in stead of a MiniDisc containing music When the operation buttons are pressed the unit does not respond z Is the unit in the hold mode z Is the battery exhausted z Is the earphones plug inserted firmly Some sounds are skipped z Is the battery exhausted z Is the unit being subjected to excessive vibration The MiniDisc cannot be ejected z Has the track number or character i...

Page 47: ...e unit is moved from a cool place to a warm place To remove condensation Remove the MiniDisc and leave the unit for approxi mately 1 hour The condensation should evaporate and the unit will work properly Maintenance Cleaning When the unit becomes dirty Clean it with a soft cloth When the unit is excessively dirty use a soft cloth dampened in water external sur faces only Clean the plugs and the co...

Page 48: ...W 0 2 T H D Charging time Approx 3 5 hours 90 Approx 5 5 hours fully charged When using the AC adaptor included with the unit Dimensions Width 83 mm 3 9 32 Height 28 mm 1 1 8 Depth 77 mm 3 1 32 Weight 134 g 0 30 lbs with rechargeable battery Input socket Line optical digital microphone powered by the main unit Output socket Earphones impedance 32 ohms remote control unit Type Portable MiniDisc rec...

Page 49: ...inuous recording Approx 11 hours Continuous play Approx 44 hours Continuous recording Approx 16 hours Continuous play Approx 52 hours Reference input level Input impedance MIC H 0 25 mV 10 k ohms MIC L 2 5 mV 10 k ohms LINE 100 mV 20 k ohms Specified output Maximum output level Load imped ance Ear phones 10 mW 10 mW 32 ohms LINE 250 mV 12 dB 10 k ohms z The continuous recording time is for analogu...

Page 50: ...MEMO ...

Page 51: ...MEMO ...

Page 52: ...d by accident misuse fair wear and tear neglect tampering with the equipment or any attempt at ad justment or repair other than by a Service Facility ap pointed by Sharp 5 In the unlikely event of a defect occuring the product must be returned to the Company s repair centre with proof of purchase A postage paid label and a fault re port form are supplied with the product for this purpose It is you...

Reviews: