background image

72

Collegamento del monitor ed accensione e spegnimento del monitor

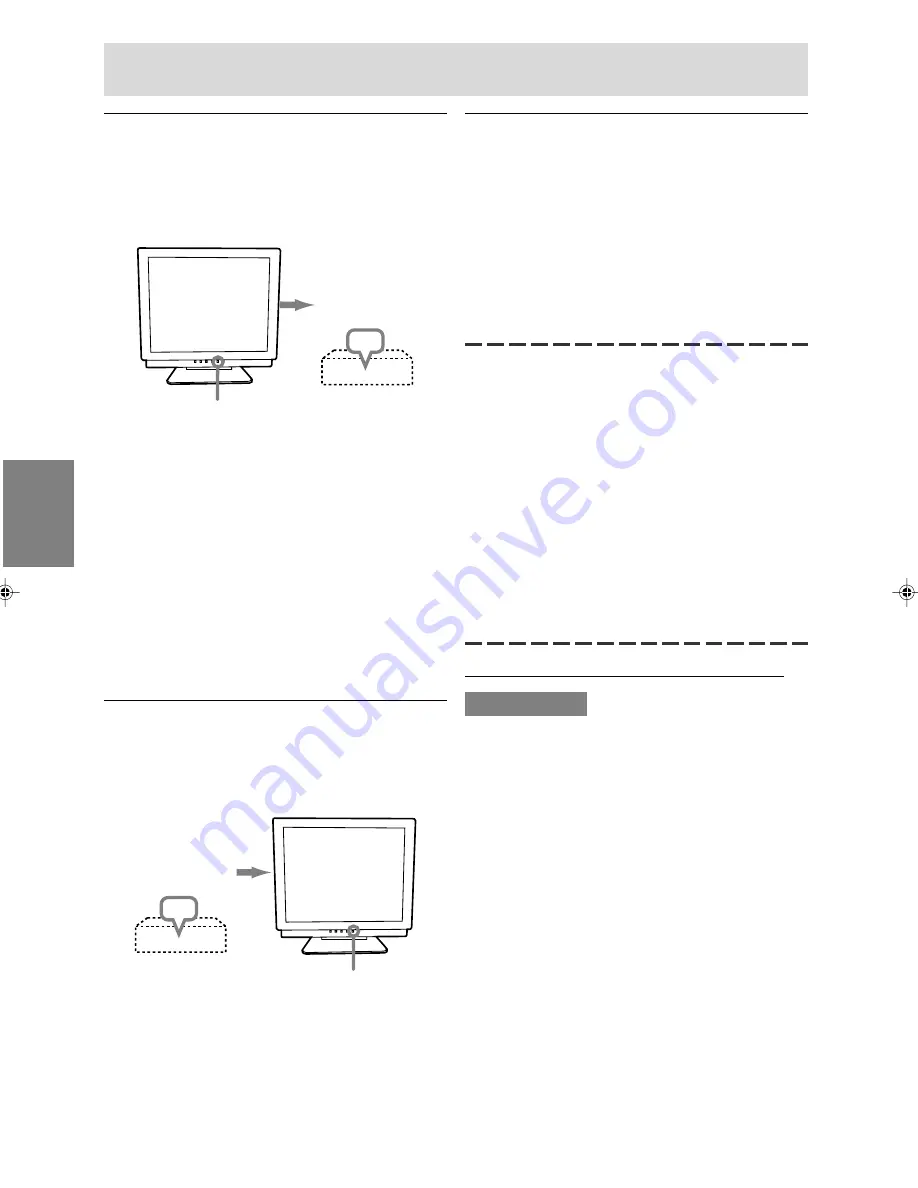
Accensione

1. Premete il tasto di alimentazione del monitor.
2. Accendete il computer.

Il LED di alimentazione si illuminerà in verde, lo
schermo visualizzerà un'immagine.

ON

Notes:

- Quando impostate il monitor oppure un computer

collegato per la prima volta, quando collegate un
computer supplementare oppure dopo aver
cambiato un aspetto del sistema attuale, eseguite
una regolazione automatica dello schermo prima
dell’uso.

- A seconda del computer o del sistema operativo,

potrebbe essere necessario usare il computer per
installare le informazioni di setup del monitor. In
questo caso seguite le istruzioni descritte nel
seguito, per installare le informazioni per il setup
del monitor.

Spegnimento

1. Spegnete il computer
2. Premete il tasto di alimentazione del monitor.

Il LED di alimentazione si spegnerà.

OFF

Se il monitor non verrà usato per lungo tempo,
assicuratevi di averlo scollegato dalla presa di
corrente alternata.

Accendete il

computer

Premete il tasto di
alimentazione

Premete il tasto
di alimentazione

Spegnete il

computer

Installazione delle informazioni per il
setup e del profilo ICC (per Windows)

A seconda del computer oppure del sistema operativo
può essere necessario usare il computer per eseguire
l'installazione delle informazioni di setup del monitor,
ecc. In questo caso, seguite i passi indicati sotto per
installare le informazioni di setup del monitor. (A
seconda del tipo di computer oppure del sistema
operativo, i nomi dei comandi ed i metodi possono
essere differenti. Per favore seguite il manuale
operativo proprio del computer, mentre leggete questo.)

Il profilo ICC

Un profilo ICC (International Color Consortium) è
un file che descrive le caratteristiche cromatiche
del monitor LCD. Utilizzando un'applicazione che
funziona con un profilo ICC, si può realizzare
un'elevata risoluzione del colore.
- Windows98/2000/Me/XP utilizzano tutti il profilo

ICC.

- Quando si installano le informazioni del setup di

Windows98/2000/Me/XP (descritte nel seguito),
anche il profilo ICC viene installato. Se
desiderate installare solo il programma ICC, per
favore fate riferimento a 

Installazione del

profilo ICC

 a pagina 74.

- Quando usate il profilo ICC , per favore impostate

[COLOR MODE] e [WHITE BALANCE] su [STD].

Installazione delle informazioni per il setup

 Per Windows95

Installazione delle informazioni per il setup del
monitor in Windows95. I messaggi di Windows, citati
nelle istruzioni per l´uso che seguono, si basano
sulla versione inglese di Windows.
In questa spiegazione si parte dall'ipotesi che l'unità
per dischetti floppy sia "A".
1. Inserite il Disco delle Utilità (fornito) nel drive A

del computer.

2. Fate clic sul pulsante [Start]. Da [Settings],

scegliete [Control Panel].

3. Fate doppio clic su [Display].
4. Fate clic su [Settings], [Advanced Properties], e

[Monitor], e quindi [Change].

5. Fate clic su [Have disk], confermate che [Copy

manufacturer's files from] è [A:] quindi fate clic su
[OK].

6. Verificate che le impostazioni del monitor siano

selezionate e fate clic su [OK].

7. Controllate che il monitor visualizzi, quindi fate

clic su [Apply].

8. Fate clic su [OK], e chiudete la finestra.
9. Rimuovete il Disco delle Utilità dal drive A.

05_LL-T7A3_it.p65

9/12/2002, 6:03 PM

72

Summary of Contents for LL-T17A3

Page 1: ...LCD Monitor LCD Farbmonitor Moniteur LCD Monitor LCD Monitor LCD LL T17A3 OPERATION MANUAL BEDIENUNGSANLEITUNG MODE D EPLOI MANUALE D USO MANUAL DE FUNCIONAMIENTO ...

Page 2: ...hnis Table des matières Indice Índice Notice for Users in Europe 3 Notice for users in the UK 4 Notice for Users in the Australia 4 Notice for Users in the USA 5 TCO 95 99 6 English 7 Deutsch 27 Français 47 Italiano 67 Español 87 107 ...

Page 3: ...ace las exigencias de las Directivas 89 336 CEE y 73 23 CEE modificadas por medio de la 93 68 CEE Denna utrustning uppfyller kraven enligt riktlinjerna 89 336 EEC och 73 23 EEC så som komplette ras av 93 68 EEC Dette produktet oppfyller betingelsene i direktivene 89 336 EEC og 73 23 EEC i endringen 93 68 EEC Tämä laite täyttää direktiivien 89 336 EEC ja 73 23 EEC vaatimukset joita on muutettu dire...

Page 4: ...letter E or by the safety earth or coloured green or green and yellow The wire which is coloured BLUE must be connected to the terminal which is marked with the letter N or coloured black The wire which is coloured BROWN must be connected to the terminal which is marked with the letter L or coloured red Ensure that your equipment is connected correctly if you are in any doubt consult a qualified e...

Page 5: ...lowing measures Reorient or relocate the receiving antenna Increase the distance between the equipment and receiver Connect the equipment into an outlet on a circuit different from that to which the receiver is connected Consult the dealer or an experienced radio TV technician for help Use nothing but the included cables and AC cord to insure compliance with FCC regulation for Class B computing eq...

Page 6: ...9 approved and labelled products may also be obtained via the Internet using the address http www tco info com Environmental requirements Flame retardants Flame retardants are present in printed circuit boards cables wires casings and housings Their purpose is to prevent or at least to delay the spread of fire Up to 30 of the plastic in a computer casing can consist of flame retardant substances M...

Page 7: ...he power off 12 Installing set up information and the ICC profile for Windows 12 Information about the ColorSync profile for MacOS 15 Adjusting the screen display and speaker volume 16 Adjusting the backlight 16 Adjusting the speaker volume 17 Setting color mode 17 Automatic screen adjustment 17 Manual screen adjustment 18 Monitor care and repair 21 Monitor care 21 Storage 21 Troubleshooting 21 Sp...

Page 8: ...emperature as this may lead to generation of excessive heat and outbreak of fire The Power Cord Do not damage the power cord nor place heavy objects on it stretch it or overly bend it Also do not add extension cords Damage to the cord may result in fire or electric shock Use only the AC adapter supplied with the monitor Using an AC adapter other than that supplied may lead to fire Insert the power...

Page 9: ...power off 5 Power LED This LED is lit green when in use and orange when in power saving mode 6 Speakers Audio entering via the monitor and the external device connected to the monitor can be heard 7 Audio input terminal A computer s audio output terminal can be connected here The audio cable included should be used 8 Power terminal The AC adapter is connected here 9 Analog RGB input terminal The a...

Page 10: ...own on the stand and lift up the top section of the monitor Folding up the monitor 1 Remove the AC adapter and the cable 2 If carrying out adjustments to the monitor place it upright 3 While pressing the rear lock disable button 1 gently fold back the monitor 2 1 2 Angle adjustment Adjust to an easy to view angle Do not use the monitor when tilted back beyond approximately 20º The monitor may fall...

Page 11: ...tosh conversion adapter commercially available to the analog signal cable Note When connecting to a notebook if the notebook computer s screen is set so that it is displaying at the same time the MS DOS screen may not be able to display properly In this case change the settings so that only the monitor is displaying Analog RGB terminal Mini D Sub 15 pin 3 row Analog signal cable Macintosh conversi...

Page 12: ... or OS command names and methods may differ Please follow the computer s own operation manual while reading this About the ICC profile An ICC International Color Consortium profile is a file that describes the color characteristics of the LCD monitor By using an application that works together with an ICC profile a high color resolution can be realized Windows98 2000 Me XP all use the ICC profile ...

Page 13: ...rom the A drive For Windows2000 Installing monitor set up information into Win dows2000 and setting the monitor s ICC profile as a predetermined value This explanation assumes that the floppy disk drive is A drive 1 Place the Utility Disk provided into the computer s A drive 2 Click on the Start button From Settings choose Control Panel 3 Double click on Display 4 Click on Settings Advanced and Mo...

Page 14: ... Properties Driver and Update Driver 7 When Hardware Update Wizard appears check Install from a list or specific location Advanced and click Next 8 Check Don t search I will choose the driver to install and click Next 9 Click on Have Disk confirm that Copy manufacturer s files from is A and click OK 10 Select the monitor from the list displayed and click Next If has not passed Windows Logo testing...

Page 15: ... MacOS8 5 or above When using the ColorSync profile set COLOR MODE and WHITE BALANCE to STD Setting up the ColorSync profile Notes A floppy disk drive is necessary In addition it is necessary to have PC Exchange or File Exchange installed in your system Depending on the type of computer or OS command names and methods may differ Please follow the computer s own operation manual while reading this ...

Page 16: ...he adjustment lock before attempting to operate control buttons ADJUSTMENT menu reset Settings of items in the ADJUSTMENT Menu CLOCK PHASE H POS V POS can be returned to their original ex factory values 1 Turn on the monitor power 2 Press the MENU button and the button simultaneously When RESET appears on the screen the reset is complete Adjustment lock function By disabling the control buttons i ...

Page 17: ... Options in the ADJUSTMENT Menu can be adjusted automatically CLOCK PHASE H POS V POS Note When setting up this monitor for the first time or after having changed an aspect of the current system perform an automatic screen adjustment before use Automatic adjustment screen display To perform an automatic adjustment first display an image that makes the entire screen very bright If you are using Win...

Page 18: ...plays an entirely dark image the automatic screen adjustment may be disabled When making an automatic adjustment be sure to either use the Adjustment Pattern or try displaying an image that makes the entire screen very bright Automatic adjustment may not be achieved correctly depending on what is displayed on the screen moving pictures or the MS DOS prompt etc Adjusting the screen display and spea...

Page 19: ...NTROL Menu GA I N CONTROL MANUAL AUTO B L ACK LEVEL 32 CONTRAST 66 1 2 8 0 X 1 0 2 4 V 6 0 H z H 6 4 0 k H z MANUAL Individual menu options are manually adjusted AUTO Every menu option is automatically adjusted using the Auto Gain Control function Notes Press the button to select AUTO To choose a menu option MODE button To go to the next menu MENU button Auto Gain Control function The Auto Gain Co...

Page 20: ...640 720 L A NGUAGE 1 2 8 0 X 1 0 2 4 V 6 0 H z H 6 4 0 k H z Notes Depending on the resolution of the input signal even if menu options can be selected the display may not change To choose a menu option MODE button When adjustment complete MENU button OSD H POSITION OSD horizontal position The position of the OSD display can be moved to the left and right buttons OSD V POSITION OSD vertical positi...

Page 21: ...y to replace the florescent tube unit Please inquire at the shop where you purchased the monitor or your nearest Sharp authorized Service Center Never attempt this replacement on your own In the initial period of use due to the characteristics of florescent tubes the screen may flicker This is not a malfunction Should this happen check by first turning off the power then turning it on again No ima...

Page 22: ...n size Plug Play VESA DDC1 DDC2B compatible Power management VESA based on DPMS Speaker output 1W 1W Input signal terminal Mini D sub 15 pin 3 row Audio input terminal Mini stereo jack Screen tilt Upward approx 0 20 downward approx 0 5 Screen swivel Approx 90 from left through right Turn table type Power supply AC100 240V 50 60Hz Use special AC adapter type NL A64J of Sharp Corporation Temperature...

Page 23: ...z 53 6kHz 56 6kHz 61 8kHz 71 7kHz 60Hz 72Hz 75Hz 56Hz 60Hz 72Hz 75Hz 60Hz 70Hz 75Hz 75Hz 60Hz 60Hz 75Hz 70Hz 66 7Hz 74 6Hz 75Hz 75Hz 60Hz 75Hz 60Hz 66Hz 70Hz 66Hz 67 2Hz 25 175MHz 31 5MHz 31 5MHz 36 0MHz 40 0MHz 50 0MHz 49 5MHz 65 0MHz 75 0MHz 78 75MHz 108 0MHz 108 0MHz 108 0MHz 135 0MHz 28 3MHz 30 2MHz 57 3MHz 80 0MHz 100 0MHz 108 0MHz 135 0MHz 64 13MHz 70 4MHz 74 25MHz 94 88MHz 117 01MHz Recomme...

Page 24: ...andard for carrying out Plug Play functions on the monitor or PC It transfers information such as degree of resolution between the monitor and PC You can use this function if your PC is DDC compliant and if it is set so that it can detect the Plug Play monitor There are many varieties of DDC due to the differences between systems This monitor works with DDC1 and DDC2B Specifications DPMS mode Scre...

Page 25: ...mputer 4 Fold back the display section 1 If carrying out adjustments to the monitor place it upright 2 While pressing the rear lock disable button gently fold back the monitor Do not overly bend the cable or add extension cords as this could lead to malfunction 5 Being careful not to damage the monitor spread out a soft cloth and lay the monitor on it display side down Instructions for attaching a...

Page 26: ...26 ...

Page 27: ...2 Installieren der Setup Informationen und des ICC Profils für Windows 32 Informationen zum Profil ColorSync für MacOS 35 Einstellen der Bildschirmanzeige und der Lautsprecher Lautstärke 36 Einstellen der Hintergrundbeleuchtung 36 Einstellen der Lautsprecher Lautstärke 37 Einstellen des Farbmodus 37 Automatische Bildschirmeinstellung 37 Manuelle Bildschirmeinstellung 38 Pflege des Monitors und Rep...

Page 28: ...ßig starken Erhitzung mit der Folge eines Brandes führen könnte Das Netzkabel Beschädigen Sie das Netzkabel nicht stellen Sie keine schweren Gegenstände darauf und überdehnen oder knicken Sie es nicht Verwenden Sie keine Verlängerungskabel Ein beschädigtes Kabel kann einen Brand oder Stromschlag verursachen Verwenden Sie nur den im Lieferumfang des Monitors enthaltenen Netzadapter Die Verwendung e...

Page 29: ...tzschalter wieder aus 5 Betriebsanzeige Diese LED leuchtet im Betrieb grün und im Energiesparmodus orange 6 Lautsprecher Töne die über den Monitor und das an den Monitor angeschlossene externe Gerät eingehen sind hörbar 7 Audioanschluß Hier kann ein Audioausgangsanschluß des Computers angeschlossen werden Das mitgelieferte Audiokabel muß verwendet werden 8 Netzanschluß Hier wird der Netzadapter ei...

Page 30: ...tors Drücken Sie auf den Fuß und heben Sie den oberen Teil des Monitors an Zusammenklappen des Monitors 1 Trennen Sie die Netzadapter und Sie die Kabel ab 2 Wenn Sie Einstellungen am Monitor vornehmen stellen Sie ihn aufrecht hin 3 Drücken Sie die hintere Entriegelungstaste 1 und klappen Sie den Monitor dabei vorsichtig zusammen 2 1 2 Winkeleinstellung Auf einen angenehmen Betrachtungswinkel einst...

Page 31: ...estigen Sie am Analogsignalkabel einen Macintosh Umwandlungsadapter im Handel erhältlich Hinweise Wenn der Bildschirm eines angeschlossenen Notebooks so eingestellt ist daß er gleichzeitig angezeigt wird wird der MS DOS Bildschirm möglicherweise nicht einwandfrei angezeigt Ändern Sie in diesem Fall die Einstellungen so daß die Anzeige nur auf dem Monitor erfolgt Analogsignalkabel Analogen RGB ansc...

Page 32: ...m verwendeten Computertyp oder Betriebssystem können die Befehlsnamen und Verfahren von den hier beschriebenen abweichen Lesen Sie auch das Benutzerhandbuch Ihres Computers Informationen zum ICC Profil Ein ICC Profil International Color Consortium ist eine Datei in der die Farbeigenschaften des LCD Monitors beschrieben sind Durch Einsatz einer Anwendung die mit einem ICC Profil zusammenarbeitet lä...

Page 33: ... the drivers in a specific location so you can select the driver you want und dann auf Next Anschließen des Monitors und Ein und Ausschalten des Monitors 8 Wenn Models angezeigt wird klicken Sie auf Have disk bestätigen Sie daß neben Copy manufacturer s files from A angezeigt wird und klicken Sie dann auf OK 9 Bestätigen Sie daß die Monitordetails ausgewählt sind klicken Sie dann auf Next Next und...

Page 34: ...und klicken Sie auf Next 8 Wenn Models angezeigt wird klicken Sie auf Have disk bestätigen Sie daß neben Copy manufacturer s files from A angezeigt wird und klicken Sie dann auf OK 9 Wählen Sie die Monitordetails klicken Sie dann auf Next Next und auf Finish 10 Prüfen Sie ob die Monitordetails angezeigt werden und klicken Sie dann auf Apply Anschließen des Monitors und Ein und Ausschalten des Moni...

Page 35: ...ei Verwendung des ICC Profil setzen Sie COLOR MODE und WHITE BALANCE auf STD Anschließen des Monitors und Ein und Ausschalten des Monitors Informationen zum Profil ColorSync für MacOS Informationen zum Profil ColorSync ColorSync ist das Farbverwaltungssystem der Apple Corporation Damit erkennt das System die Farbauflösung bei Verwendung mit einer kompatiblen Anwendung Ein ColorSync Profil beschrei...

Page 36: ...Heben Sie die Einstell sperre auf bevor Sie die Steuertasten betätigen Zurücksetzen des Menüs ADJUSTMENT Die Einstellungen im Menü ADJUSTMENT CLOCK PHASE H POS V POS können auf die ursprünglichen Werkseinstellungen zurückgesetzt werden 1 Schalten Sie den Monitor ein 2 Drücken Sie gleichzeitig die Taste MENU und die Taste Wenn RESET auf dem Bildschirm angezeigt wird ist der Reset abgeschlossen Eins...

Page 37: ...g ausgeblendet Einstellen der Bildschirmanzeige und der Lautsprecher Lautstärke Automatische Bildschirmeinstellung Die Optionen im Menü ADJUSTMENT können automatisch eingestellt werden CLOCK PHASE H POS V POS Hinweis Wenn Sie den Monitor zum ersten Mal einrichten oder eine Komponente des bestehenden Systems geändert haben führen Sie vor der Verwendung eine automatische Bildschirmeinstellung durch ...

Page 38: ...ng ist eventuell nicht möglich Wenn OUT OF ADJUST angezeigt wird Wenn auf dem Bildschirm ein ganz dunkles Bild angezeigt wird ist die automatische Bildschirmjustierung möglicherweise deaktiviert Vergewissern Sie sich beim Ausführen einer automatischen Einstellung daß entweder das Einstellmuster verwendet wird oder versuchen Sie ein Bild anzuzeigen das den gesamten Bildschirm sehr hell erscheinen l...

Page 39: ... 1 2 8 0 X 1 0 2 4 V 6 0 H z H 6 4 0 k H z MANUAL Einzelne Menüoptionen werden manuell eingestellt AUTO Alle Menüoptionen werden mit der Funktion Auto Gain Control automatisch eingestellt Hinweise Drücken Sie die Taste um AUTO auszuwählen So wählen Sie eine Menüoption Taste MODE So gelangen Sie zum nächsten Menü Taste MENU Funktion Auto Gain Control Die Funktion Auto Gain Control justiert den Kont...

Page 40: ... 0 X 1 0 2 4 V 6 0 H z H 6 4 0 k H z Hinweise Abhängig von der Auflösung des Eingangssignals ändert sich die Anzeige eventuell selbst dann nicht wenn die Menüoptionen ausgewählt werden können So wählen Sie eine Menüoption Taste MODE Nach Abschluß der Einstellung Taste MENU OSD H POSITION OSD horizontale Position Die Position der OSD Anzeige kann nach links und rechts verschoben werden Tasten OSD V...

Page 41: ...ehr leuchtet muß die Leuchtstoffröhre evtl erneuert werden Wenden Sie sich an das Geschäft in dem Sie den Monitor gekauft haben oder an das nächste autorisierte Sharp Kundendienst zentrum Nehmen Sie diesen Austausch niemals selber vor Am Anfang kann aufgrund der Eigenschaften der Leuchtstoffröhre Flimmern auftreten Es handelt sich dabei nicht um eine Funktionsstö rung Schalten Sie in diesem Fall p...

Page 42: ... gesamte Bildschirmgröße Plug Play VESA DDC1 DDC2B kompatibel Power Management VESA basiert auf DPMS Lautsprecherausgang 1W 1W Eingangssignalanschluß 15poliger Mini D Sub Anschluß 3 Reihen Audioanschluß Mini Stereobuchse Bildschirmneigung nach oben ca 0 20 nach unten ca 0 5 Bildschirmdrehung Ca 90 von links nach rechts Drehteller Stromversorgung 100 240 VAC 50 60 Hz mit Spezialnetzadapter Typ NL A...

Page 43: ...ne Auflösung ist 1280 x 1024 Alle nur mit Non Interlace Die Frequenzen für die Serien Power Macintosh und Sun Ultra sind lediglich Referenzwerte Für den Anschluß ist evtl ein anderer Adapter im Handel erhältlich notwendig Wenn der Monitor Taktsignale empfängt die nicht kompatibel sind wird OUT OF TIMING angezeigt Stimmen Sie den Takt anhand der Anweisungen im Computer Benutzerhandbuch auf den Moni...

Page 44: ... SUSPEND Anzeige aus 3W Ja Nein OFF Nein Nein DDC Plug Play Dieser Monitor unterstützt den Standard VESA DDC Display Data Channel DDC ist ein Signalstandard zum Ausführen von Plug Play Funktionen am Monitor oder PC Er überträgt Informationen beispielsweise den Auflösungsgrad zwischen dem Monitor und dem PC Sie können diese Funktion anwenden wenn Ihr PC DDC kompatibel und so gesetzt ist daß er den ...

Page 45: ...yteil nach hinten klappen 1 Wenn Sie Einstellungen am Monitor vornehmen stellen Sie ihn aufrecht hin 2 Drücken Sie die hintere Entriegelungstaste und klappen Sie den Monitor dabei vorsichtig zusammen Entriegelungstaste Überdehnen Sie das Kabel nicht und schließen Sie kein Verlängerungskabel an da dies Funktionsstörungen hervorrufen kann 5 Achten Sie dabei darauf daß der Monitor nicht beschädigt wi...

Page 46: ...46 ...

Page 47: ...2 Installation des fichiers relatifs au paramétrage du moniteur et au profil ICC pour Windows 52 Informations sur le profil ColorSync pour MacOS 55 Réglage de l image au moniteur et volume des haut parleurs 56 Réglage du rétro éclairage 56 Réglage du volume des haut parleurs 57 Réglage du mode couleur 57 Réglage automatique de l image 57 Réglage manuel de l image 58 Entretien et réparation du moni...

Page 48: ...a peut mener à des dégagements excessifs de chaleur et conduire à un début d incendie Le cordon d alimentation électrique Ne pas endommager le cordon d alimentation ne pas déposer d objets lourds sur le cordon ne pas l étendre ni le plier de manière excessive Ne pas y ajouter de rallonge non plus Tout endommagement au cordon d alimentation peut entraîner un début d incendie ou des chocs électrique...

Page 49: ...n Cette diode est éclairée en vert lorsque le moniteur est en cours d utilisation et en orange lorsqu il se trouve en mode veille économie d énergie 6 Haut parleurs Les signaux audio entrant via le moniteur et via un appareil extérieur connecté au moniteur peuvent être écoutés 7 Borne audio La borne de sortie audio d un ordinateur peut y être connectée Le câble audio fourni doit être utilisé 8 Bor...

Page 50: ...upérieure du moniteur Repliement du moniteur 1 Enlever l adaptateur secteur et câble 2 Si des réglages sont apportés au moniteur il convient de placer celui ci à la verticale 3 Tout en enfonçant le bouton arrière de déblocage du verrouillage 1 replier doucement le moniteur 2 1 2 Réglage de l inclinaison Trouver l inclinaison idéale pour bien voir Ne pas utiliser le moniteur avec une inclinaison ve...

Page 51: ...osh en vente dans le commerce sur le câble de signal analogique Câble du signal analogique Borne de analogique RVB mini D sub à 15 broches sur 3 rangées Adaptateur de conversion Macintosh Remarque En cas de raccordement à un ordinateur portable si l écran de ce dernier est réglé de façon à afficher en même temps l écran MS DOS peut ne pas s afficher correctement Dans ce cas modifier les paramètres...

Page 52: ...t le cas il convient de procéder comme suit pour installer sur l ordinateur les fichiers relatifs à la configuration du moniteur Le nom des commandes et les procédures peuvent varier en fonction du type d ordinateur ou du système d exploitation Veiller à suivre le propre mode d emploi de l ordinateur tout en lisant ce qui suit A propos du profile ICC Le profil ICC International Color Consortium es...

Page 53: ... s files from est A et ensuite cliquer sur OK 9 Confirmer la sélection des caractéristiques du moniteur et ensuite cliquer sur Next Next et Finish Raccordement activation et désactivation du moniteur 10 S assurer que le moniteur diffuse une image ensuite cliquer sur Apply 11 Cliquer sur OK et refermer la fenêtre 12 Enlever la disquette utilitaire du lecteur A Pour Windows 2000 Installation des fic...

Page 54: ...lications qui suivent considèrent que le lecteur de disquettes est le lecteur A 1 Placer la disquette utilitaire dans le lecteur A de l ordinateur 2 Cliquer sur le bouton Start Sélectionner Control Panel 3 Commutation sur Classic View 4 Double cliquer sur Display Raccordement activation et désactivation du moniteur 5 Cliquer sur Settings sur Advanced et sur Monitor 6 Cliquer sur Properties sur Dri...

Page 55: ...rs de l utilisation du profil ColorSync régler COLOR MODE et WHITE BALANCE sur STD Configuration du profil ColorSync Remarques Un lecteur de disquette est nécessaire De plus PC Exchange ou File Exchange doit être installé sur votre ordinateur Le nom des commandes et les procédures peuvent varier en fonction du type d ordinateur ou du système d exploitation Veiller à suivre le propre mode d emploi ...

Page 56: ...e tenter d utiliser les boutons de commande R A Z du menu ADJUSTMENT Les paramètres de réglage du menu ADJUST MENT CLOCK PHASE H POS V POS peuvent revenir à leurs valeurs initiales définies en usine 1 Mettre l ordinateur sous tension 2 Presser simultanément les boutons MENU et ainsi que le bouton d alimentation Lorsque RESET apparaît à l écran du moniteur le retour aux valeurs initiales est exécut...

Page 57: ...la dernière opération Réglage de l image au moniteur et volume des haut parleurs Réglage automatique de l image Les options du menu ADJUSTMENT peuvent être effectués automatiquement CLOCK PHASE H POS V POS Remarque Lors de la toute première installation du moniteur ou après avoir changé un des paramètres de la configuration du système effectuer un réglage automatique de l écran avant de commencer ...

Page 58: ...se peut que le réglage automatique soit impossible Lorsque OUT OF ADJUST est affiché Lorsque le moniteur affiche une image complètement noire il se peut que le réglage automatique de l écran ne soit pas opérationnel Lors de la réalisation d un réglage automatique veiller soit à utiliser le modèle de réglage soit à essayer d afficher une image très claire Il peut ne pas être possible de réaliser un...

Page 59: ...z H 6 4 0 k H z MANUEL Les options individuelles du menu sont réglées manuellement AUTO Chaque option du menu est automatiquement réglée via la fonction de Auto Gain Control Remarques Presser le bouton pour sélectionner AUTO Pour choisir une option du menu Bouton MODE Pour passer au menu suivant Bouton MENU Fonction de réglage automatique des couleurs La commande du réglage automatique des couleur...

Page 60: ...L I NE S 640 720 L A NGUAGE 1 2 8 0 X 1 0 2 4 V 6 0 H z H 6 4 0 k H z Remarques En fonction de la résolution du signal d entrée même si les options peuvent être sélectionnées l affichage ne peut pas être modifié Pour choisir une option du menu Bouton MODE Lorsque le réglage est terminé Bouton MENU OSD H POSITION positionnement horizontal OSD Le positionnement de l affichage OSD peut être modifié v...

Page 61: ...lus il peut s avérer nécessaire de remplacer la lampe de rétroéclairage Se renseigner auprès du revendeur ou du mainteneur agréé Sharp le plus proche Ne jamais tenter d effectuer ce remplacement soi même Au début de l utilisation en raison de la conception des lampes de rétroéclairage il se peut que l écran scintille Il ne s agit pas d un dysfonctionnement Si cela se produit essayer d abord d étei...

Page 62: ...mpatible Gestion de l alimentation VESA basé sur le DPMS Sortie des enceintes 1W 1W Raccordement entrées vidéo Mini D sub 15 broches sur 3 rangées Fiche audio Mini prise stéréo Inclinaison du moniteur Vers le haut approx 0 20 Vers le bas approx 0 5 Rotation du moniteur Approx 90 de gauche à droite de type platine tournante Alimentation AC100 240V 50 60Hz utiliser un adaptateur secteur spécial type...

Page 63: ...s fréquences pour les séries Macintosh et Sun Ultra sont des valeurs de référence Pour le raccordement un autre adaptateur en vente dans le commerce peut être nécessaire Si le moniteur reçoit des signaux de fréquence non compatibles le message OUT OF TIMING apparaîtra Suivre le mode d emploi de l ordinateur utilisé pour régler la fréquence de manière à ce qu elle soit compatible avec le moniteur S...

Page 64: ... Suspendu désactivé 3W Oui Non Désactivé Non Non DDC Plug Play Ce moniteur supporte la norme VESA DDC Display Data Channel Le DDC est une norme de signal servant à exécuter les fonctions Plug Play sur un moniteur ou un ordinateur Il transfère des informations telles que le degré de résolution entre le moniteur et l ordinateur Il est possible d utiliser cette fonction si l ordinateur utilisé est co...

Page 65: ...nal analogique et le câble audio de l ordinateur 4 Relever l écran 1 Si des réglages sont apportés au moniteur il convient de placer celui ci à la verticale 2 Tout en enfonçant le bouton arrière de déblocage du verrouillage replier doucement le moniteur Bouton de déblocage Ne pas courber le câble de manière excessive ni y ajouter de rallonge car cela peut conduire à un dysfonctionnement 5 Tout en ...

Page 66: ...66 ...

Page 67: ...rmazioni per il setup e del profilo ICC per Windows 72 Informazioni sul profilo ColorSync per MacOS 75 Regolazione della visualizzazione sullo schermo e volume dell altoparlante 76 Regolazione della retroilluminazione 76 Regolazione del volume dell altoparlante 77 Impostazione della modalità del colore 77 Regolazione automatica dello schermo 77 Regolazione manuale dello schermo 78 Cura e riparazio...

Page 68: ...one di calore ed allo scoppio di un incendio Il cavo di alimentazione rete Non danneggiate il cavo alimentazione rete non mettete degli oggetti pesanti su di esso non tiratelo e non piegatelo eccessivamente Non aggiungete inoltre dei cavi di prolunga Danni al cavo possono dare luogo ad incendi o folgorazioni Usate solo l adattatore AC fornito con il monitor Usando un adattatore per corrente altern...

Page 69: ...tazione Questo LED è illuminato in verde durante l uso ed in arancione nel modo risparmio energetico 6 Altoparlanti l entrata dell audio attraverso il monitor ed il dispositivo esterno collegato al monitor si può sentire 7 Terminale audio Il terminale audio di un computer oppure si possono collegare qui Si dovrebbe usare il cavo audio accluso 8 Terminale di alimentazione Collegate l adattatore AC ...

Page 70: ...d alzate la sezione superiore del monitor Ripiegare il monitor 1 Rimuovete l adattatore AC e cavo 2 Se eseguite delle regolazioni sul monitor dispone telo verticalmente 3 Mentre premete il pulsante per disattivare lo sbloccaggio posteriore 1 ripiegate delicatamente indietro il monitor 2 1 2 Regolazione dell angolazione Regolare su un angolazione comoda per la vista Non usate il monitor inclinato a...

Page 71: ...tosh da acquistare in commercio al cavo del segnale analogico Note Quando collegate ad un notebook se lo schermo del computer del notebook è impostato in modo da visualizzare contemporaneamente lo schermo MS DOS potrebbe non essere in grado di visualizzare correttamente In questo caso modificate le impostazioni in modo che solo il monitor visualizzi Cavo del segnale analogico Terminale di analogic...

Page 72: ...stema operativo i nomi dei comandi ed i metodi possono essere differenti Per favore seguite il manuale operativo proprio del computer mentre leggete questo Il profilo ICC Un profilo ICC International Color Consortium è un file che descrive le caratteristiche cromatiche del monitor LCD Utilizzando un applicazione che funziona con un profilo ICC si può realizzare un elevata risoluzione del colore Wi...

Page 73: ... la finestra 12 Rimuovete il Disco delle Utilità dal drive A Per Windows2000 Installazione delle imformazioni di setup del monitor in Windosw2000 e impostazione del profilo ICC del monitor come valore predeterminato I messaggi di Windows citati nelle istruzioni per l uso che seguono si basano sulla versione inglese di Win dows In questa spiegazione si parte dall ipotesi che l unità per dischetti f...

Page 74: ... A del computer 2 Fate clic sul pulsante Start Scegliete Control Panel 3 Cambia in Classic View 4 Fate doppio clic su Display 5 Fate clic su Settings Advanced e Monitor 6 Fate clic su Properties Driver e Update Driver 7 Quando appare Hardware Update Wizard spuntate Install from a list or specific location Advanced fate clic su Next 8 Spuntate Don t search I will choose the driver to install e fate...

Page 75: ...postazione del profilo ColorSync Notes Un drive per dischetti floppy è necessario E inoltre necessario avere PC Exchange oppure File Exchange installato nel vostro sistema A seconda del tipo di computer oppure del sistema operativo i nomi dei comandi ed i metodi possono essere differenti Per favore seguite il manuale operativo proprio del computer mentre leggete questo 1 Inserite il Disco delle Ut...

Page 76: ...e Rimuovete il blocco delle regolazioni prima di tentare di far funzionare i tasti di controllo Reset del menu ADJUSTMENT REGOLAZIONE I valori predisposti per le voci CLOCK PHASE H POS V POS del menu ADJUSTMENT REGOLAZIONE possono essere riportati ai valori iniziali di fabbrica 1 Accendete l alimentazione del monitor 2 Premete il tasto MENU ed il tasto simultaneamente Quando sullo schermo appare R...

Page 77: ...o e volume dell altoparlante Regolazione automatica dello schermo Le opzioni nel menu ADJUSTMENT REGOLAZIONE si possono regolare automaticamente CLOCK PHASE FASE H POS V POS Note Quando impostate questo monitor per la prima volta oppure dopo aver cambiato un aspetto del sistema corrente prima dell uso eseguite una regolazione automatica dello schermo Display della regolazione automatica dello sche...

Page 78: ...magine completamente scura la regolazione automatica dello schermo può essere disattivata Quando eseguite una regolazione automatica assicura tevi di usare il monoscopio oppure tentate di visualizzare un immagine che rende lo schermo molto luminoso La regolazione automatica potrebbe non essere ottenuta correttamente a seconda di quanto è visualizzato sullo schermo immagini in movimento o la richie...

Page 79: ...L le singole opzioni del menu vengono regolate manualmente AUTO ogni opzione del menu viene regolata automaticamente utilizzando la funzione Auto Gain Control Notes Premete il tasto per selezionare AUTO Per selezionare un opzione di menu Tasto MODE Per passare al menu successivo Tasto MENU Auto Gain Control function funzione controllo automatico del guadagno Il Controllo automatico del guadagno re...

Page 80: ...AGE 1 2 8 0 X 1 0 2 4 V 6 0 H z H 6 4 0 k H z Notes A seconda della risoluzione del segnale di input anche se si possono selezionare delle opzioni di menu il display potrebbe non cambiare Per selezionare un opzione di menu Tasto MODE Quando la regolazione è stata completata Tasto MENU OSD H POSITION posizione orizzontale dell OSD La posizione del display dell OSD si può spostare verso sinistra e v...

Page 81: ...à tubo fluorescente Per favore informatevi presso il negozio dal quale avete acquistato il monitor oppure dal Centro del Servizio Tecnico Assi stenza Clienti della Sharp più vicino a voi Non tentate mai di eseguire la sostituzione da voi Nel periodo iniziale del loro uso a causa delle caratteristiche dei tubi fluorescenti lo schermo potrebbe presentare uno sfarfallamento Questo non è un difetto de...

Page 82: ...ermo di grandi dimensioni Plug Play VESA Compatibile DDC1 DDC2B Gestione dell energia VESA basata su DPMS Uscita altoparlanti 1W 1W Terminale del segnale di ingresso 15 pin mini D sub 3 file Terminale audio Jack stereo mini Inclinazione dello schermo Verso l alto circa 0 20 verso il basso circa 0 5 Rotazione dello schermo Circa 90 da sinistra a destra tipo a piattaforma girevole Alimentazione AC10...

Page 83: ...ono valori di riferimento Per collegare potrebbe essere necessario un altro adattatore da acquistare in commercio Se il monitor riceve dei segnali di sincronismo che non sono compatibili verrà visualizzato OUT OF TIMING Seguite il manuale di istruzioni del vostro computer per impostare il sincronismo in modo da renderlo compatibile con quello del monitor Se il monitor non riceve nessun segnale seg...

Page 84: ...ata Channel DDC è uno standard per i segnali per eseguire le funzioni Plug Play sul monitor o sul PC Esso trasferisce delle informazioni come il grado di risoluzione tra il monitor ed il PC Potete utilizzare questa funzione se il vostro PC è conforme al DDC e se è impostato in modo da rilevare il monitor Plug Play Vi sono molte varietà di DDC dovute alle differenze tra i sistemi Questo monitor fun...

Page 85: ...io 4 Richiudere lo schermo 1 Se eseguite delle regolazioni sul monitor disponetelo verticalmente 2 Mentre premete il pulsante per disattivare lo sbloccaggio posteriore ripiegate delicatamente indietro il monitor Tasto di disattivazione del bloccaggio Non curvate eccessivamente il cavo e non aggiungete delle prolunghe in quanto ciò può dar luogo a difetti di funzionamento 5 Facendo attenzione a non...

Page 86: ...86 ...

Page 87: ... de configuración y del perfil ICC para Win dows 92 Información acerca del perfil ColorSync para MacOS 95 Ajuste de la pantalla y volumen del altavoz 96 Regulación de la retroiluminación 96 Ajuste del volumen del altavoz 97 Configuración del modo de color 97 Ajuste automático de la pantalla 97 Ajuste manual de la pantalla 98 Conservación y reparación del monitor 101 Conservación del monitor 101 Al...

Page 88: ...vo y provocar un incendio El cable de alimentación No deteriore el cable de alimentación ni coloque objetos pesados sobre el mismo ni lo estire o doble excesivamente No utilice tampoco cables de prolongación Si el cable de alimentación se daña puede provocar un incendio o una descarga eléctrica Utilice únicamente el adaptador de CA suministrado con el monitor El uso de un adaptador de CA distinto ...

Page 89: ... LED se ilumina de color verde cuando el monitor se encuentra en uso y naranja cuando se encuentra en el modo de ahorro de energía 6 Altavoces El audio entra a través del monitor y se puede oír el dispositivo externo conectado al monitor 7 Borne de audio Aquí se puede conectar un borne de salida de audio de un ordenador Debe usarse el cable de audio incluido 8 Borne de alimentación El adaptador de...

Page 90: ...ón sobre la base y levante la sección superior del monitor Bajada del monitor 1 Retire el adaptador de CA y cable 2 Si va a ajustar el monitor colóquelo en posición vertical 3 Al tiempo que presiona el botón de desbloqueo posterior 1 baje con cuidado el monitor 2 1 2 Ajuste de ángulo Ajuste un ángulo adecuado para ver la imagen con comodidad No utilice el monitor estando inclinado hacia atrás más ...

Page 91: ...able de señal analógica Nota Si la conexión es a un ordenador portátil y la pantalla del portátil está configurada de modo que funcione al mismo tiempo puede que la pantalla de MS DOS no se vea correctamente En este caso cambie la configuración de modo que sólo se vea el monitor Conexión del monitor y encendido apagado del mismo Cable de señal analógica Borne de analógica RGB D sub 15 vías 3 hiler...

Page 92: ...uera siga los pasos que se indican a continuación para instalar la información de configuración del monitor Dependiendo del tipo de ordenador o de sistema operativo los nombres de los comandos y los procedimientos a seguir podrían ser diferentes Siga el manual de uso propio del ordenador mientras lee esto Acerca del perfil ICC Un perfil ICC Consorcio Internacional de Color es un archivo en el que ...

Page 93: ...inuación haga clic sobre Next Next y Finish 10 Compruebe que el monitor está funcionando y a continuación haga clic en Apply 11 Haga clic sobre OK y cierre la ventana 12 Retire el Disquete de utilidades de la unidad A Para Windows2000 Instalación de la información de configuración del monitor en Windows2000 y configuración del perfil ICC del monitor como valor predeterminado Los mensajes de Window...

Page 94: ...l Panel 3 Cambie a Classic View 4 Haga doble clic en Display 5 Haga clic en Settings Advanced y Monitor 6 Haga clic sobre Properties Driver y Update Driver 7 Cuando aparezca el Asistente Hardware Update Wizard Compruebe Install from a list or specific location Advanced haga clic sobre Next 8 Compruebe Don t search I will choose the driver to install y haga clic sobre Next 9 Haga clic en Have disk ...

Page 95: ...ALANCE en STD Configuración del perfil ColorSync Notas Debe tener una unidad de disquetes También debe tener PC Exchange o File Exchange instalados en el sistema Dependiendo del tipo de ordenador o de sistema operativo los nombres de los comandos y los procedimientos a seguir podrían ser diferentes Siga el manual de uso propio del ordenador mientras lee esto 1 Introduzca el Disquete de utilidades ...

Page 96: ...o de ajustes antes de utilizar los botones de control Puesta a cero de menú de AJUSTE ADJUSTMENT Los valores de ajuste del menú AJUSTE ADJUST MENT CLOCK PHASE H POS y V POS pueden restaurarse a sus valores originales de fábrica 1 Encienda el monitor 2 Pulse al mismo tiempo los botones MENU y Cuando RESET aparece en la pantalla significa que la reposición ha finalizado Función de bloqueo de ajustes...

Page 97: ...opciones del Menú ADJUSTMENT CLOCK PHASE H POS V POS se pueden ajustar automáticamente Nota Al configurar por primera vez el monitor o un ordenador conectado conectar un ordenador adicional o tras haber modificado cualquier aspecto del sistema actual lleve a cabo un ajuste automático de la pantalla antes de utilizarla Máscara en pantalla para el ajuste automático Para llevar a cabo un ajuste autom...

Page 98: ... ajuste automático de la pantalla puede estar deshabilitado Al realizar un ajuste automático asegúrese de utilizar bien la Carta de ajuste o bien intentar que aparezca una imagen que ponga toda la pantalla muy clara El ajuste automático puede que no se realice correctamente dependiendo de lo que se visualiza en la pantalla imágenes en movimiento indicación MS DOS etc Ajuste manual de la pantalla L...

Page 99: ...ST 66 1 2 8 0 X 1 0 2 4 V 6 0 H z H 6 4 0 k H z MANUAL Las diferentes opciones del menú se ajustan manualmente AUTO Cada opción del menú se ajusta automáticamente con la función Control Automático de la Ganancia Notas Pulse el botón para seleccionar AUTO Para seleccionar una opción del menú Botón MODE Para pasar al siguiente menú Botón MENU Función Control Automático de Ganancia La función Control...

Page 100: ...ción de la señal de entrada la pantalla puede no cambiar incluso si pueden seleccionarse las opciones del menú Para seleccionar una opción del menú Botón MODE Una vez finalizados los ajustes Botón MENU OSD H POSITION posición horizontal OSD La posición de la pantalla OSD puede desplazarse hacia la izquierda y hacia la derecha botones OSD V POSITION posición vertical OSD La posición de la pantalla ...

Page 101: ...u proveedor o al servicio autorizado de asistencia técnica de Sharp más cercano No intente jamás hacer usted mismo este cambio Debido a las características de los tubos fluorescentes la pantalla puede reverberar durante el período inicial de uso No se trata de una anomalía Si esto ocurriera intente en primer lugar solucionar el problema apagando y encendiendo el monitor de nuevo Si no se ve ningun...

Page 102: ...DC1 DDC2B compatible Gestión de energía VESA basada en DPMS Salida de altavoces 1W 1W Borne de señales de entrada Mini D sub de 15 vías 3 hileras Borne de audio Clavija estéreo mini Inclinación de pantalla Hacia arriba aprox 0 20 Hacia abajo aprox 0 5 Giro de pantalla Aprox 90 de izquierda a derecha tipo plataforma giratoria Suministro eléctrico CA100 240V 50 60Hz Uso de un adaptador de CA especia...

Page 103: ...compatibles únicamente con non interlace Las frecuencias para las series Power Macintosh y Sun Ultra son sólo valores de referencia Para establecer la conexión puede que sea necesario otro adaptador de venta en el comercio Si el monitor recibe señales de sincronización que no son compatibles aparecerá OUT OF TIMING Consulte el manual de instrucciones de su ordenador para ajustar la sincronización ...

Page 104: ...W Sí No OFF No No DDC Plug Play Este monitor soporta el estándar VESA DDC Display Data Channel DDC es un estándar de señalización para la ejecución de las funciones Plug Play en el monitor o PC Transmite información tal como el grado de resolución entre el monitor y el PC Puede utilizar esta función si su ordenador tiene compatibilidad DDC y si está configurado de modo que pueda detectar el monito...

Page 105: ...r el monitor colóquelo en posición vertical 2 Al tiempo que presiona el botón de desbloqueo posterior baje con cuidado el monitor Botón de desbloqueo No doble excesivamente el cable ni utilice cables de prolongación ya que ello podría llevar a un funcionamiento anómalo 5 Con mucho cuidado de no dañar el monitor extienda un paño suave y ponga el monitor sobre él con la parte de la pantalla mirando ...

Page 106: ...106 ...

Page 107: ...107 English Deutsch Français Italiano Español 108 109 111 111 111 112 112 ICC Windows 112 ColorSync MacOS 115 116 116 117 COLOR MODE 117 117 118 121 121 121 121 122 VESA 125 ...

Page 108: ... 0NIT15V1 0056 LL T17A3 H 0NIT17A3 0115 LL T17A3 B 1 0NIT17A3 0010 LL T17A3 H 0NIT17A3 0116 LL T17A3 B Windows Macintosh 1 1 0123 01 012 01 0 0123 0 WindowsXP XP WindowsMe Windows2000 2000 Windows98 98 Windows95 95 Windows3 1 3 1 Windows Microsoft Windows Microsoft Corporation Macintosh Apple Computer Inc ...

Page 109: ...sh Deutsch Français Italiano Español 7 5 4 3 2 1 8 9 11 6 10 12 1 MENU OSD On Screen Display 2 MODE OSD OSD COLOR MODE 3 OSD 0 OSD 4 01234567 5 012 3456 6 012 345 7 0 1 8 9 RGB 10 Kensington Micro Saver 11 12 0 ...

Page 110: ...110 0123 01 0 1 2 3 1 2 1 2 20 0 20 20 45 45 5 5 ...

Page 111: ...111 English Deutsch Français Italiano Español 0 12 0 01 D sub 15 Apple Power Macintish Macintosh MS DOS 0 Macintosh 1 2 RGB 15 D sub 3 ...

Page 112: ... Windows2000 WindowsXP ICC Windows98 WindowsMe Windows2000 WindowsXP ICC ICC 115 ICC ICC COLOR MODE WHITE BALANCE STD Windows95 Windows95 012 Windows A 1 A 2 Start Settings Control Panel 3 Display 4 Settings Advanced Properties Monitor Change 5 Have disk Copy manufacturer s files from A OK 6 0 OK 7 0 Apply 8 OK 9 A ...

Page 113: ...ext 7 Display a list of all the drivers in a specific location so you can select the driver you want Next 8 Models Have disk Copy manufacturer s files from A OK 9 Next Next Finish 10 Apply 11 OK 12 A Windows2000 Windows2000 ICC 012 Windows A 1 A 2 Start Settings Control Panel 3 Display 4 Settings Advanced Monitor 5 Properties Driver Update Driver 6 Upgrade Device Driver Wizard Next 7 Display a lis...

Page 114: ... driver Advanced Next 7 Display a list of all the drivers in a specific location so you can select the driver you want Next 8 Models Have disk Copy manufacturer s files from A OK 9 Next Next Finish 10 0 Apply 11 OK 12 A WindowsXP WindowsXP ICC 012 Windows A 1 A 2 Start Control Panel 3 Classic View 4 Display 5 Settings Advanced Monitor 6 Properties Driver Update Driver 7 Hardware Update Wizard Inst...

Page 115: ...ALANCE STD ColorSync 012 PC Exchange PC File Exchange 0123 1 2 Mac ColorSync 3 ColorSync ICC ICC ICC 012 Windows A 1 A 2 Start Settings Control Panel 3 Display 4 Settings Advanced 5 General Compatibility Apply the new display setting without restarting Color Management 6 Add 31 2 Floppy A 31 2 A 7 Add 8 Set As Default 9 OK 10 A ICC COLOR MODE WHITE BALANCE STD ...

Page 116: ...POS 118 OSD 0123 01234 1 2 MENU MODE ALL RESET 0 ALL RESET 01 01 ADJUSTMENT ADJUSTMENT CLOCK PHASE H POS V POS 1 2 MENU RESET 0 1 2 MENU ADJUSTMENT LOCKED 01 1 2 MENU ADJUSTMENT UNLOCKED 1 OSD VOLUME 80 BRIGHT 31 SELECT MODE 2 BRIGHT MODE BRIGHT 3 0 ...

Page 117: ... sRGB sRGB IEC 01 VIVID VIVID COLOR MODE sRGB VIVID ADJUSTMENT WHITE BALANCE STD ADJUSTMENT MODE 0 STD sRGB VIVID STD 01 ADJUSTMENT CLOCK PHASE H POS V POS 012 012 0123 Windows Windows Windows 012 Windows Windows 95 98 2000 Me XP A A 0 A A 1 A 2 My Computer 31 2 Floppy A 31 2 A Windows 3 1 File Manager A 3 Adj_uty exe Esc 65K ...

Page 118: ...USTING ADJUSTMENT 3 4 MENU OSD 012 012 2 3 012 Composite Sync Sync On Green OUT OF ADJUST 012 0 012 MS DOS On Screen Display 1 Windows 117 2 MENU ADJUSTMENT ADJ USTMENT MANUAL AUTO CLOCK 127 PHASE 16 H POS 200 V POS 29 1 2 8 0 X 1 0 2 4 V 6 0 H z H 6 4 0 k H z MENU ADJUSTMENT GAIN CONTROL WHITE BALANCE MODE SELECT OSD 30 OSD Windows ...

Page 119: ... H z H 6 4 0 k H z MANUAL AUTO AUTO MODE MENU CLOCK PHASE CLOCK PHASE H POS V POS 0123 H POS V POS GAIN CONTROL GA I N CONTROL MANUAL AUTO B L ACK LEVEL 32 CONTRAST 66 1 2 8 0 X 1 0 2 4 V 6 0 H z H 6 4 0 k H z MANUAL AUTO AUTO MODE MENU 01 5 5 01 composite sync sync on green 0 OUT OF ADJUST WHITE BALANCE USER USER BLACK LEVEL 012 CONTRAST 012 ...

Page 120: ...AST G CONTRAST B CONTRAST MENU COOL STD WARM USER R CONTRAST G CONTRAST B CONTRAST MODE SELECT MODE SELECT OS D H POS I T I ON OS D V POS I T I ON S C AL I NG 3 I N P U T VESA MAC 4 0 0 L I NE S 640 720 L A NGUAGE 1 2 8 0 X 1 0 2 4 V 6 0 H z H 6 4 0 k H z 0123 MODE MENU OSD H POSITION OSD OSD V POSITION OSD SCALING 1280 1024 01 INPUT Power Macintosh MAC 400 LINES US 400 640 640 400 720 720 400 US ...

Page 121: ...121 English Deutsch Français Italiano Español 01 01 01 23 012 0 0 012 01234 0123 01234 01234 012 01 111 111 0 123 116 0 123 117 01 111 117 0 01 2 0123 0 0123 0123 5 110 ...

Page 122: ... FRC 250 2 0 264 0 264 500 1 160 135 337 9 270 3 RGB 0 7 75Ω TTL TTL VGA SVGA XGA Plug Play VESA DDC1 DDC2B VESA DPMS 1 1 15 D sub 3 0 20 0 5 90 100 240 50 60 NL A64J 5 35 44 3 398 188 376 6 5 398 61 5 344 376 239 188 1 5 147 59 32 1 8 1 8 ...

Page 123: ...8 3 53 6 56 6 61 8 71 7 60 72 75 56 60 72 75 60 70 75 75 60 60 75 70 66 7 74 6 75 75 60 75 60 66 70 66 67 2 25 175 31 5 31 5 36 0 40 0 50 0 49 5 65 0 75 0 78 75 108 0 108 0 108 0 135 0 28 3 30 2 57 3 80 0 100 0 108 0 135 0 64 13 70 4 74 25 94 88 117 01 1280x1024 Power Macintosh SUN Ultra 0 012 OUT OF TIMING 0 synch signal NO SIGNAL 15 D sub 5 1 2 3 4 10 6 7 8 9 15 11 12 13 14 Power Macintosh VESA ...

Page 124: ... VESA DPMS Display Power Management Signaling Power Management VESA DPMS DDC Plug Play VESA DDC Display Data Channel DDC PC Plug Play 01234 PC DDC Plug Play DDC DDC1 DDC2B DPMS ON 44 STANDBY SUSPEND 3 OFF ...

Page 125: ...125 English Deutsch Français Italiano Español VESA VESA 01 VESA 100 100 01 1 2 3 4 1 0 2 5 012 6 4 01 7 10 M4 0123 7 7 10 ...

Page 126: ...126 ...

Page 127: ...127 M E M O ...

Page 128: ...128 M E M O ...

Page 129: ...129 M E M O ...

Page 130: ...130 M E M O ...

Page 131: ......

Page 132: ...SHARP CORPORATION 2002 SHARP CORPORATION Printed in Taiwan P N 0NIT17A3 0111 1925 1300 4150 ...

Reviews: