GB
22
Auto Installation
Preparation
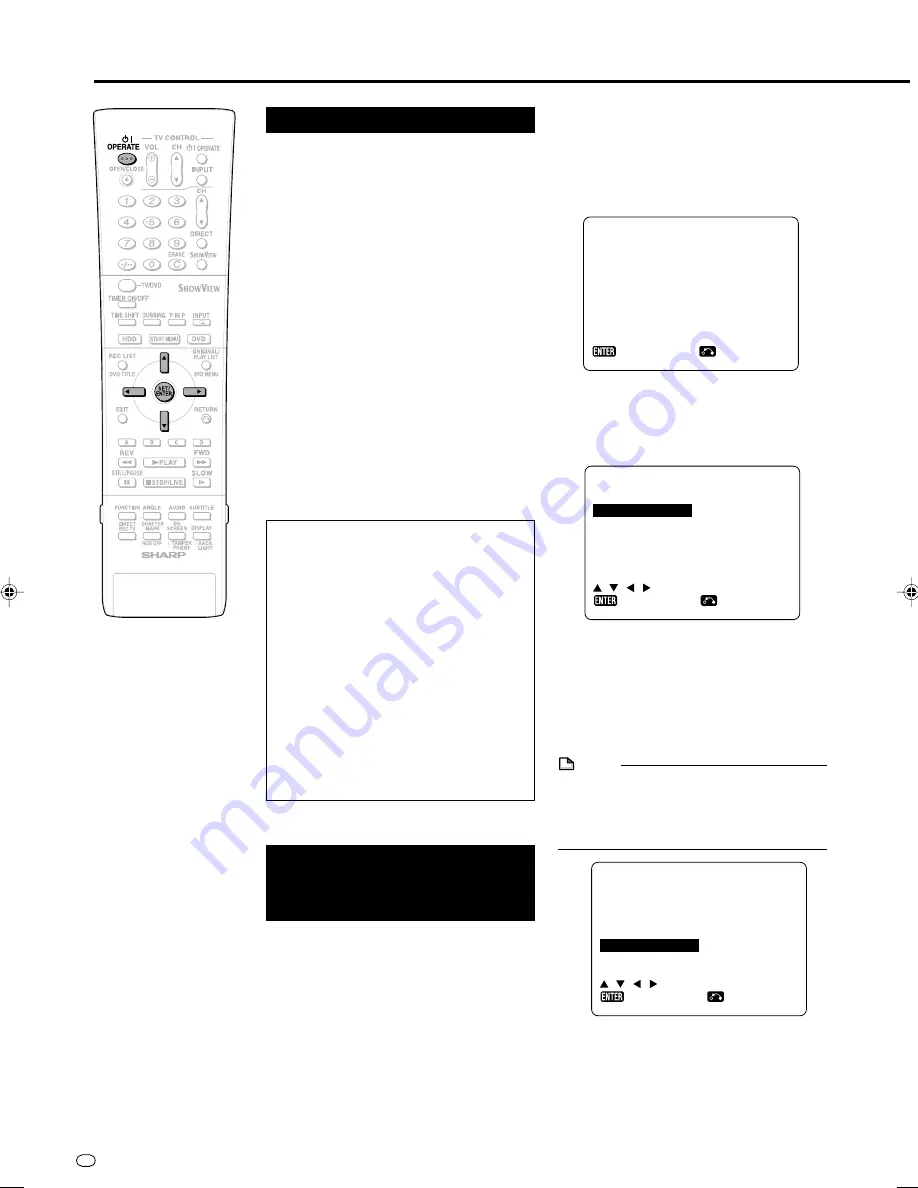
• Turn on the power of TV and switch to the
AV input used to connect to the Recorder.
1
Press
OPERATE
for the first time
after purchase.
• The “AUTO INSTALLATION” screen is
displayed.
2
Press
SET/ENTER
to continue
with the installation.
Turning the Power On
Press
OPERATE
on the remote
control or Recorder to turn on the
power of Recorder.
• When you turn on power, the
HDD
button
and
DVD
button on the front of Recorder
will blink. If either the
HDD
or
DVD
button is
blinking, system processing is in progress,
so wait until the button lights up.
• When the Recorder power is turned on for the
first time after purchase, the “AUTO
INSTALLATION” screen is displayed. Follow
the procedure shown on pages
22
,
23
.
To Turn the Power Off
Press
OPERATE
on the remote
control or Recorder to turn off power.
• The
HDD
or
DVD
button on the front of
Recorder will go out, and the STANDBY
indicator will light up.
• If you press
OPERATE
again immediately
after turning off, the Recorder may not turn
on. If this happens, wait a while and then
turn on power again.
About the Power Supply
• Do not unplug the power cord immedi-
ately after you plug it into the AC outlet
(less than about 15 seconds after
plugging in). In very rare cases, this
may cause the memory to revert to its
initial state, and all timer programmes
will be erased. If you pull out the power
plug while power is on, it will take a
while for the hard disc to get ready
when you turn on power the next time.
During this time you can only view live
broadcasts.
• If you turn on power in a low-tempe
rature environment, only live broadcast
viewing is possible until the hard disc
(HDD) reaches its operating tempera-
ture.
A U T O I N S T A L L A
P R E S S E N T E R K E Y
A U T OMA T I S CH E E I N
Z UM B EG I N N , D I E
E N T E R - T A S T E
DRÜ C K E N .
T I ON
T O S T A R T
S T E L L U NG
: R E T URN
: E N T E R
E NG L I S H
E S P A
S P R A C H E
DE U T S C H
S V E N
F R A NÇ A I S
N E D E
I T A L I A NO
: WÄ H L E N
ÑO L
S KA
R L A ND S
: R E T URN
: E N T E R
• The “LANGUAGE” screen is
displayed.
3
Select the On-Screen Display
language you want to display on
the screen using
'
/
"
/
\
/
|
,
then press
SET/ENTER
.
NOTE
• If changing the On-Screen Display
language, use AUTO INSTALLATION again.
See the information under “Important” on
page
23
for details on the AUTO
INSTALLATION procedure.
• The “COUNTRY” screen is displayed.
COUN T R Y
A
B
D K
F I N
D
N L
O
: S E L E C T
I
N
P
E
S
CH
T H E R S
: R E T URN
: E N T E R
Using the AUTO
INSTALLATION
for initial setting
When the Recorder power is turned on for the
first time after purchase, the “AUTO
INSTALLATION” screen is displayed. You can
use the “AUTO INSTALLATION” function for
easy initial settings regarding On-Screen
Display language, TV channel, etc. From the
second time on, the “AUTO INSTALLATION”
screen will not appear.
DV-HR300S-020-023
04.1.14, 6:26 PM
22


