8. POWER TO COPIER
1) Ensure that the power switch of the copier is in the OFF position.
Insert the attached power cord into the power cord socket at the
rear of the copier.
2) Plug the other end of the power cord into the nearest outlet.
9. INSTALLING THE PRINTER DRIVER
(Description of the printer driver)
The printer driver is the software program which runs the printer. It con-
verts the data in your file into information that the printer can under-
stand. It also controls communication between the printer and
computer as the data is printed.
(Checking the hardware and software require-
ments)
You will need the following hardware and software in order to install the
printer driver.
Computer type
IBM PC/AT or compatible computer equipped
with a bi-directional parallel or USB interface,
and CD-ROM drive
Windows type
Windows 3.1x, Windows 95, Windows 98*,
Windows NT 4.0 * USB is supported on Win-
dows 98 preinstalled only.
CPU
486DX 66MHz or better
Physical RAM
Windows 95, Windows 3.1x: 8MB (16MB or
more is recommended.)
Windows NT 4.0: 12MB (16MB or more is
recommended.)
Windows 98: 16MB (32MB or more is recom-
mended.)
Display
640
×
480 dots (VGA) or better
Hard disk free space
10MB or more
Caution: The printer driver included in this product cannot be used
under Windows NT 3.5x, OS/2, pure MS-DOS and other
operating systems which are not described above.
Note: The PCL6 printer driver is not available in Windows 3.1 en-
vironment.
(Installing the printer driver)
The software for your printer is provided on CD-ROM.
Before installing the printer driver, be sure to check the following items.
●
Is the printer connected properly to the computer?
●
Does the printer have paper?
A. Windows 95/Windows NT 4.0 Installation In-
structions:
With both the computer and the printer turned off, connect the printer
to the computer with a parallel interface cable.
1) Load paper into the paper tray of the printer. For instructions on
loading paper, see the section LOADING COPY PAPER in the
copier operation manual.
2) Turn on the printer.
3) Turn on your computer and start Windows.
Note: Before installing the printer driver, be sure to close all other
applications which may be open.
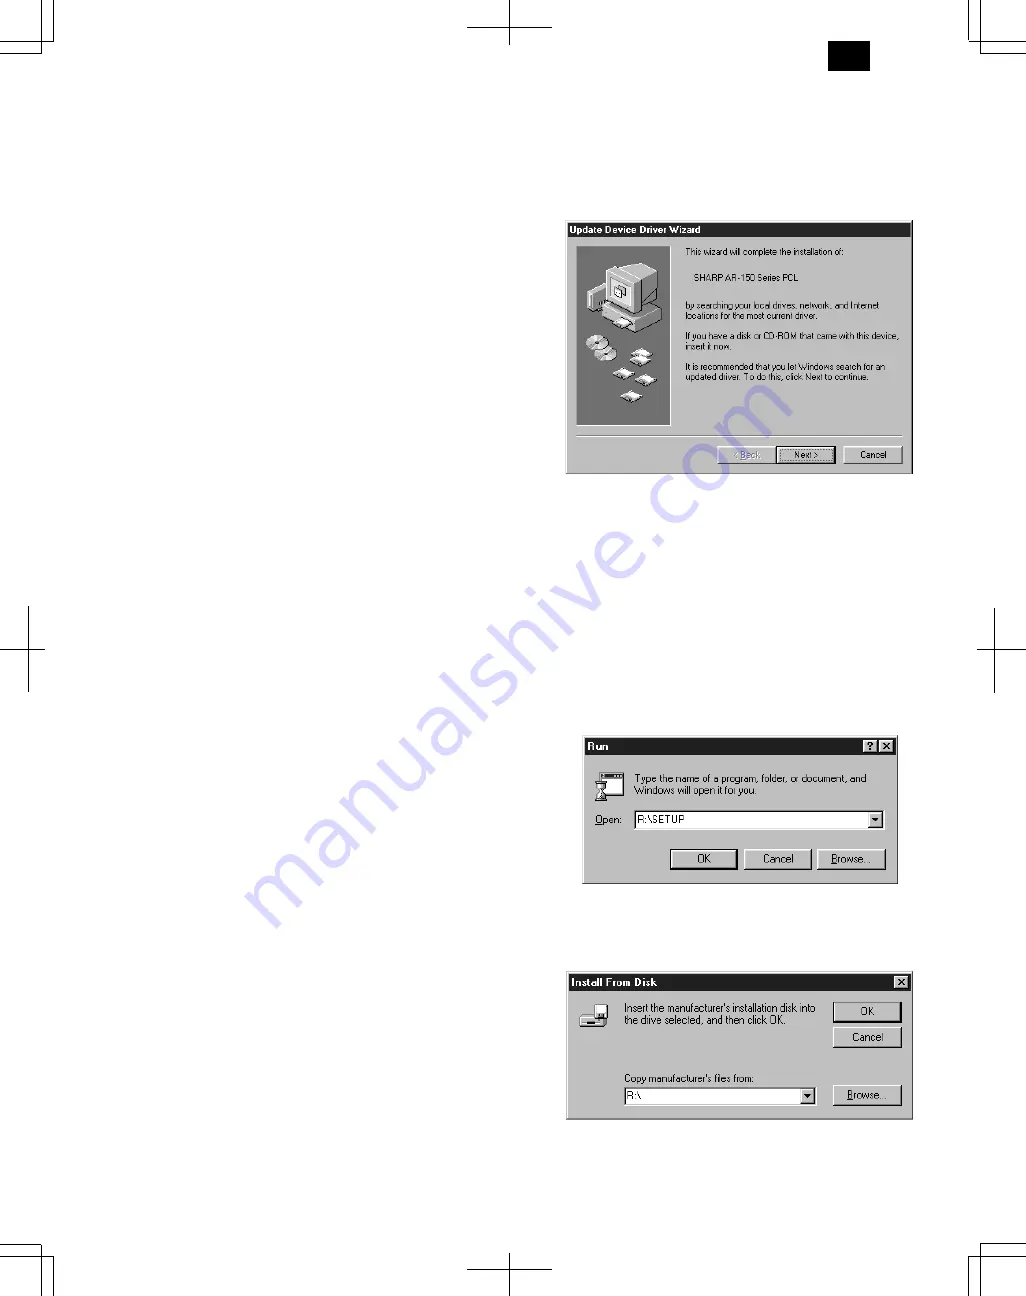
4) When using Windows 95 on a personal computer with plug & play*,
the “Update Device Driver Wizard” window will appear. Insert the in-
stallation CD-ROM into the CD-ROM drive. Click the Next button
and follow the on-screen instructions. If the “Copying Files” window
appears during this operation, enter R:\ (if the CD-ROM is desig-
nated as drive R), click the OK button and follow the on-screen in-
structions.
●
If you use Windows 95 and the “New Hardware Found” window will
appear, select Driver from Disk Provided by Hardware Manufacturer
and then click the OK button. Proceed to step 6.
●
If you use Windows 95 and the screen shown above or the “New
Hardware Found” window does not appear, proceed to step 5.
●
If you use Windows NT 4.0, proceed to step 5.
* Plug & play
This feature is effective if both the computer and peripheral equipment
are equipped with IEEE 1284 compliant parallel interface.
Note: The screen displayed depends on the version of Windows
you are using.
5) Insert the installation CD-ROM into the CD-ROM drive.
Click the Start button and select Run. When the screen shown
below appears, type R:\SETUP (if the CD-ROM is designated as
drive R) and click the OK button. Follow the on-screen instructions.
6) The “Install From Disk” window will appear. Insert the installation
CD-ROM into the CD-ROM drive. Type R:\ (if the CD-ROM is desig-
nated as drive R) and click the OK button. Follow the on-screen in-
structions.
Note: If you have any problem with the test print, check the
symptoms and solutions. Print the test page again after
resolving the problem.
DM-1505
5 – 4
Summary of Contents for DM-1500
Page 125: ...OPU DM 1505 12 9 ...


