background image

1

PRINT

13

C O N T E N T S

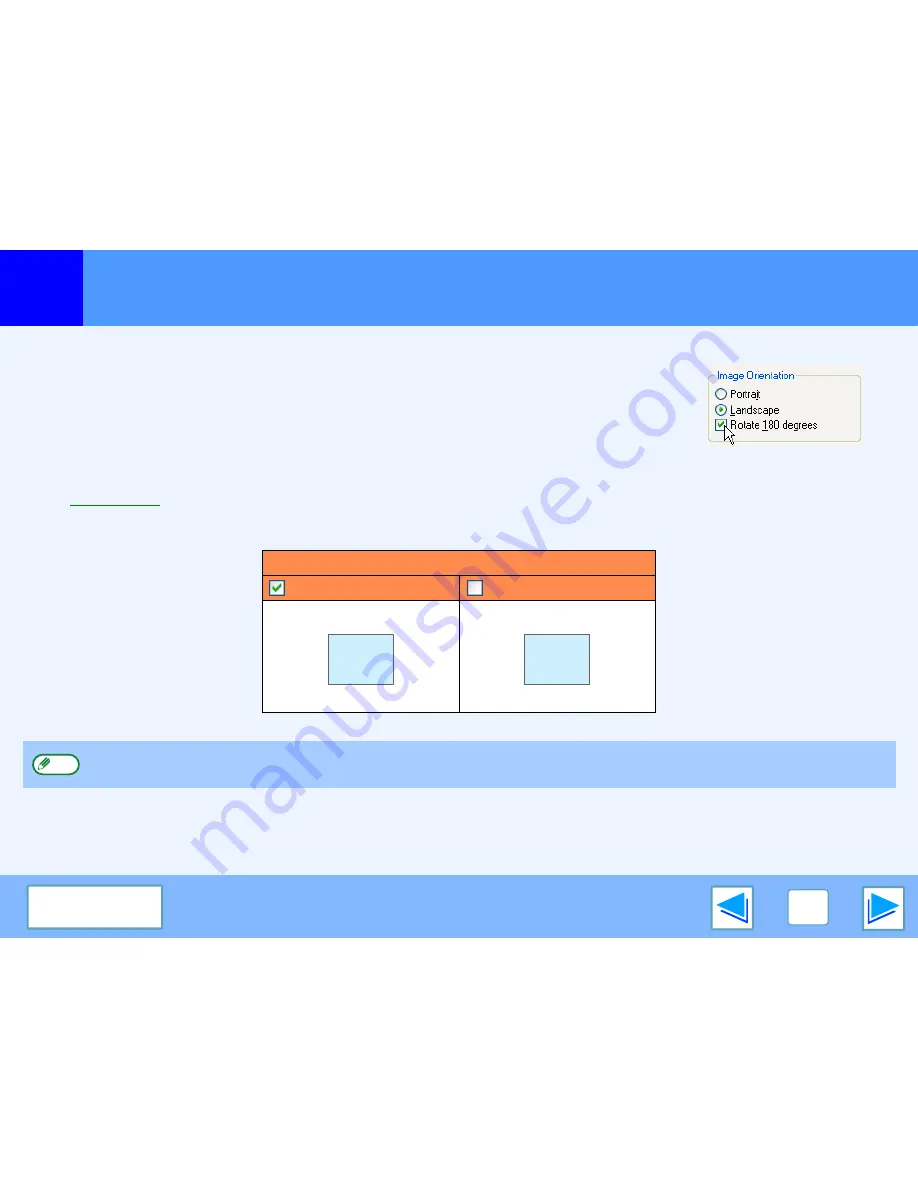
Rotating the print image 180 degrees

The print image can be rotated 180 degrees.
This feature is used to enable correct printing on envelopes and other paper with flaps that can 
only be loaded in one orientation.
Use this feature when automatic rotation (which takes place when the loaded paper is the same 
size as the print image and the orientations are different) results in reversal of the top and bottom 
of the image.
To use the feature, select the image orientation in "Image Orientation" on the "Paper" tab, and 
then select the "Rotate 180 degrees" checkbox.

See 

Basic printing

 for details on how to open the printer driver.

Printing result

Rotate 180 degrees

Rotate 180 degrees

The procedure for loading paper is explained in operation manual for copier.

ABCD

ABCD

Note

Summary of Contents for AR-5625

Page 1: ...AR M250 M310 5600 Series Online Manual Start Start Click this Start button AR M256 M257 M316 M317 5625 5631 ...

Page 2: ...r s guide Where AR XXXX appears in this manual please substitute the name of your model for XXXX For the name of your model see PART NAMES AND FUNCTIONS in the operation manual for copier This manual refers to the Reversing single pass feeder as the RSPF The screen images and procedures that appear in this manual are mainly for Windows XP With other versions of Windows some screen images may be di...

Page 3: ... forward page by page Takes you back page by page Following Links This manual uses a link function that allows you to jump to a related page If you click green underlined text the related page will be displayed In the Contents section the linked areas are not underlined Example Contents To return to the previous page click the button on the menu bar of Acrobat Reader Using Bookmarks Bookmarks have...

Page 4: ... Printing a watermark 14 Stapling printed pages when a finisher is installed 15 Giving priority to a print job 17 Canceling a print job 18 Sharing the printer using windows networking 19 Shared printer settings 20 Client settings 21 Troubleshooting 24 Printing does not take place 25 Improper printing operation 29 Print quality is not satisfactory 31 If a Notice Page is printed 33 Uninstalling the ...

Page 5: ...AR XXXX is selected as the printer If you need to change any print settings click the Preferences button Properties button in Windows 98 Me NT 4 0 to open the printer driver setup screen The printer driver setup screen will appear Windows 2000 does not have the Preferences button in this dialog box Select settings as needed on each of the tabs in the setup screen Printer driver settings Two sided ...

Page 6: ...ically When FORCED OUTPUT OF PRINT is enabled Printing will take place using a size of paper that is close to the size of the print image The output tray can be selected in the key operator programs see OUTPUT TRAYS in the key operator s guide The output tray can also be selected in the print settings at the time of printing To change the tray selection select the desired tray in Output in the Pap...

Page 7: ...he printing size Even though the paper size is different printing will take place using the selected paper type However if FORCED OUTPUT OF PRINT is disabled printing will not take place You selected a Paper Type but the selected type of paper is not loaded in the machine If the bypass tray can be used a message prompting you to print from the bypass tray will appear Press the PRINT key on the ope...

Page 8: ...k the Start button and select Settings 2 Click Printers and Other Hardware and then click Printers and Faxes In Windows 2000 click Printers 3 Click the SHARP AR XXXX printer driver icon and select Properties from the File menu 4 Click the Printing Preferences button in the General tab The printer driver setup screen will appear Printer driver settings Windows 98 Me NT 4 0 1 Click the Start button ...

Page 9: ...activate or deactivate a function Machine image This shows The paper tray in blue selected in Paper selection on the Paper tab The output tray in green selected in Output on the Paper tab You can also click on a tray to select it Check button Allows you to select one item from a list of options OK button Click this button to save your settings and exit the dialog box Cancel button Click this butto...

Page 10: ...nting are Ledger Letter Letter R Legal A3 A4 A4R A5 B4 B5 B5R and Foolscap Paper types that can be used for two sided printing are Plain Letter Head Recycled and Color The use of Letter Head paper for two sided printing can be prohibited in the TRAY SETTINGS of the custom settings See CUSTOM SETTINGS in the operation manual for copier Two sided printing is not possible if disabled in the key opera...

Page 11: ...he printer driver setup screen and select 2 Up or 4 Up for N Up Printing on the Main tab See Basic printing for details on how to open the printer driver If you select the Border checkbox borderlines will be printed around each page The N Up Printing setting is not available when Fit To Paper Size is selected Fitting the printed image to the paper Note N Up Border Border 2 Up 4 Up ...

Page 12: ... the printer driver 1 Click the Paper tab in the printer driver setup screen 2 Select the original size Ledger of the print image in Paper Size 3 Check the Fit To Page box 4 Select the actual size of paper to be used for printing Letter The size of the printed image will be automatically adjusted to match the paper loaded in the machine The Fit To Paper Size setting is not available when N Up Prin...

Page 13: ...when the loaded paper is the same size as the print image and the orientations are different results in reversal of the top and bottom of the image To use the feature select the image orientation in Image Orientation on the Paper tab and then select the Rotate 180 degrees checkbox See Basic printing for details on how to open the printer driver Printing result Rotate 180 degrees Rotate 180 degrees...

Page 14: ...llow the steps below See Basic printing for details on how to open the printer driver How to Print a Watermark From the Watermark drop down list select the watermark that you wish to print for example CONFIDENTIAL and start printing You can enter text to create your own custom watermark For details on watermark settings view printer driver Help Printer driver settings Print sample ...

Page 15: ...ting are Ledger Letter Letter R Legal A3 A4 A4R B4 B5 B5R and Foolscap B5R can only be used when a saddle stitch finisher is installed Paper types that can be used for staple printing are Plain Letter Head Recycled and Color Staple printing is not possible when the ROPM function is disabled See CONFIGURING THE PRINTER DRIVER in the software setup guide If the finisher is disabled in the key operat...

Page 16: ...installed on a saddle stitch finisher the Punch checkbox can be selected to punch holes in the printed output Select the punch hole positions in Binding Edge Staple Left Right Top 1 Staple 2 Staples Left Right Top The number of holes that can be punched and the spacing between the holes varies depending on the installed punch module Paper sizes that can be punched vary depending on the punch modul...

Page 17: ...hted The print job status screen appears when the PRINT JOB key is highlighted If the PRINT JOB key is not highlighted touch the PRINT JOB key 3 In the job keys of the jobs waiting to be printed touch the key of the job that you wish to print immediately The touched key is highlighted 4 Touch the PRIORITY key A message appears asking you to confirm the priority print job Touch the OK key to interr...

Page 18: ...rinted appear Touch the key of the job that you wish to cancel The touched key is highlighted 4 Touch the STOP DELETE key A message appears asking you to confirm the cancellation Touch the YES key to delete the job If you do not wish to cancel the job touch the NO key FAX DATA LINE JOB STATUS CUSTOM SETTING PRINT PRINT JOB 010 00 To pause a print job during printing press the PRINT key on the oper...

Page 19: ...twork environment Note that the Windows network environment must already be established Print server as explained here is a computer that is directly connected to the machine and a Client is any other computer that is connected to the same network Shared printer Client Client Client Print server Shared printer settings On the print server Client settings ...

Page 20: ...n in the Network dialog box 6 Click Printers and Other Hardware in the control panel and click Printers and Faxes In operating systems other than Windows XP double click the printer icon 7 Click the SHARP AR XXXX printer driver icon and select Sharing from the File menu 8 Establish the settings for sharing and click the OK button Client settings For detailed setting procedures refer to the Operati...

Page 21: ...re and click Printers and Faxes In Windows 98 Me 2000 click Printers 3 Click Add a printer in Printer Tasks In Windows 98 Me 2000 double click the Add Printer icon The Add Printer Wizard will appear 4 Click the Next button 5 Select A network printer or a printer attached to another computer and click the Next button In Windows 98 Me 2000 select Network printer and click the Next button If your ope...

Page 22: ... browse for a printer and click the Next button 7 Select the printer to be shared in the network and click the Next button In Windows 98 Me select the printer to be shared in the network click the OK button and then click the Next button The contents of this window will vary depending on your network environment 8 Select settings in the Default Printer screen and click the Next button 9 Click the ...

Page 23: ...ck the SHARP AR XXXX printer driver icon and select Properties from the File menu The printer properties will appear 3 Click the Ports tab and click the Add Port button The Printer Ports dialog box will appear 4 Select Local Port in the Available Printer Ports list and click the New Port button The Port Name dialog box will appear 5 Enter name of server connected to machine name of shared printer ...

Page 24: ...e place Check the connections Check Your Computer Check the machine Checking the printer driver Improper printing operation Printing is slow Two sided printing is not possible Stapling is not possible when a finisher or a saddle stitch finisher is installed Punching is not possible when a saddle stitch finisher is installed Print quality is not satisfactory Check the paper being used The printed i...

Page 25: ...into the connectors of the machine and computer To connect the cable see CONNECTING TO A COMPUTER in the software setup guide Are any other USB peripherals being connected along with the machine If your computer is connected to the machine through a USB hub see if printing is possible when no other USB devices are connected or if printing is possible when the machine and computer are directly conn...

Page 26: ... parallel port is the parallel port LPT mode set to other than EPP mode The machine may not operate correctly if the parallel port mode is set to EPP mode To set the parallel port mode to a mode other than EPP mode refer to your computer manual or ask the manufacturer of the computer ECP mode is recommended to obtain the best performance from the machine Note that some computers may use different ...

Page 27: ...occurs a message will appear in the touch panel to alert you Follow the instructions in the message to clear the error Printing will automatically resume when the error is cleared For information on handling errors see TROUBLESHOOTING in the operation manual for copier Copy job being performed Wait until copying is finished You can also select the key of the job that you wish to print in the job s...

Page 28: ...he printer driver Is your machine selected correctly in the current application for the print job Select the printer driver of the machine in the Print dialog box of the application If the printer drivers appear as icons click the icon of the machine If the printer drivers are selected from a pull down menu select the printer driver of the machine from the menu Basic printing Is the port configure...

Page 29: ... when a finisher or a saddle stitch finisher is installed Is stapling disabled in the key operator programs Enable stapling in the key operator programs see DISABLING OF STAPLER in the key operator s guide Is the finisher disabled in the key operator programs when a saddle stitch finisher is installed Enable the finisher in the key operator programs See USING THE KEY OPERATOR PROGRAMS in the opera...

Page 30: ...e key operator programs Enable the finisher in the key operator programs See USING THE KEY OPERATOR PROGRAMS in the operation manual for the saddle stitch finisher and DISABLING OF STAPLER in the key operator s guide Are pages of different width mixed together in the print job Punching is not possible when pages of different width are mixed together in a print job Does the print job include page s...

Page 31: ...e content Use paper that is in good condition with a low moisture content and no curling Is the paper loaded with the wrong side up Some types of paper have a front and a back side If the paper is loaded so that printing takes place on the back side toner will not adhere well to the paper and poor print quality will result Are you printing on paper that has an uneven surface It may not be possible...

Page 32: ...r guides See the operation manual for copier for more details on inserting paper Part of the printed image is missing Did you set sufficient margins in the paper settings of your application Printing is not possible at the edges of the paper The print margins are 5 32 4 mm at the top and bottom of the paper and 1 8 3 mm at the sides of the paper When configuring the paper settings in the software ...

Page 33: ...When the Staple function is selected Select Draft for the Print quality setting or increase the value set for MEMORY FOR PRINTER in the key operator programs If this does not solve the problem add more IMC memory Disabling notice page printing Notice page printing can be disabled using a key operator program see PROHIBIT NOTICE PAGE PRINTING in the key operator s guide Notice Page The IMC memory f...

Page 34: ... button select Settings and then click Control Panel 2 Click Add or Remove Programs On Windows 98 Me NT 4 0 2000 double click the Add Remove Programs icon 3 Delete the SHARP AR M250 M310 5600 Series Printer Driver from the list of applications For more information refer to your operating manual or to the help files for your operating system 4 Restart your computer When reinstalling the printer dri...

Page 35: ...lution 600 dpi IMC Memory 32 MB Additional memory slots 2 slots maximum of 1024 MB of additional memory modules 168 pin SDRAM DIMM can be installed Interface IEEE 1284 compliant bi directional parallel interface USB 2 0 Full Speed Low Speed interface As a part of our policy of continuous improvement SHARP reserves the right to make design and specification changes for product improvement without p...

Page 36: ...ARM316 EN1 ...

Reviews: