


4-2
MAKING CONFIGURATION SETTING
The printer configuration setting allows basic printer settings to be made. The items set with the printer configuration
settings are shown below.
●
Printer default settings .........Basic settings used in printing (See
●
PCL settings .........................Sets a PCL symbol set. (See
●
PostScript settings* ..............Sets whether a PostScript error page is printed or not when a PostScript error has
occurred. (See
* An optional PS3 expansion kit is needed.
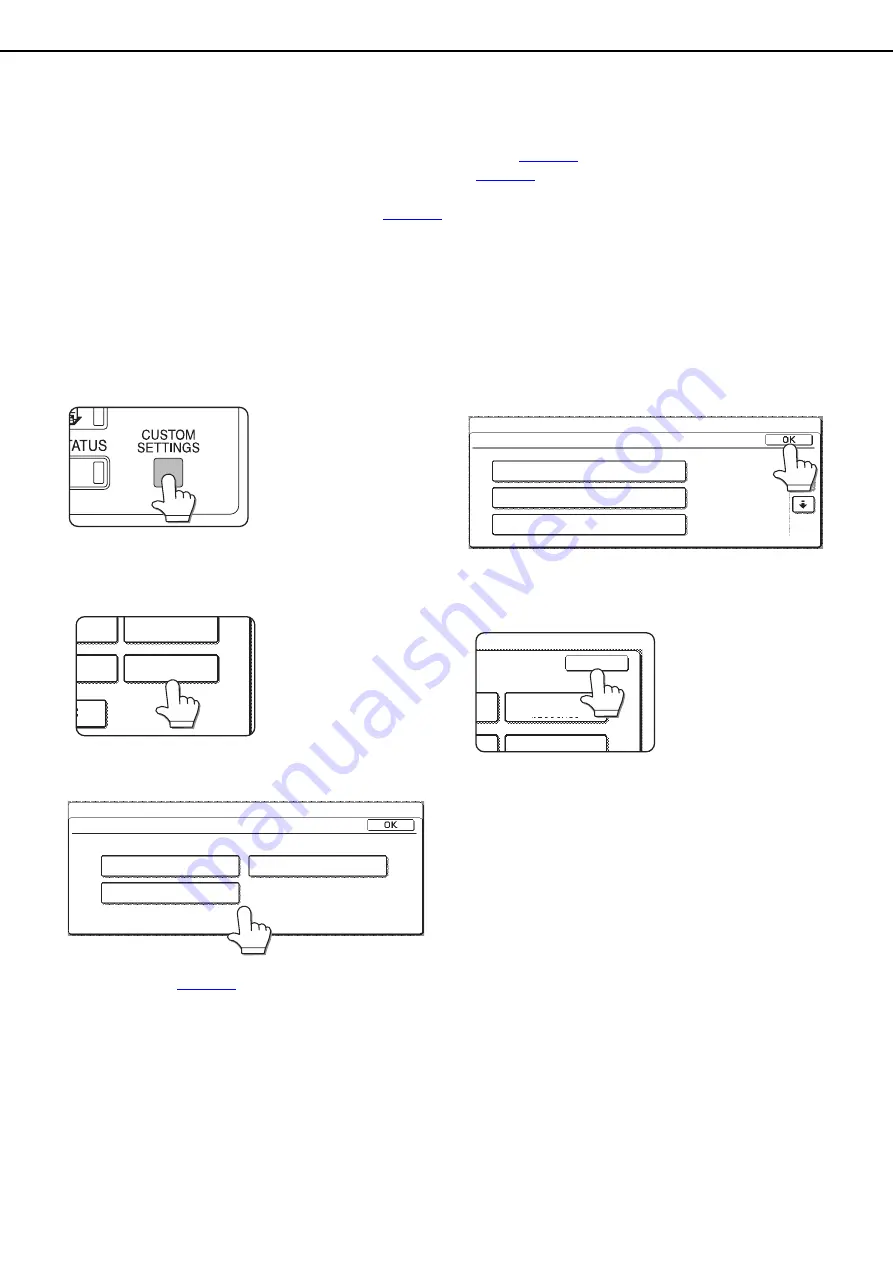
Operation procedure common to all printer configuration settings
(items that can be set from the operation panel)
1
Press the [CUSTOM SETTINGS] key.
The custom setting
menu screen will
appear.
2
Touch the [PRINTER CONDITION] key on
the custom setting menu screen to display
the printer condition setting menu screen.
3
Touch the key of the desired item to
display its setting screen.
Detailed descriptions for configuration settings
start on the
4
Touch the desired setting item on the
screen and touch the [OK] key.
To set another item, repeat steps 3 and 4.
5
To finish the setting operation, touch the
[EXIT] key.
PAPER TRAY
SETTING
PRINTER
CONDITION
ATE
FORWARD
PRINTER DEFAULT SETTINGS
PRINTER CONDITION SETTINGS
CUSTOM SETTINGS
PostScript SETTINGS
PCL SETTINGS
PRINTER DEFAULT SETTINGS
CUSTOM SETTINGS
COPIES
1
PORTRAIT
A4
ORIENTATION
DEFAULT PAPER SIZE
PAPER TRAY
SETTING
T
EXIT
PRINTER
CONDITION
ARD
http://www.usersmanualguide.com/


