background image

Example

System options (Continue)

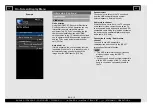
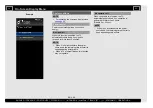
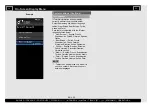
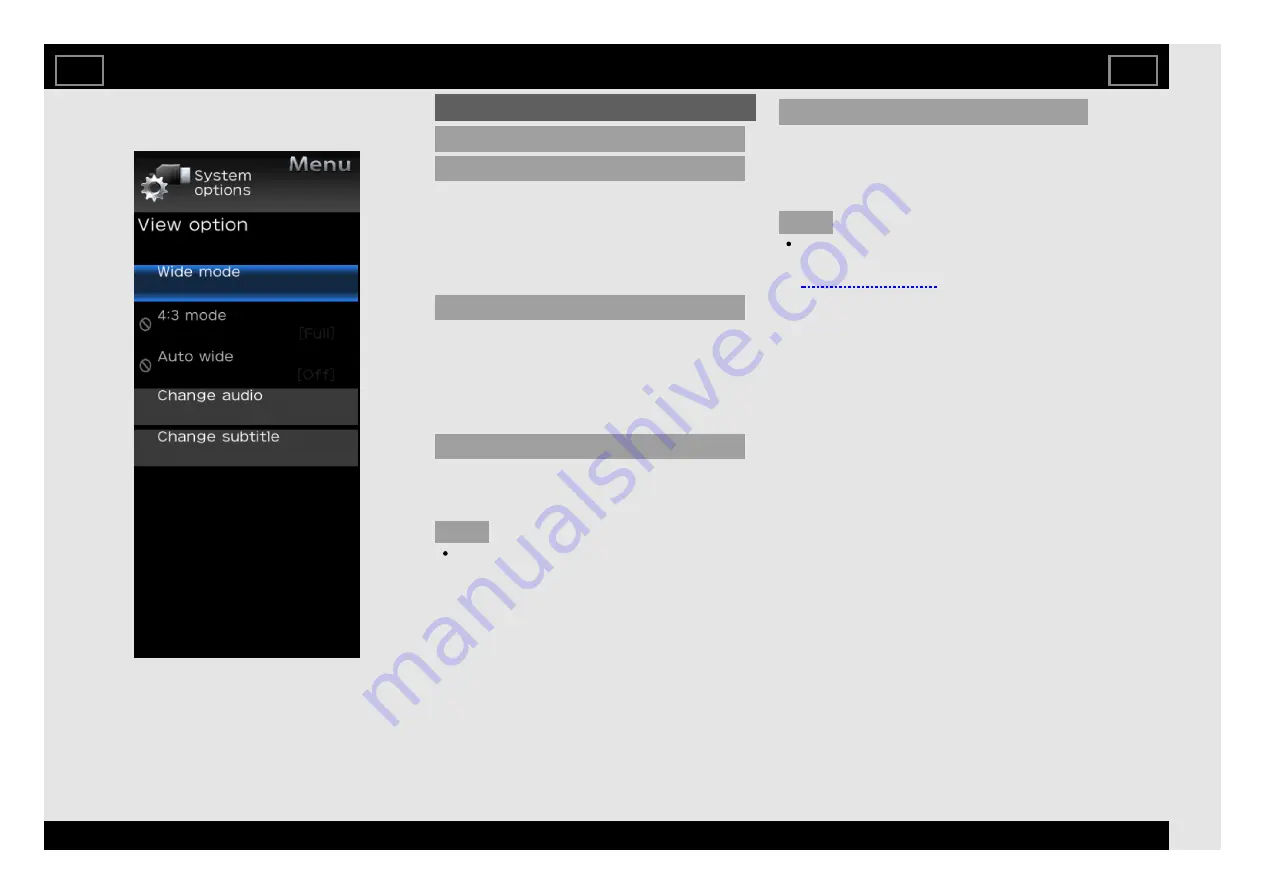
View option

Wide mode

This function changes the screen size.
Select "View option" on the menu to display the
Wide mode menu screen.
The Wide mode menu varies depending on the
input source.

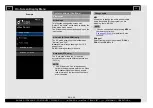
4:3 mode (DTV and HDMI only)

The 4:3 mode allows you to select between
"Normal" and "Full".
Normal: Normal range keeping 4:3 or 16:9
aspect ratio.
Full: Wide image without side bars.

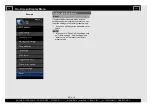
Auto wide (DTV only)

The “Auto wide” allows the TV to switch
automatically among the different picture size.
(Off, On)

NOTE

Use “Wide mode” if an image does not

switch to the appropriate picture size. When
the broadcast signal contains no aspect
ratio information, the function will not work
even if enabled.

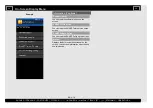
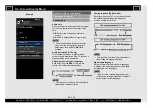
Change audio

MPX
Allows you to change the audio when multiple
audio is available for the program you are
watching. (Auto, MONO)

NOTE

You can change Audio by pressing MPX on

the remote control unit. 

See pages 3-5 to 3-6

 for details of Audio

function.

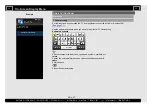
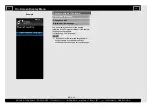
Bilingual
Select from among 3 kinds of mode: DUAL I,
DUAL II and DUAL I + II.

On-Screen Display Menu

EN 4-29

ENGLISH  |  FRANÇAIS   PORTUGUÊS  |  РУССКИЙ  |  

中文

  |  INDONESIA  |  

ภาษาไทย

   TIẾNG VIỆT   ﻲﺑرﻋ  |  АҒЫЛШЫН  |  O'ZBEK TILIDA

>>

<<

Summary of Contents for Aquos LC40SA5500X

Page 1: ...page from the content If you want to close the operation manual press the HOME button Also if you want to return to the previously displayed page press the RETURN button ENGLISH FRANÇAIS PORTUGUÊS РУССКИЙ 中文 INDONESIA ภาษาไทย TIẾNG VIỆT ﻋرﺑﻲ АҒЫЛШЫН O ZBEK TILIDA ...

Page 2: ...g the Folders to Play Back 5 6 Playing Back Files on a USB Memory Device Home Network Server 6 Using LINK Operation 6 1 Controlling HDMI Equipment Using LINK Operation 7 Using a PC 7 1 Control of the TV 7 7 PC Compatibility Chart 8 Using the Internet 8 1 Connecting to the Internet 8 4 Smart TV 8 7 Entering Text Software Keyboard 8 9 Using the Browser 8 14 Using Keyboard and Mouse 8 15 Using Applic...

Page 3: ...IMPORTANT INFORMATION EN Important1 ENGLISH FRANÇAIS PORTUGUÊS РУССКИЙ 中文 INDONESIA ภาษาไทย TIẾNG VIỆT ﻋرﺑﻲ АҒЫЛШЫН O ZBEK TILIDA ...
Page 4: ...IMPORTANT INFORMATION EN Important2 ENGLISH FRANÇAIS PORTUGUÊS РУССКИЙ 中文 INDONESIA ภาษาไทย TIẾNG VIỆT ﻋرﺑﻲ АҒЫЛШЫН O ZBEK TILIDA ...
Page 5: ...actual operations Part Names One Button Key Functions Descriptions Single Press On Off No OSD display Long Press Sub menu display on TV screen 10s timeout Function During Menu 1 INPUT 2 CH 3 CH 4 VOL 5 VOL Single Press Scroll Down Hold Press Select item EN 1 1 ENGLISH FRANÇAIS PORTUGUÊS РУССКИЙ 中文 INDONESIA ภาษาไทย TIẾNG VIỆT ﻋرﺑﻲ АҒЫЛШЫН O ZBEK TILIDA ...

Page 6: ...is operation manual are for explanation purposes and may vary slightly from the actual operations The drawings used throughout this manual are based on the LC 60SA5500X model Part Names EN 1 2 ENGLISH FRANÇAIS PORTUGUÊS РУССКИЙ 中文 INDONESIA ภาษาไทย TIẾNG VIỆT ﻋرﺑﻲ АҒЫЛШЫН O ZBEK TILIDA ...

Page 7: ...al equipment connection 2 Use HDMI IN 1 to connect ARC compatible equipment 3 Usually do not connect anything to this terminal as it reserved only for service personnel Part Names EN 1 3 ENGLISH FRANÇAIS PORTUGUÊS РУССКИЙ 中文 INDONESIA ภาษาไทย TIẾNG VIỆT ﻋرﺑﻲ АҒЫЛШЫН O ZBEK TILIDA ...

Page 8: ...rnal equipment connection 2 Use HDMI IN 1 to connect ARC compatible equipment 3 Usually do not connect anything to this terminal as it reserved only for service personnel Part Names EN 1 4 ENGLISH FRANÇAIS PORTUGUÊS РУССКИЙ 中文 INDONESIA ภาษาไทย TIẾNG VIỆT ﻋرﺑﻲ АҒЫЛШЫН O ZBEK TILIDA ...

Page 9: ...ee page 3 13 9 VOL Set the volume See page 3 2 10 0 9 Set the channel See page 3 1 11 FLASHBACK Return to the previous channels HDMI IN 1 2 USB or video input mode See page 3 4 12 R G Y B The coloured buttons are correspondingly used to select the coloured items on the screen 13 Buttons for useful operations Teletext Select the teletext mode Reveal hidden teletext Display hidden characters Hold St...

Page 10: ...ube Display the YouTube screen 19 DISPLAY Display the channel information 20 RETURN Return to the previous screen 21 AV MODE Select an audio or video setting See page 4 23 22 CH Select the channel See page 3 1 23 WIDE Change a wide image mode See pages 3 8 to 3 10 24 INPUT Select an input source Part Names EN 1 6 ENGLISH FRANÇAIS PORTUGUÊS РУССКИЙ 中文 INDONESIA ภาษาไทย TIẾNG VIỆT ﻋرﺑﻲ АҒЫЛШЫН O ZBE...

Page 11: ...60SA5500X on the TV Watching TV Example You can also select the input source by pressing INPUT Each time INPUT is pressed the input source toggles 1 Press INPUT The INPUT list screen displays 2 Press to select the input source An image from the selected source automatically displays EN 2 1 ENGLISH FRANÇAIS PORTUGUÊS РУССКИЙ 中文 INDONESIA ภาษาไทย TIẾNG VIỆT ﻋرﺑﻲ АҒЫЛШЫН O ZBEK TILIDA ...

Page 12: ...mote control The initial auto installation wizard appears Press ENTER to start the wizard Language Language setting Select from among 12 languages English Simplified Chinese Arabic Thai French Portuguese Russian Persian Vietnamese Indonesian Hebrew and Hindi 1 Press to select the desired language listed on the screen and then press ENTER Watching TV EN 2 2 ENGLISH FRANÇAIS PORTUGUÊS РУССКИЙ 中文 IND...

Page 13: ... Iran Singapore Malaysia Morocco Vietnam Indonesia Myanmar Thailand Uzbekistan Philippines Kenya Tanzania Nigeria Angola United Arab Emirates Georgia Mauritius Egypt or Others and then press ENTER Watching TV EN 2 3 ENGLISH FRANÇAIS PORTUGUÊS РУССКИЙ 中文 INDONESIA ภาษาไทย TIẾNG VIỆT ﻋرﺑﻲ АҒЫЛШЫН O ZBEK TILIDA ...

Page 14: ... where you plan to install the TV 3 Press to select Home or Store Press ENTER to enter the setting Home AV Mode is set to STANDARD Store AV Mode is set to DYNAMIC Fixed Watching TV EN 2 4 ENGLISH FRANÇAIS PORTUGUÊS РУССКИЙ 中文 INDONESIA ภาษาไทย TIẾNG VIỆT ﻋرﺑﻲ АҒЫЛШЫН O ZBEK TILIDA ...

Page 15: ...V ATV or DTV ATV in Search type and then press ENTER 5 Press to select Start and then press ENTER for searching receivable channels The Channel search will start automatically To exit the Channel search screen select Cancel and then press ENTER Watching TV EN 2 5 ENGLISH FRANÇAIS PORTUGUÊS РУССКИЙ 中文 INDONESIA ภาษาไทย TIẾNG VIỆT ﻋرﺑﻲ АҒЫЛШЫН O ZBEK TILIDA ...

Page 16: ...d is used If any other method is used make settings by Smart TV Internet Setup See pages 8 4 to 8 6 6 Press to select Yes and then press ENTER 7 Press to select Wired or Wireless and then press ENTER Watching TV EN 2 6 ENGLISH FRANÇAIS PORTUGUÊS РУССКИЙ 中文 INDONESIA ภาษาไทย TIẾNG VIỆT ﻋرﺑﻲ АҒЫЛШЫН O ZBEK TILIDA ...

Page 17: ...network settings configure the TV name setting See page 4 27 When you change the network settings refer to Smart TV Internet Setup See pages 8 4 to 8 6 SHARP Legal 8 Press to view Sharp Terms of Use and Sharp Privacy Policy Completed 9 The settings confirmation screen is displayed Confirm the information displayed on the screen click OK will complete the Easy Setup procedure Examples of the settin...

Page 18: ...hannel number e g Channel 115 Press 1 1 5 ENTER NOTE When selecting a 1 digit channel number it is not necessary to press 0 before the number When you enter 0 9 only channel selection will be made if there is no operation within a few seconds If you push 0 by itself nothing will happen Complete the above steps within a few seconds Direct Button Operation EN 3 1 ENGLISH FRANÇAIS PORTUGUÊS РУССКИЙ 中...

Page 19: ...press VOL To decrease the volume press VOL Audio status Output device Audio Output Select Audio Out Headphone TV Speaker Variable Sound Mute AUDIO OUT HEADPHONE Fixed Sound Volume MAX Variable Sound Direct Button Operation EN 3 2 ENGLISH FRANÇAIS PORTUGUÊS РУССКИЙ 中文 INDONESIA ภาษาไทย TIẾNG VIỆT ﻋرﺑﻲ АҒЫЛШЫН O ZBEK TILIDA ...

Page 20: ...t Press MUTE will be displayed on the screen for 30 minutes NOTE Mute can be cancelled by pressing VOL or MUTE Direct Button Operation EN 3 3 ENGLISH FRANÇAIS PORTUGUÊS РУССКИЙ 中文 INDONESIA ภาษาไทย TIẾNG VIỆT ﻋرﺑﻲ АҒЫЛШЫН O ZBEK TILIDA ...

Page 21: ...ack to the currently tuned channel NOTE FLASHBACK will not work if no channel has been changed after the TV is turned on With FLASHBACK only input from TV HDMI 1 2 USB or Video will be stored in Memory Direct Button Operation EN 3 4 ENGLISH FRANÇAIS PORTUGUÊS РУССКИЙ 中文 INDONESIA ภาษาไทย TIẾNG VIỆT ﻋرﺑﻲ АҒЫЛШЫН O ZBEK TILIDA ...

Page 22: ...s MPX the mode switches between Nicam Stereo and Mono When receiving a bilingual signal Each time you press MPX the mode switches among Nicam Dual I Nicam Dual II Nicam Dual I II and Mono When receiving a monaural signal Each time you press MPX the mode switches between Nicam Mono and Mono In the TV mode of A2 TV broadcasts When receiving a stereo signal Each time you press MPX the mode switches b...

Page 23: ...witches between ST SAP SAP ST and Mono When receiving a stereo signal Each time you press MPX the mode switches between Stereo and Mono When receiving a SAP signal Each time you press MPX the mode switches between Mono and SAP Direct Button Operation EN 3 6 ENGLISH FRANÇAIS PORTUGUÊS РУССКИЙ 中文 INDONESIA ภาษาไทย TIẾNG VIỆT ﻋرﺑﻲ АҒЫЛШЫН O ZBEK TILIDA ...

Page 24: ...arts counting down If you want to adjust the sleep timer you can press SLEEP twice then change the time setting When it is 5 minutes before the time expires the remaining time will start to keep appearing every minute NOTE Select Off by pressing SLEEP to cancel the sleep timer The TV will enter standby when the remaining time reaches 0 Direct Button Operation EN 3 7 ENGLISH FRANÇAIS PORTUGUÊS РУСС...

Page 25: ...f screen Displays an image with the same number of pixels on the screen when receiving HD signals only NOTE When using Dot by Dot it is possible to see noise or bars around different outer portions of the screen Please change wide mode to correct this This feature is available with TV HDMI IN 1 2 and Video input Availability in other input modes varies according to the individual App specification...

Page 26: ...ama For 14 9 letterbox pictures Bars may appear on the top and bottom with some programmes For 14 9 letterbox pictures A thin side bar appears on each side and you may also see bars on the top and bottom with some programmes In this mode the picture is stretched toward each side of the screen The picture may appear similar to Full depending on broadcast signals Direct Button Operation EN 3 9 ENGLI...

Page 27: ...lay An image fully fills the screen Detects the resolution of the signal and displays an image with the same number of pixels on the screen NOTE Connect the PC before making adjustments See the Setup Guide Direct Button Operation EN 3 10 ENGLISH FRANÇAIS PORTUGUÊS РУССКИЙ 中文 INDONESIA ภาษาไทย TIẾNG VIỆT ﻋرﺑﻲ АҒЫЛШЫН O ZBEK TILIDA ...

Page 28: ...Displays the BROWSER screen Press BROWSER NOTE Please press HOME key to exit BROWSER Direct Button Operation EN 3 11 ENGLISH FRANÇAIS PORTUGUÊS РУССКИЙ 中文 INDONESIA ภาษาไทย TIẾNG VIỆT ﻋرﺑﻲ АҒЫЛШЫН O ZBEK TILIDA ...

Page 29: ... mode the TV turns on and the YouTube screen is displayed To enjoy YouTube you need to make a broadband Internet connection See page 8 1 settings of Internet Setup See pages 8 4 to 8 6 Direct Button Operation EN 3 12 ENGLISH FRANÇAIS PORTUGUÊS РУССКИЙ 中文 INDONESIA ภาษาไทย TIẾNG VIỆT ﻋرﺑﻲ АҒЫЛШЫН O ZBEK TILIDA ...

Page 30: ...HOME Displays the HOME screen Press HOME Direct Button Operation EN 3 13 ENGLISH FRANÇAIS PORTUGUÊS РУССКИЙ 中文 INDONESIA ภาษาไทย TIẾNG VIỆT ﻋرﺑﻲ АҒЫЛШЫН O ZBEK TILIDA ...

Page 31: ...indicates that the item can be selected Item in brackets This indicates the current setting for the item Item displayed in gray This indicates that the item cannot be selected There are various reasons why the items cannot be selected but the main reasons are as follows Nothing is connected to the selected input terminal The function is not compatible with the current input signal When this confli...

Page 32: ...e are enlarged others cropped and may vary slightly from the actual screens The order of explanations for each menu item in the following pages is not necessarily in accordance with the alignment of the items on the screen Introduction Continue On Screen Display Menu EN 4 2 ENGLISH FRANÇAIS PORTUGUÊS РУССКИЙ 中文 INDONESIA ภาษาไทย TIẾNG VIỆT ﻋرﺑﻲ АҒЫЛШЫН O ZBEK TILIDA ...

Page 33: ...eferring to the guide display Operations vary depending on the function or item Refer to the guide display corresponding to the menu setting screen for button operations 3 Press MENU to exit NOTE Menu options differ in the selected input modes but the operating procedures are the same On Screen Display Menu Operation Example On Screen Display Menu EN 4 3 ENGLISH FRANÇAIS PORTUGUÊS РУССКИЙ 中文 INDON...

Page 34: ...o return to the previous step Using the control panel of the TV Only for LC 50 60SA5500X You can also operate the menu with the control panel of the TV Button operations on the control panel correspond to the ones on the remote control as shown below MENU MENU on the remote control INPUT ENTER on the remote control CH Cursor on the remote control VOL Cursor on the remote control On Screen Display ...

Page 35: ...able in the set area Smart TV When you connect to the Internet on the TV confirm the connection method and make adjustments Wireless LAN connection is possible only when the WPS push button method is used If any other method is used make settings by Smart TV Internet Setup See pages 8 4 to 8 6 SHARP Legal To view Sharp Terms of Use and Sharp Privacy Policy Completed The settings confirmation scree...

Page 36: ...nu item and then press ENTER Auto search Use this menu to add new services automatically after auto installation has been completed Press to select DTV or DTV ATV Manual search Add new services within a specified frequency band Press to find the channel and then press ENTER Signal information Use this menu to check signal information depends on receiving channel NOTE This selection does not work w...

Page 37: ...ress MENU to exit Manual adjust You can set some channel items manually 1 Repeat steps 1 to 3 in Auto search 2 Press to select Manual adjust and then press ENTER 3 Press to select your desired item press ENTER and then press or to adjust the settings Current CH Select the channel you want to edit Sound system Select the optimum sound system Broadcasting system to receive B G D K I M Colour system ...

Page 38: ...the TV will try to get the time for the broadcast It will only be selectable when Auto synchronization is set to Off Time zone enables you to select your local time zone It will only be selectable when Auto synchronization is set to On Time display This function allows you to display the clock time in the lower right corner of the screen Off Hides the clock time On Displays the clock time NOTE Tim...

Page 39: ...Arabic Thai French Portuguese Russian Persian Vietnamese Indonesian Hebrew and Hindi NOTE To change the language of the manual select MENU Initial setup Language to change the language Then press ENTER On Screen Display Menu EN 4 9 ENGLISH FRANÇAIS PORTUGUÊS РУССКИЙ 中文 INDONESIA ภาษาไทย TIẾNG VIỆT ﻋرﺑﻲ АҒЫЛШЫН O ZBEK TILIDA ...

Page 40: ...nd then press ENTER 4 Press to select Set password and then press ENTER 5 If you have already set the password enter it here 6 Enter the 4 digit number as a password using 0 9 7 Enter the same 4 digit number as in step 6 to confirm NOTE To view a locked channel you must enter a password When you select a locked channel Child lock has been activated is displayed and then enter the password Block pr...

Page 41: ...peat steps 1 to 5 in Set password 2 Press to select Parental rating and then press ENTER 3 Press to select your desired rating and then press ENTER Off Cancel the blocking Age xx years Select desired age to block Example If age 14 is selected programmes rated for ages of 15 or more are blocked On Screen Display Menu EN 4 11 ENGLISH FRANÇAIS PORTUGUÊS РУССКИЙ 中文 INDONESIA ภาษาไทย TIẾNG VIỆT ﻋرﺑﻲ АҒ...

Page 42: ...ess RETURN to exit NOTE Label is available only for ATV channel On Screen Display Menu Erase Channels can be erased individually Press to select Yes or No and then press ENTER to erase the selected channel Label You can change channel names individually Maximum 5 alphanumerics can be input Press ENTER to start labelling Press to select a character press to select next character and then press ENTE...

Page 43: ...t up time or even let the TV in standby mode start displaying images and so on via the connected equipment on the network Off On NOTE Setting Quick start mode to On consumes more power On Screen Display Menu EN 4 13 ENGLISH FRANÇAIS PORTUGUÊS РУССКИЙ 中文 INDONESIA ภาษาไทย TIẾNG VIỆT ﻋرﺑﻲ АҒЫЛШЫН O ZBEK TILIDA ...

Page 44: ...eiver or surround audio controller NOTE If you select Headphone when a cable is inserted in the AUDIO output terminal the TV speakers are muted and all Audio menu items cannot be adjusted except for Balance If you select Audio out sound via the AUDIO output terminal is not adjustable and constantly outputs CAUTION AUDIO output terminal is also used for headphones Reduce the volume before using hea...

Page 45: ...he TV sound only from the LINK compatible audio system Internal speakers External device Audio return channel If this function is set to Auto the TV can send audio data for video content shown on the TV to a connected audio device with just one ARC compatible cable Using this function eliminates the need to use a separate digital or analogue audio cable Off Auto Connection for using Audio return c...

Page 46: ... the factory preset values If you have already set the password enter it here NOTE If you execute Reset all the settings such as Picture settings Audio settings and Initial setup will be reset to the factory preset values On Screen Display Menu EN 4 16 ENGLISH FRANÇAIS PORTUGUÊS РУССКИЙ 中文 INDONESIA ภาษาไทย TIẾNG VIỆT ﻋرﺑﻲ АҒЫЛШЫН O ZBEK TILIDA ...

Page 47: ...ing the software USB update Updates the software using a USB memory device containing the update file See pages 4 20 to 4 22 for details on the Updating the Software via the USB Memory device Network update Downloads the update file via the network and then updates the software See page 4 22 for details on the Updating the Software via the Network NOTE A broadband connection and Internet Setup are...

Page 48: ... in progress as this may cause the upgrade to fail If problem arises ask a qualified service personnel before the software upgrade period expires Network update When the TV is on or when an Internet application is being accessed this function enables the TV to connect to the network and check for updates automatically When an update is available a message is displayed Press to select Yes and then ...

Page 49: ...ARP Terms of Use on the screen SHARP Privacy Policy You can read the SHARP Policy on the screen Manual Displays the built in operation manual on the screen You can read information about how to use this device On Screen Display Menu EN 4 19 ENGLISH FRANÇAIS PORTUGUÊS РУССКИЙ 中文 INDONESIA ภาษาไทย TIẾNG VIỆT ﻋرﺑﻲ АҒЫЛШЫН O ZBEK TILIDA ...

Page 50: ...e Updating the Software via the USB Memory device 1 Insert the USB memory device with the update file into the USB terminal on the TV On Screen Display Menu EN 4 20 ENGLISH FRANÇAIS PORTUGUÊS РУССКИЙ 中文 INDONESIA ภาษาไทย TIẾNG VIỆT ﻋرﺑﻲ АҒЫЛШЫН O ZBEK TILIDA ...

Page 51: ...ice 4 Press ENTER again and the TV will update software If the USB memory device is not properly installed or the correct update file cannot be found on the USB memory device an error message is displayed Check the file on the USB memory device and then reinsert the USB memory device correctly On Screen Display Menu EN 4 21 ENGLISH FRANÇAIS PORTUGUÊS РУССКИЙ 中文 INDONESIA ภาษาไทย TIẾNG VIỆT ﻋرﺑﻲ АҒ...

Page 52: ...ts to the network and checks for updates To cancel press ENTER 2 The current version of the TV and the latest version of software are displayed To update the TV software select Yes and then press ENTER When a server connection cannot be established or an update is not available a message is displayed If a server connection cannot be established check the broadband connection and Internet Setup 3 A...

Page 53: ...you several viewing options to choose from to best match the surrounding environment of the TV which can vary due to factors like room brightness type of program watched or the type of device connected These settings will be automatically saved on each input for convenience STANDARD For a highly defined image in a normal lighting MOVIE For a movie PC For PC USER Allows you to customise settings as...

Page 54: ...e technology provides superior solutions for display picture quality removing motion blur Off High Advance NOTE This effect is greater on fast moving images If images appear blurred or flickering set to Off Color temp Adjusts the colour temperature to give the best white image Item High White with bluish tone Mid High Intermediate tone between High and Middle Middle Natural tone Mid Low Intermedia...

Page 55: ...TE For some discs setup may be required on your BD DVD player In this case please refer to the operation manual of your BD DVD player Bass enhancer This function allows you to enjoy bass enhanced sound Off Outputs the normal sound On Bass enhancer function is on NOTE If distorted bass sound is heard set to Off Auto volume Different sound sources sometimes do not have the same loudness level such a...

Page 56: ...n when TV in standby mode NOTE This feature only available in TV with internet connected and Digital broadcast User can choose either pre install images or photo from USB act as the background Images will rotate every 30 seconds User need to set the folder name as CLK in order to read the image in USB To improve realistic viewing user need to insert the picture which equal or more than 1920 x 1080...

Page 57: ...ard when you need to input text at TV name setting Software Keyboard Switches character to lowercase uppercase numbers symbols etc return Applies the entered information and closes the software keyboard space Enters a space Erases the character string On Screen Display Menu EN 4 27 ENGLISH FRANÇAIS PORTUGUÊS РУССКИЙ 中文 INDONESIA ภาษาไทย TIẾNG VIỆT ﻋرﺑﻲ АҒЫЛШЫН O ZBEK TILIDA ...

Page 58: ...huts down the remaining time will start to keep appearing every minute When a TV program finishes this function may not operate No operation off When you enable this function the TV automatically shuts down if no operation is performed for more than 3 hours Disable 3hr 30min NOTE When it is 5 minutes before the power shuts down the remaining time will start to keep appearing every minute On Screen...

Page 59: ...ng the different picture size Off On NOTE Use Wide mode if an image does not switch to the appropriate picture size When the broadcast signal contains no aspect ratio information the function will not work even if enabled Change audio MPX Allows you to change the audio when multiple audio is available for the program you are watching Auto MONO NOTE You can change Audio by pressing MPX on the remot...

Page 60: ...ime you press MPX on the remote control the audio language switches NOTE This function is valid only if broadcaster is transmitting audio description Hearing impaired DVB subtitle Each time you press on the remote control the subtitle switches when the broadcast contains subtitle information NOTE This function is valid only if broadcaster is transmitting multilingual subtitles Digital audio langua...

Page 61: ...in the Teletext broadcast if the subtitle languages are available 1st language 2nd language NOTE If subtitles for the selected language are not included in a received broadcast subtitles will not be shown for that language On Screen Display Menu EN 4 31 ENGLISH FRANÇAIS PORTUGUÊS РУССКИЙ 中文 INDONESIA ภาษาไทย TIẾNG VIỆT ﻋرﺑﻲ АҒЫЛШЫН O ZBEK TILIDA ...

Page 62: ...h Italian East Europe Polish French Scandinavian Czech German Slovenian Croatian Italian Rumanian Cyrillic English Russian Estonian Czech German Slovenian Croatian Ukrainian Lettish Arabic English French Scandinavian Turkish German Hebrew Italian Arabic Farsi English French Scandinavian Turkish German Hebrew Italian Farsi NOTE Teletext can be displayed only when it is sent by a network Not used to...

Page 63: ...ecorded data if the USB memory device USB hard drive Home Network server contains many files or folders Use only alphanumeric characters for naming files File names over 80 characters may vary depending on character set may not be displayed Connecting a USB Memory Device USB Hard Drive Insert the USB memory device with recorded photos music or videos into the USB terminal on the TV Enjoying Photo ...

Page 64: ...a USB memory device to the USB terminal on the TV Using a USB extension cable with the USB memory device may prevent the TV from performing correctly Connecting a Home Network Server Connect the TV to the Home Network server using an ETHERNET cable You can also connect a Home Network server by using a wireless LAN NOTE Do not disconnect a Home Network server from the TV while transferring files wh...

Page 65: ...s ENTER NOTE Wide mode is fixed during Photo and Music Depending on the USB device the TV may not be able to recognise the contained data A file name with more than 10 characters may not be displayed all depending on the character set Files in USB 1 1 devices may not be played properly Operation using USB hubs is not guaranteed The compatibility of USB HDDs may not be guaranteed Enjoying Photo Mus...

Page 66: ...atibility USB device USB Memory File system FAT32 NTFS Photo file format Format JPEG jpg PNG BMP Music file format Format Bitrate KHz MP3 32k 40k 48k 56k 64k 80k 96k 112k 128k 160k 192k 224k 256k 320kbps Enjoying Photo Music Video Playback EN 5 4 ENGLISH FRANÇAIS PORTUGUÊS РУССКИЙ 中文 INDONESIA ภาษาไทย TIẾNG VIỆT ﻋرﺑﻲ АҒЫЛШЫН O ZBEK TILIDA ...

Page 67: ...devices may not be played properly Operation using USB hubs is not guaranteed Some video file formats may not be played depending on the file Some images may not be displayed in the appropriate aspect ratio depending on the file format File extensions are not used to determine the file format Home Network Server Compatibility Photo file format JPEG Music file format LPCM MP3 Video file format AVI ...

Page 68: ...return to the list of files Loop Each time you press ENTER the mode will switch between Play cancel the background music Two loop Press ENTER to set the current playback time starting point Press ENTER to set the loop end of the current playing time and start loop playback Press ENTER button to cancel the loop Slow motion Each time you press slow motion the speed will change NOTE Enjoying Photo Mu...

Page 69: ...kwise 90 Rotate counterclockwise 90 Zoom in an image video Select to display larger image video size Zoom out an image video Select to display smaller image video size Select subtittle to On or Off subtitle NOTE Enjoying Photo Music Video Playback Files in folder which are not related to a selected mode cannot be accessed Unsupport file alert will pops up for a selected file of invalid format EN 5...

Page 70: ...E If the equipment does not operate turn on the equipment and select the appropriate input source using INPUT The LINK feature may not operate properly when an HDMI splitter or AV selector unit is used These devices may cause interruptions to the image and or sound Connected LINK compatible devices can be operated without changing the settings of the remote control unit One Touch Play While the TV...

Page 71: ...s button to go in reverse Starts playback Hold down this button to fast forward Stops playback Sets pauses and still pictures Pressing quickly once takes you to the start of the chapter currently playing Each time you press it you move back to the start of the previous chapter Pressing quickly once takes you to the start of the next chapter Each time you press it you move ahead to the start of the...

Page 72: ...Login ID password Follow the on screen instructions to configure the settings Device Name Set the name of the TV displayed on other network devices Configure the settings from Menu Smart TV Advanced TV name setting Communication Conditions for RS 232C Set the RS 232C communication settings on the PC to match the TV s communication conditions The TV s communication settings are as follows Baud rate...

Page 73: ...s not indicated here are not guaranteed to operate CONTROL ITEM COMMAND PARAMETER CONTROL CONTENTS POWER SETTING P O W R 0 _ _ _ Power Off It shifts to standby 1 _ _ _ Power On Power On INPUT SELECTION TOGGLE I T G D _ _ _ _ Toggle It input switches by the toggle It is the same as an input change key TV I T V D _ _ _ _ It input switches to TV A channel remains as it is Last memory 0 4 I A V D _ _ ...

Page 74: ... Toggle 1 Normal 2 Zoom 14 9 3 Panorama 4 Full 5 Cinema 16 9 6 Cinema 14 9 7 Normal PC 9 Full PC 10 Dot by Dot 11 Underscan 12 Auto USB 13 Original USB It is the same as Wide Mode key MUTE M U T E _ _ _ 0 Toggle 1 On 2 Off NOTE If an underbar _ appears in the parameter column enter a space If an asterisk appears enter a value in the range indicated in brackets under CONTROL CONTENTS Any numerical ...

Page 75: ...MER 150 MIN TELETEXT T E X T 0 _ _ _ TEXT OFF T E X T 1 _ _ _ Toggle CHANNEL D C C H _ _ TV DIRECT CHANNEL 1 99 I D T V _ _ _ _ An input change to DTV NOTE If an underbar _ appears in the parameter column enter a space If an asterisk appears enter a value in the range indicated in brackets under CONTROL CONTENTS Any numerical value can replace the x on the table Using a PC EN 7 4 ENGLISH FRANÇAIS ...

Page 76: ...DEL NAME M N R D 1 _ _ _ The model name of the TV CONTROL ITEM COMMAND PARAMETER CONTROL CONTENTS SOFTWARE VERSION S W V N 1 _ _ _ The current version of the TV software is displayed IP PROTOCOL VERSION I P P V 1 _ _ _ The currently supported version of IP protocol is displayed NOTE If an underbar _ appears in the parameter column enter a space If an asterisk appears enter a value in the range ind...

Page 77: ...MOTE CONTROL BUTTONS R C K Y _ _ 45 RETURN 49 MPX 50 R red 51 G green 52 B blue 53 Y yellow 61 MANUAL 64 SUBTITLE 65 TELETEXT 66 GUIDE 68 HOLD 71 INFO 72 REVEAL HIDDEN 82 RADIO 83 EPG 84 YouTube 85 BROWSER NOTE If an underbar _ appears in the parameter column enter a space If an asterisk appears enter a value in the range indicated in brackets under CONTROL CONTENTS Any numerical value can replace...

Page 78: ... 800 x 600 35 1 kHz 56 Hz 37 9 kHz 60 Hz 48 1 kHz 72 Hz 46 9 kHz 75 Hz XGA 1024 x 768 48 4 kHz 60 Hz 56 5 kHz 70 Hz 60 0 kHz 75 Hz WXGA 1360 x 768 47 7 kHz 60 Hz SXGA 1280 x 1024 64 0 kHz 60 Hz SXGA 1400 x 1050 65 3 kHz 60 Hz 1080p 1920 x 1080 67 5 kHz 60 Hz VGA and XGA are registered trademarks of International Business Machines Corp Using a PC EN 7 7 ENGLISH FRANÇAIS PORTUGUÊS РУССКИЙ 中文 INDONES...

Page 79: ...ave a broadband Internet connection If you do not have a broadband Internet connection consult the store where you purchased your TV or ask your Internet service provider or telephone company When an Internet connection is made an Ethernet and wireless connection cannot be used at the same time Use only one of the connection types Using an ETHERNET cable Use an ETHERNET cable commercially availabl...

Page 80: ...aranteed for all residential environments In the following cases the wireless LAN signal may be poor or drop or the connection speed may become slower When used in buildings made with concrete reinforced steel or metal When placed near objects that obstruct the signal When used with other wireless devices that emit the same frequency When used in the vicinity of microwave ovens and other devices t...

Page 81: ...ty or disposal be sure to initialize the wireless LAN settings Please follow the legislation in your country when using the wireless LAN outdoors If you have failed to connect to the Internet in the above operation then an error message will appear In this case press MENU to exit from the connected TV feature to make changes to the network settings If you still cannot connect to the Internet pleas...

Page 82: ...s setup when you make general adjustments to connect to the Internet 5 Press to select a specific item and then press ENTER 6 Press to select the desired setting and then press ENTER 7 Press MENU to exit Connection type Select the connection type Wired The signal is detected and setup is performed automatically Use Wired setup to check and change the settings as necessary See page 8 5 Wireless Con...

Page 83: ...nual Check that numbers are displayed for each setting If there are any settings without numbers specify the numbers by following the on screen instructions Input the IP address etc by using remote control buttons 0 9 Using the Internet EN 8 5 ENGLISH FRANÇAIS PORTUGUÊS РУССКИЙ 中文 INDONESIA ภาษาไทย TIẾNG VIỆT ﻋرﺑﻲ АҒЫЛШЫН O ZBEK TILIDA ...

Page 84: ...ettings in Connection type If Wired is selected press to select Wireless 2 Select the desired connection method and follow the instructions shown on the display 3 When a connection is established the connection details are displayed Press ENTER NOTE Operations cannot be guaranteed when used with access points that do not have Wi Fi certification A wireless LAN router access point is required to co...

Page 85: ...sed for accessing the Internet enter text from the software keyboard NOTE You can enter up to 128 characters for text Some special characters or diacritics may not be available depending on where you enter the text Using the Internet The text you enter is displayed as you type it in While you are entering text likely input conversion candidates are displayed based on what you typed in EN 8 7 ENGLI...

Page 86: ...ved at the far edge the focus moves to the opposite edge ENTER Performs the processing for the button currently in the focus RETURN Closes the software keyboard without applying the original input elements for the entered text 0 9 Directly enters the single byte number for that button Using the Internet EN 8 8 ENGLISH FRANÇAIS PORTUGUÊS РУССКИЙ 中文 INDONESIA ภาษาไทย TIẾNG VIỆT ﻋرﺑﻲ АҒЫЛШЫН O ZBEK T...

Page 87: ... the currently tuned channel Buttons for Using the Browser ENTER Press to select a link that you want to jump and then press ENTER RETURN Press the button to return to the previous page NOTE Restrictions apply to window display Using the Internet EN 8 9 ENGLISH FRANÇAIS PORTUGUÊS РУССКИЙ 中文 INDONESIA ภาษาไทย TIẾNG VIỆT ﻋرﺑﻲ АҒЫЛШЫН O ZBEK TILIDA ...

Page 88: ...rch Zoom in out the page Using the Toolbar You can use the toolbar to control the browser and to specify settings 1 Press to select a function and then press ENTER Browsing Web Contents You can display the web content you want to enjoy 1 Press to move to the address area in the toolbar and then press ENTER The Enter Address menu is displayed 2 Enter an address and then press ENTER The web content ...

Page 89: ...s Web pages on the Internet often include links that allow you to jump to other web pages or sites Links can take various forms including words or images but they always work in the same way letting you jump to the link destination when you select them Selected items such as links of text input fields are enclosed in a frame You can jump from a link to the corresponding link destination DISCLAIMER...

Page 90: ...browser settings from the Browser menu 1 Press to select in the toolbar and then press ENTER 2 Press to specify the required setting and then press ENTER Using the Internet EN 8 12 ENGLISH FRANÇAIS PORTUGUÊS РУССКИЙ 中文 INDONESIA ภาษาไทย TIẾNG VIỆT ﻋرﺑﻲ АҒЫЛШЫН O ZBEK TILIDA ...

Page 91: ... User need to bookmark the website link at web browser before they can bookmark at Home menu Once bookmark complete by user in web browser user can move the cursor to icon to create direct link at Home menu Using the Internet EN 8 13 ENGLISH FRANÇAIS PORTUGUÊS РУССКИЙ 中文 INDONESIA ภาษาไทย TIẾNG VIỆT ﻋرﺑﻲ АҒЫЛШЫН O ZBEK TILIDA ...

Page 92: ...SB devices connect the device to the USB terminal on the TV NOTE The keyboard or mouse may not operate properly depending on the application being used In YouTube the usage of keyboard is not supported Using the Internet EN 8 14 ENGLISH FRANÇAIS PORTUGUÊS РУССКИЙ 中文 INDONESIA ภาษาไทย TIẾNG VIỆT ﻋرﺑﻲ АҒЫЛШЫН O ZBEK TILIDA ...

Page 93: ...n for the first time the Disclaimer appears on the screen Press to select Agree and then press ENTER You must select Agree to use the application Check the web site of the provider for details on setup and use of the functions NOTE If or is displayed check your TV s network settings and connection These applications are provided by content providers The available applications vary depending on you...

Page 94: ...Is the sleep timer set Page 3 7 Check the power control settings Page 4 28 The unit s internal temperature has increased Remove any objects blocking vent or clean Problem Possible Solution No picture Is connection to other components correct If the PC image is not displayed check the following When connecting a laptop PC to the TV check that display output mode of the PC is set to external monitor...

Page 95: ...ted via an HDMI cable you may need to configure the audio to be output through the HDMI cable When connecting a PC via an HDMI certified cable check the following Is the audio output of the PC configured correctly Check the audio output settings and output audio format in Sound Properties on the PC The audio formats compatible with this TV are PCM Dolby Digital With other formats audio cannot be o...

Page 96: ...n incompatible audio signal has been received Check the output device settings This message is displayed when an audio format other than PCM Dolby Digital is input Set the audio output format of connected external HDMI equipment to PCM Dolby Digital Refer to the operation manual of the external equipment for setting details Appendix EN 9 3 ENGLISH FRANÇAIS PORTUGUÊS РУССКИЙ 中文 INDONESIA ภาษาไทย TI...

Page 97: ...temperature environments When the unit is used in a low temperature space e g room office the picture may leave trails or appear slightly delayed This is not a malfunction and the unit will recover when the temperature returns to normal Do not leave the unit in a hot or cold location Also do not leave the unit in a location exposed to direct sunlight or near a heater as this may cause the cabinet ...

Page 98: ...NO LICENSE IS GRANTED OR SHALL BE IMPLIED FOR ANY OTHER USE ADDITIONAL INFORMATION MAY BE OBTAINED FROM MPEG LA L L C SEE HTTP WWW MPEGLA COM THIS PRODUCT IS LICENSED UNDER THE AVC PATENT PORTFOLIO LICENSE FOR THE PERSONAL USE OF A CONSUMER OR OTHER USES IN WHICH IT DOES NOT RECEIVE REMUNERATION TO i ENCODE VIDEO IN COMPLIANCE WITH THE AVC STANDARD AVC VIDEO AND OR ii DECODE AVC VIDEO THAT WAS ENC...

Page 99: ... W Standby 144 W 0 5 W Standby Dimensions without stand 911 W x 567 H x 75 D mm 1125 W x 662 H x 67 D mm 1355 W x 791 H x 86 D mm with stand 911 W x 633 H x 239 D mm 1125 W x 711 H x 231 D mm 1355 W x 856 H x 379 D mm Weight without stand with stand 7 4 kg 7 6 kg 14 0 kg 14 5 kg 24 0 kg 25 5 kg Operating temperature 0 C to 40 C As a part of policy of continuous improvement SHARP reserves the right...

Page 100: ...K CCK OFDM IEEE802 11g BPSK QPSK 16QAM DBPSK DQPSK CCK PBCC OFDM IEEE802 11n BPSK QPSK 16QAM 64QAM OFDM IEEE802 11ac BPSK QPSK 16QAM 64QAM 256QAM OFDM Throughput IEEE802 11b 1 2 5 5 11Mbps IEEE802 11a 6 9 12 18 24 36 48 54Mbps IEEE802 11g 6 9 12 18 24 36 48 54Mbps IEEE802 11n 300Mbps IEEE802 11ac 866 6Mbps Specifications EN 11 2 ENGLISH FRANÇAIS PORTUGUÊS РУССКИЙ 中文 INDONESIA ภาษาไทย TIẾNG VIỆT ﻋر...

Page 101: ...LC 40SA5500X Unit mm Dimensional Drawings EN 12 1 ENGLISH FRANÇAIS PORTUGUÊS РУССКИЙ 中文 INDONESIA ภาษาไทย TIẾNG VIỆT ﻋرﺑﻲ АҒЫЛШЫН O ZBEK TILIDA ...

Page 102: ...LC 50SA5500X Unit mm Dimensional Drawings EN 12 2 ENGLISH FRANÇAIS PORTUGUÊS РУССКИЙ 中文 INDONESIA ภาษาไทย TIẾNG VIỆT ﻋرﺑﻲ АҒЫЛШЫН O ZBEK TILIDA ...

Page 103: ...LC 60SA5500X Unit mm Dimensional Drawings EN 12 3 ENGLISH FRANÇAIS PORTUGUÊS РУССКИЙ 中文 INDONESIA ภาษาไทย TIẾNG VIỆT ﻋرﺑﻲ АҒЫЛШЫН O ZBEK TILIDA ...

Page 104: ...ENGLISH FRANÇAIS PORTUGUÊS РУССКИЙ 中文 INDONESIA ภาษาไทย TIẾNG VIỆT ﻋرﺑﻲ АҒЫЛШЫН O ZBEK TILIDA ...

Reviews: