background image

15

Setup menu (Continued)

Parental rating

This function allows TV channels to be restricted.

It prevents children from watching violent or sexual 

scenes that may be considered inappropriate.


1

Repeat steps 1 to 3 in 

Setting a password

.


2

Press 

a/b

 to select “Parental rating”, and then 

press 

ENTER

.


3

Press 

a/b

 to select your desired rating, and then 

press 

ENTER

.

When the country setting is set to “Australia”.

Selected item

Description

General and 

above (G)

Content is not offensive to most viewers.

Parental 

guidance and 

above (PG)

Content is such that parents may 

not want their children to view the 

programme.

Mature and 

above (M)

Mature audience only. This programme 

is specifically designed to be viewed by 

adults and therefore may be unsuitable 

for children under 15.

Mature adult 

and above (MA)

Mature adult only. Mature audience only. 

This programme is specifically designed 

to be viewed by adults and therefore 

may be unsuitable for children under 15.

Adult violence 

and above (AV)

Not for children under age 15. Strong 

elements of sex and/or violence.

Restricted and 

above (R)

Not for children under age 18. Strong 

elements of sex and/or violence.

No block (–)

Cancel the blocking.

When the country setting is set to “New Zealand”.

Block 5 age and below
Block 11 age and below
Block 13 age and below
Block 15 age and below
Block 17 age and below
Block 18 age and below
No block


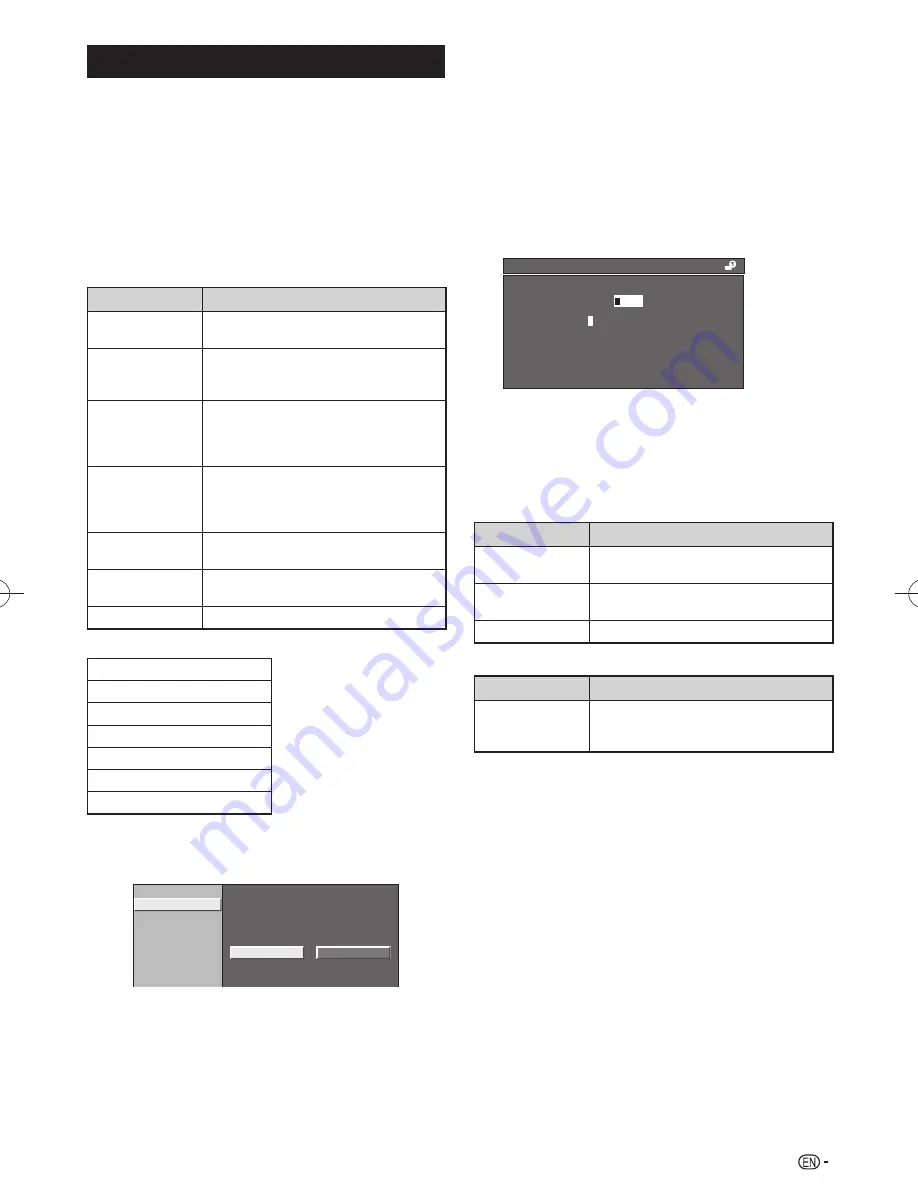
Input skip

This setting allows you to skip the HDMI or PC input on 

the input source selection operation.

HDMI1

HDMI2
HDMI3
PC

Yes

No

Skip input selection of HDMI


Input label

You can assign each input source a label as you prefer.


1

Press 

INPUT

 to select the desired input source.


2

Press 

MENU

 and the MENU screen displays.


3

Press 

c/d

 to select “Setup”.


4

Press 

a/b

 to select “Input label”, and then press 

ENTER

.


5

Press 

a/b/c/d

 to select a desired 

alphanumeric, and then press 

ENTER

Repeat until the name is fully spelt out. Maximum 

6 alphanumeric can be input.

External equipment name settings

CLEAR

BACK

END

U V W X Y Z + – . _

KLMNOPQRST

0 1 2 3 4 5 6 7 8 9

A

B C D E F G H I J

To exit, select 

END

 and then press 

ENTER

.

If the wrong alphanumeric is entered, select 

CLEAR

 to clear, and then press 

ENTER

.

NOTE

•  You cannot change labels if the input source is ATV and DTV.


Position

For adjusting a picture’s horizontal and vertical position.

Selected item

Description

H-Position

Centres the image by moving it to the left 

or right.

V-Position

Centres the image by moving it up or 

down.

Reset

Reset position to factory preset values.


HDMI auto view (HDMI input mode only)

Selected item

Description

Enable/Disable

Set whether or not to use WIDE MODE 

based on signal recognition, including an 

HDMI signal.


WSS

WSS allows a television to switch automatically among 

the different screen formats (On, Off).

NOTE

•  Try to set WIDE mode if an image does not switch to the 

correct screen format. When the broadcast signal contains no 

WSS information, the function will not work even if enabled.

•  Not available for COMPONENT, PC and HDMI signal.

LE530X̲LE630X̲en.indd   15

LE530X̲LE630X̲en.indd   15

2011/07/08   13:39:21

2011/07/08   13:39:21

Summary of Contents for Aquos LC-40LE530X

Page 1: ...MODEL LC 40LE530X LC 46LE530X LC 60LE630X LCD COLOUR TELEVISION OPERATION MANUAL ...

Page 2: ......

Page 3: ...E630X 4 Angle adjustment only for 40 46LE530X 5 Setting the TV 5 Connecting external devices 6 Remote control unit 7 Part names 8 Turning the TV on off 9 Supplying electric power to the antenna 9 Initial auto installation 9 Checking Signal information 9 Auto installation 10 Programme setup 10 Selecting a preset AV mode 12 Menu operation 12 Picture menu 13 Audio menu 13 ECO menu 14 Setup menu 14 Op...

Page 4: ... may appear on the screen as a fixed point of blue green or red This is within product specifications and does not constitute a fault Precautions when transporting the TV When transporting the TV never carry it by holding or otherwise putting pressure onto the display Be sure to always carry the TV by two people holding it with two hands one hand on each side of the TV Do not display a still pictu...

Page 5: ...e screws and one short screw 2 Attach the supporting post for the stand unit onto the base using the long screws with a screwdriver as shown Supporting post n 40 inch models o 46 inch models 3 Insert the stand into the openings on the bottom of the TV hold the stand so it will not drop from the edge of the base area Soft cushion n 40 inch models o 46 inch models 4 Insert and tighten middle screws ...

Page 6: ...it For 60 inch models Eight long screws and four short screws 2 Attach the supporting post for the stand unit onto the base using the long screws with a screwdriver as shown Supporting post Front 3 Insert the stand into the openings on the bottom of the TV hold the stand so it will not drop from the edge of the base area Soft cushion 4 Attaching the stand cover 1 Insert the stand cover 2 Insert an...

Page 7: ...lustration with your other hand Setting the TV Connecting the antenna cable To enjoy a clearer picture use an outdoor antenna Standard DIN45325 plug IEC169 2 75 ohm coaxial cable round cable Room antenna terminal 75 ohm type Antenna cable commercially available To antenna terminal CAUTION TO PREVENT RISK OF ELECTRIC SHOCK DO NOT TOUCH UN INSULATED PARTS OF ANY CABLES WITH THE AC CORD CONNECTED The...

Page 8: ...le Camcorder VCR Game console Camcorder Connecting a DVD player Digital TV STB Set Top Box You can use the HDMI 1 HDMI 2 HDMI 3 or INPUT 6 terminals when connecting to a DVD player Digital TV STB Set Top Box and other audiovisual equipment When using HDMI certified cable commercially available When using component cable commercially available AUDIO L R Y PB CB PR CR DVD player Digital TV STB Set T...

Page 9: ... volume VOLl Decrease the volume R CHa CHb TV input mode Select the channel CHa Increase the channel number CHb Decrease the channel number TELETEXT mode Select the page See page 24 T INPUT INPUT SOURCE Select an input source Y GUIDE DTV mode Display the programme list See page 19 U RADIO Press to access RADIO mode See page 20 I MENU Display the menu screen O RETURN MENU mode Return to the previou...

Page 10: ...ut terminal 17 USB terminal 18 Headphone jack 3 5 mm The speakers do not output volume when headphones are plugged in The HDMI1 and PC terminals can both use the same audio input terminal However the proper item must be selected in the PC audio select menu See page 16 The illustrations in this operation manual are for explanation purposes and may vary slightly from the actual operations The illust...

Page 11: ...tenna The factory default setting of this function is No Initial auto installation When the TV powers on for the first time after purchase the initial auto installation wizard appears Follow the menus and make the necessary settings one after another 1 Press POWER on the TV The initial auto installation wizard appears 2 Press c d to select HOME or STORE and then press ENTER Press c d to select you...

Page 12: ...ENU to exit Programme setup Digital settings You can reconfigure DTV services settings automatically or manually 1 Press MENU and the MENU screen displays 2 Press c d to select Setup 3 Press a b to select Digital programme setup and then press ENTER If you have already set the password enter it here See page 14 for setting a password 4 Press a b to select the desired menu item and then press ENTER...

Page 13: ...t channel will be search in order Fine You can adjust the frequency to your desired position NOTE Adjust while checking the background picture as a reference Instead of pressing c d to adjust the frequency you can set by directly entering the frequency number of the channel with 0 9 EXAMPLE 179 25 MHz Press 1 s 7 s 9 s 2 s 5 49 25 MHz Press 4 s 9 s 2 s 5 s ENTER Colour system Select the optimum co...

Page 14: ... or the type of image input from external equipment 1 Press AV MODE 2 Each time you press AV MODE the mode changes You can also switch the mode in the AV mode menu on the Picture menu screen Selected item Description STANDARD For a highly defined image in a normally bright room MOVIE For a movie GAME For game play PC For PC Available only when inputting an HDMI or PC signal USER Allows the user to...

Page 15: ...for high definition picture quality On Off Active contrast Automatically adjusts the contrast of an image according to the scene On Off 3D Y C Provides high quality images with minimal dot crawl and cross colour noise On Off NOTE 3D Y C is not selectable depending on the input signal type 3D Y C may not operate depending on the input signal type or noisy input signal Monochrome For viewing images ...

Page 16: ...s the following power saving mode OPC set to On Page 13 No signal off set to Enable Page 14 Power management set to Mode1 Page 14 No operation off set to 3 hr Page 14 Quick start set to Off Page 16 NOTE Ecology mode cannot be deactivated by selecting No Each setting must be changed individually to deactivate Ecology mode Setup menu MENU Setup Auto installation Analogue programme setup Digital prog...

Page 17: ...ng allows you to skip the HDMI or PC input on the input source selection operation HDMI1 HDMI2 HDMI3 PC Yes No Skip input selection of HDMI Input label You can assign each input source a label as you prefer 1 Press INPUT to select the desired input source 2 Press MENU and the MENU screen displays 3 Press c d to select Setup 4 Press a b to select Input label and then press ENTER 5 Press a b c d to ...

Page 18: ...nc 4 DivX R Reg Code Version up PC audio select When using the PC terminal or HDMI1 terminal you must select which terminal uses the AUDIO R L jack for analogue audio input Selected item Description HDMI1 When connecting devices including a PC with DVI HDMI cable to the HDMI 1 terminal and inputting analogue audio signals from the AUDIO R L jack PC When connecting a PC to the PC terminal and input...

Page 19: ...29 Version up This function is only for service personnel to use for software updates Fine sync PC input mode only Adjusting the PC image automatically Auto sync This function enables the screen to be automatically adjusted to its best possible condition when the analogue terminals of the TV and PC are connected with a commercially available RGB cable etc NOTE Auto sync is likely to succeed when a...

Page 20: ...ill not be shown for that language Switching subtitle languages DVB Subtitle Each time you press on the remote control the subtitle switches when the broadcast contains subtitle information Set Hearing impaired to On Hearing impaired 1st Language 2nd Language Off s s s s s s s s Set Hearing impaired to Off 1st Language 2nd Language Hearing impaired Off s s s s NOTE This function is valid only if b...

Page 21: ...nosaur Dorothy The Dinosaur Gardening Australia Dorothy The Dinosaur 13 23 13 30 R ENTER MENU RETURN 3 Press R to view programme information 4 Press RETURN or MENU to exit Info While watching DTV you can check the extended programme information on the screen using INFO on the remote control Input Info ABC2 People Dimensions 13 30 14 00 Video 576i Audio MPEG Age 09 6 5 4 1 3 2 General INFO screen 1...

Page 22: ...rol unit See page 7 DTV When the TV accesses to DTV mode for the first time you need to run the auto search To scan all available services in your area follow the procedures below 1 To watch DTV broadcasts select DTV from auto installation menu See page 10 2 After setting the channels you can select a channel using CH a b or 0 9 on the remote control unit See page 7 Switching the analogue audio fo...

Page 23: ...BBC1 B G MONO PAL PAL 01 ATV ATV BBC1 When receiving a bilingual signal Each time you press MPX the mode switches among CH A CH B and CH AB Bilingual mode B G CH A 01 BBC1 B G CH B PAL PAL 01 ATV ATV BBC1 B G CH AB PAL 01 ATV BBC1 When receiving a monaural signal When you press MPX MONO displays Monaural mode B G MONO PAL 01 ATV BBC1 NOTE BBC1 01 and PAL are tentative network name channel and colo...

Page 24: ...TER MENU ABC TV Syd 002 13 30 14 30 2 3 2 2 Press c d R G to select the time span you want to search Continue to press d to display programmes in the next time span 3 Press a b to select the desired programme Close the EPG screen 4 Press EPG again or MENU to exit NOTE For New Zealand delivery model the EPG screen and operation differ due to the use of MHEG EPG The EPG screen and operation vary dep...

Page 25: ...function even when the WSS option is enabled Manual Selection You can select different picture sizes that account for the kind of each picture 1 Press WIDE The WIDE MODE menu displays The menu lists the wide mode options selectable for the type of video signal currently received 2 Press WIDE or a b while the WIDE MODE menu displays on the screen As you toggle down the options each mode is immediat...

Page 26: ...TE Teletext can display only when it is sent by network Not used to convert between languages PC Control of the TV When a programme is set the TV can be controlled from the PC using the RS 232C terminal The input signal PC video can be selected the volume can be adjusted and various other adjustments and settings can be made enabling automatic programmed playing Attach an RS 232C cable cross type ...

Page 27: ... M D 3 _ _ _ GAME A V M D 4 _ _ _ USER A V M D 5 _ _ _ DYNAMIC FIXED A V M D 6 _ _ _ DYNAMIC A V M D 7 _ _ _ PC NOTE If an underbar _ appears in the parameter column enter a space If an asterisk appears enter a value in the range indicated in brackets under CONTROL CONTENTS CONTROL ITEM COMMAND PARAMETER CONTROL CONTENTS VOLUME V O L M _ _ VOLUME 0 60 POSITION H P O S _ H POSITION AV 10f010 H P O ...

Page 28: ... disconnect a USB device from the TV repeatedly CAUTION Do not use a USB extension cable when connecting a USB device to the USB terminal of the TV Using a USB extension cable may prevent the TV from performing correctly USB media Press INPUT to select the USB mode or the TV automatically switches to the USB mode when a USB device is connected to the TV USB media In this mode you can enjoy viewing...

Page 29: ... Page up down RETURN Return to the USB select mode Viewing video Buttons for full screen display operation Buttons Description ENTER Play Pause the video a Cursor Go to the previous file b Cursor Go to the next file d Cursor The FWD speed changes every time you press d After playing to the end the player goes to the next file and starts to play c Cursor The REW speed changes every time you press c...

Page 30: ...1 1 Page 1 Press c d to select Photo mode and then press ENTER 2 Press a b c d to select the desired folder and then press ENTER 3 Press a b c d to select the desired photo and then press ENTER Buttons for thumbnail operations Buttons Description ENTER When selecting a folder icon Enter this directory When selecting a photo thumbnail Display the photo in full screen a b c d Cursor Select a desired...

Page 31: ... with USB mode USB device USB Memory USB card reader Mass Storage class File system FAT FAT32 NTFS Photo file format JPEG jpg DCF2 0 compliant Music file format MP3 mp3 Bitrate 32 k 40 k 48 k 56 k 64 k 80 k 96 k 112 k 128 k 160 k 192 k 224 k 256 k 320 kbps Sampling frequency 32 k 44 1 k 48 kHz Video file format File extension Container Video avi AVI DivX 3 11 4 4 12 5 x 6 XviD H 264 MPEG2 mkv MKV ...

Page 32: ...ting See pages 11 and 17 Check the input signal setting See page 17 Check the HDMI auto view setting See page 15 Power is suddenly turned off The unit s internal temperature has increased Remove any objects blocking the vent or clean Check the ECO setting See page 14 Is the sleep timer set See page 7 No picture Is the connection to external equipment correct See page 6 Has the input signal setup b...

Page 33: ... 0 5 W Standby 116 W 0 5 W Standby 190 W 0 5 W Standby Dimensions without stand mm 959 W g 605 H g 89 D 1093 W g 682 H g 89 D 1383 W g 838 H g 72 D with stand mm 959 W g 642 H g 257 D 1093 W g 719 H g 293 D 1383 W g 871 H g 333 D Weight without stand with stand 14 kg 16 5 kg 19 kg 22 5 kg 29 5 kg 32 5 kg Operating temperature 0 C 40 C The HDMI1 and PC terminals can both use the same audio input te...

Page 34: ...ble should be set where it will not be overturned Be sure to use at least two people when moving the TV Protection against overturning 60LE630X There is a danger of the product overturning in the case of a disaster or sudden collision Carry out the following tip resistant measurement for your safety Anchoring the TV to the wall or a pillar 1 Affix the TV to the wall or a pillar using extra strong ...

Page 35: ...odels o 46 inch models NOTE To attach the stand perform the above steps in reverse order As the TV is very heavy be careful when moving it Removing the stand 60LE630X For wall mounting with the optional bracket AN 52AG4 remove the stand Before setting TV on the wall Remove the connected cables DVD VCR etc from the terminals Detach the four caps at the 4 locations on the rear of the TV 1 Unfasten t...

Page 36: ...al skills and should only be performed by qualified service personnel Customers should not attempt to do the work themselves SHARP bears no responsibility for improper mounting or mounting that results in accident or injury You can ask qualified service personnel about using an optional bracket and attachment to mount the TV to a wall When you mount the TV on a wall you should attach the supportin...

Page 37: ...ttons J Active area K Including tip prevention brackets when stored L Including tip prevention brackets when attached LC 46LE530X 400 400 200 19 215 1093 1 719 682 400 525 55 263 375 128 320 20 1018 1 2 572 7 2 293 3 123 89 47 299 4 I The projecting operation buttons J Active area K Including tip prevention brackets when stored L Including tip prevention brackets when attached ...

Page 38: ... CLEARING THE PASSWORD If you forget the password clear the password using the following procedure 1 Press MENU to display the MENU screen and then press c d to select Setup 2 Press a b to select Child lock and then press ENTER and the password input screen display 3 If you enter 3001 using 0 9 the Child lock setting menu will be displayed 4 Enter the 4 digit number as a password using 0 9 The new...

Page 39: ......

Page 40: ...Printed in Malaysia TINS F214WJZZ 11P07 MA NG ...

Reviews: