

5
6
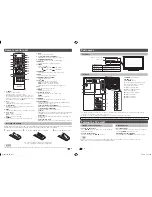
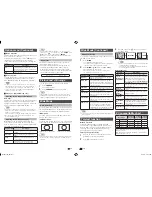
Remote control unit
1
2
3
4
5
6
7
8
9
10
11
12
13
14
15
16
17
18
19
20
7 EXIT
Return to the default screen.
8 Colour
(Red/Green/Yellow/Blue)
TELETEXT mode: Select a page. (See page 14.)
9 POWER
(STANDBY/ON)
To switch the power on and off. (See page 6.)
10 DISPLAY
Display the channel or input information.
11 SLEEP
Set the Sleep timer.
0 hr. 30 min.
1 hr. 00 min.
2 hr. 30 min.
1 hr. 30 min.
2 hr. 00 min.
Off
12 AV MODE
Select an audio and video setting. (See page 8.)
13 MPX
Select the sound multiplex mode.
14 TV/VIDEO (INPUT SOURCE)
Select an input source.
15 CH
a
/CH
b
TV input mode: Select the channel.
(
CH
a
) Increase the channel number.
(
CH
b
) Decrease the channel number.
TELETEXT mode: Select the page. (See page 14.)
16 PC
Directly select the PC terminal.
17 MENU
Display the menu screen.
18
a
/
b
/
c
/
d
(Cursor)
Select a desired item on the setting screen.
ENTER
Execute a command.
19 RETURN
MENU mode: Return to the previous menu screen.
20
m
(TELETEXT)
Select the TELETEXT mode. (all TV image, all TEXT image,
TV/TEXT image) (See page 14.)
k
(Reveal hidden for TELETEXT)
TELETEXT mode: Display hidden characters. (See page 14.)
[
(SUBTITLE for TELETEXT)
To turn the subtitles on. (See page 14.)
3
(Hold)
TELETEXT mode: Stop updating Teletext pages automatically.
Press
3
again to release the hold mode. (See page 14.)
1
(Subpage)
Display the Teletext subpage directly when in Teletext mode.
(See page 14.)
v
(Top/Bottom/Full)
TELETEXT mode: Set the area of magnifi cation. (See page 14.)
1
e
(Mute)
Press
e
s
Mutes sound.
Press
e
again
s
Restores sound.
Mute will be cancelled after 30 minutes. However,
the TV will not suddenly output loud sound as the
volume level will be set to 0 automatically. Increase
the volume level by pressing
VOL
k
.
2 0 – 9
Set the channel.
TELETEXT mode: Set the page. (See page 14.)
3
A
(Flashback)
Press
A
to return to the previous selected channel
or external input mode.
4 WIDE
Change the wide image mode. (See pages 13 and 14.)
5 VOL
k
/VOL
l
Set the volume.
(
VOL
k
) Increase the volume.
(
VOL
l
) Decrease the volume.
6 FREEZE
Freeze a motion picture on the screen. (See page
13.)
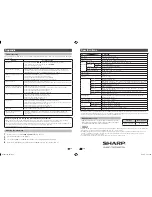
Inserting the battery
Before using the TV for the fi rst time, insert a “AA” size battery (supplied). When the battery become depleted
and the remote control fails to operate, replace the battery with new “AA” size battery.
1
Open the battery cover.
2
Insert the supplied “AA” size battery.
3
Close the battery cover.
• Place battery with their terminals corresponding to the
(
e
) and (
f
) indications in the battery compartment.
CAUTION
• Battery (battery pack or battery installed) shall not be exposed to excessive heat such as sunshine, fi re or the like.
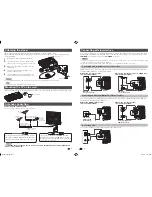
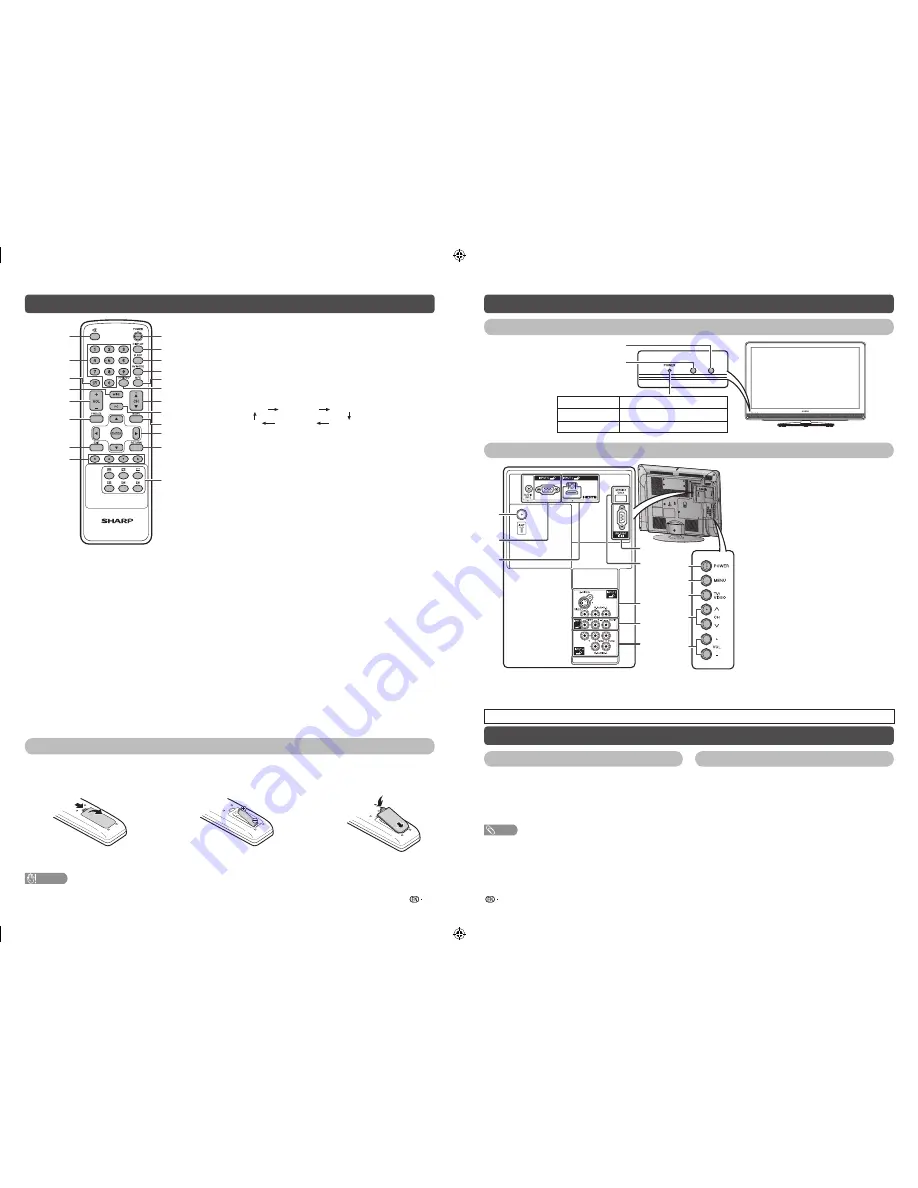
Part names
TV (Front)
OPC sensor
Remote control sensor
POWER indicator
Light off
Power off
Lighted (Red)
The TV is in standby mode.
Lighted (Green)
The TV is on.
TV (Rear)
ANALOGUE RGB (PC)
6
9
11
8
7
10
12
13
1
2
3
4
5
1
POWER
(On/Off) button
2
MENU
button
3
TV/VIDEO
button
4
Channel up (
r
)/down (
s
) buttons
5
Volume up (
e
)/down (
f
) buttons
6
Antenna input terminal
7
INPUT 5 (PC) terminals*
8
INPUT 1 (HDMI) terminal*
9
RS-232C
terminal
10
SERVICE ONLY terminal**
11
INPUT 2 terminals
12
INPUT 3 terminals
13
INPUT 4 terminals
* The INPUT 1 and INPUT 5 terminals can both use the same audio input terminal. However, the proper item must be
selected in the “PC Audio Select” menu. (See page 12.)
** Usually do not connect anything to this terminal as it is reserved only for service personnel.
• The illustrations in this operation manual are for explanation purposes and may vary slightly from the actual operations.
Turning the TV on/off
Turning on/off the power
Standby mode
• To turn on the power
Press
POWER
on the TV. (After a few seconds, an image
appears with sound.)
• To turn off the power
Switch it off by pressing
POWER
on the TV.
• To standby mode
If the TV is switched on, you can switch it to standby by
pressing
POWER
on the remote control.
• Switching on from standby
From standby, press
POWER
on the remote control.
NOTE
• If you are not going to use this TV for a long period of time, be sure to remove the AC cord from the AC outlet.
• Minor power is consumed when the unit is in standby mode.
LC32M300M_EN.indd 3
LC32M300M_EN.indd 3
6/3/2011 4:11:23 PM
6/3/2011 4:11:23 PM


