38
Adjusting the Clock
The LCD TV set has a built-in clock. Be sure to adjust the
clock with “Clock setup” in “Setup” before setting the timer.
(See page 21.)
Timer Rec
Warning:
• When broadcasting other than Teletext broadcast is received the
time is possibly displayed incorrectly. Take especially care when
performing timer-recording, etc.
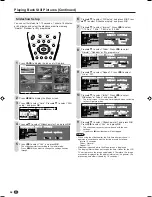
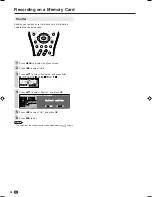
Set the date, start time, end time, channel, and record mode
for the TV programme you want to record.
You can set up to 8 programmes for timer recording up to
one month in advance.
Make sure that you have finished setting channels. (See pages
18 and 19.)
•
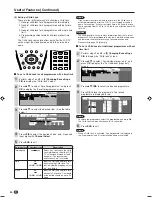
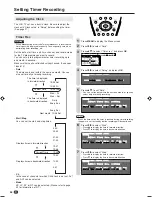
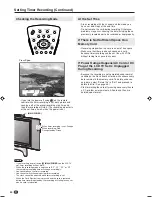
Date
The date can be set within the next one month. You can
also set for daily or weekly recording.
15/05 Sat
14/05 Fri
13/05 Thu
Mon ~ Fri
Mon ~ Sat
Daily
Every Sun
:
Every Sat
The time is displayed
in forward direction
The time is displayed
in backward direction
Current Date
a
b
Next month 12/06 Sat
•
Start/Stop
You can set the start and stop times.
0:00
23:59
:
21:50
21:40
:
19:47
19:46
19:45
19:44
:
12:00
:
0:01
Displays times in forward direction
Displays times in backward direction
Current Time
a
b
•
Ch
In the case of channels for which Child Lock is not set, AV1
and AV2 can be selected.
•
Mode
SP, LP, EP or FIT can be selected. (Please refer to page
39 for information of FIT.)
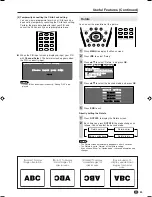
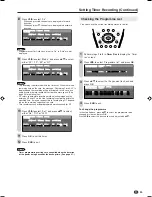
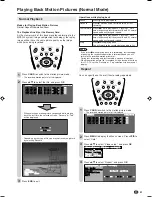
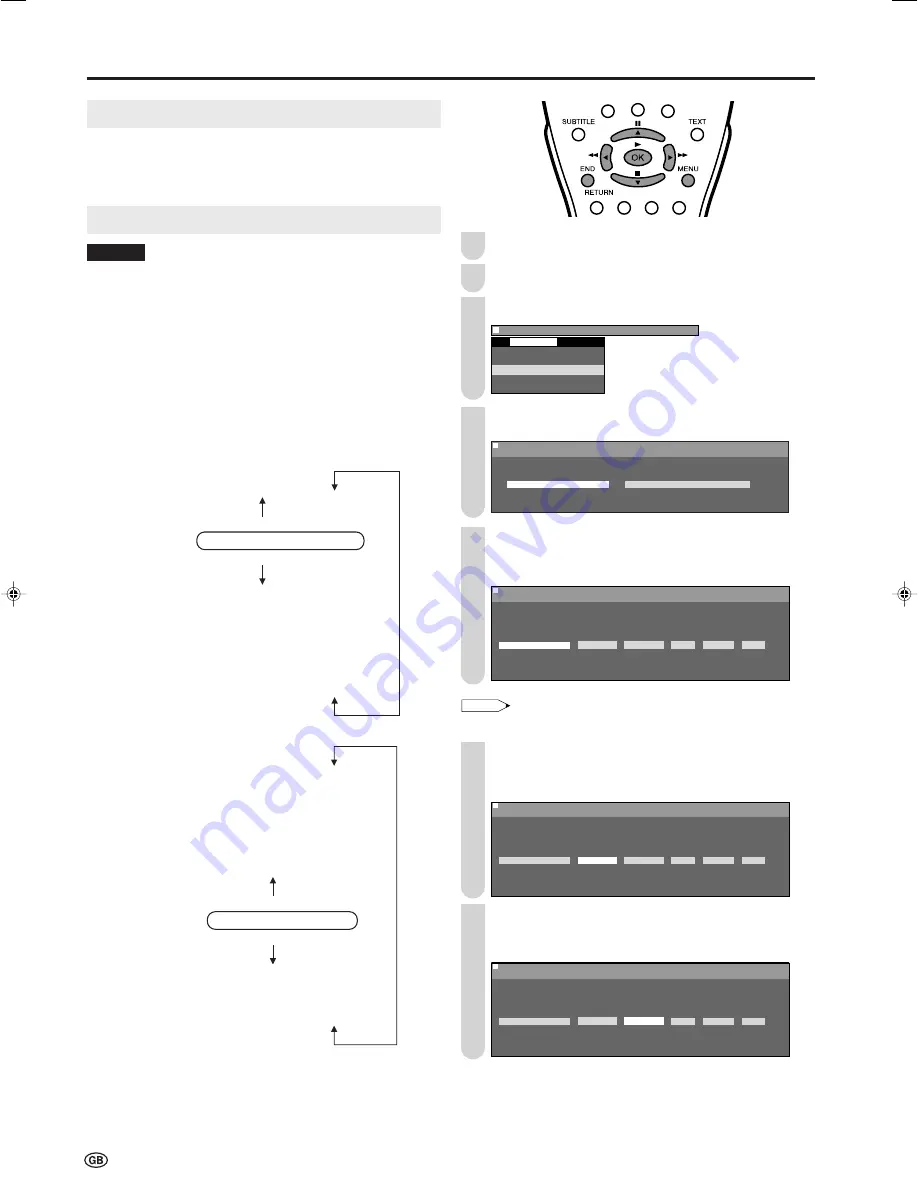
Press
MENU
to display the Menu screen.
Press
\
/
|
to select “Card”.
Press
'
/
"
to select “Timer rec”, and press
OK
.
M e n u [ C a r d T i m e r r e c ]
S e l e c t m o d e
V i d e o s e t u p
T i m e r r e c
S t i l l s e t u p
F o r m a t
C a r d
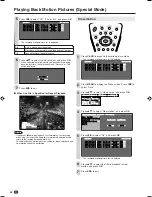
Press
\
/
|
to select “Setup”, and press
OK
.
: SELECT O K : ENTER M : BACK E : EXIT
M e n u [ C a r d
M e n u [ C a r d T i m e r r e c ]
S e t u p
S e t u p
S e t u p P r o g r a m m e l i s t
Press
'
/
"
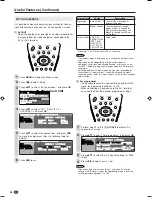
to set “Date”.
• You can set the date within the next one month, or you can
select daily or weekly recording.
: SELECT O K : ENTER M : BACK E : EXIT
M e n u [ C a r d
M e n u [ C a r d T i m e r r e c ]
S e t u p
S e t u p
A d j u s t T i m e r R e c . s e t t i n g
D a t e S t a r t S t o p C h M o d e S e t
D a t e S t a r t S t o p C h M o d e S e t
1 3 /
0
5 T h u - - : - -
~
- - : - - 1 S P O n
0 0
NOTE
• When the time set by the timer is reached during timer recording,
the power is set to standby but the recording will be continued.
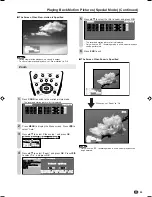
Press
\
/
|
to select “Start”.
• Press
'
to display the time in forward direction.
• Press
"
to display the time in backward direction.
: SELECT O K : ENTER M : BACK E : EXIT
M e n u [ C a r d
M e n u [ C a r d T i m e r r e c ]
S e t u p
S e t u p
A d j u s t T i m e r R e c . s e t t i n g
D a t e S t a r t S t o p C h M o d e S e t
D a t e S t a r t S t o p C h M o d e S e t
1 3 /
0
5 T h u 1 9 : 4 5
~
- - : - - 1 S P O n
0 0
Press
\
/
|
to select “Stop”.
• Press
'
to display the time in forward direction.
• Press
"
to display the time in backward direction.
: SELECT O K : ENTER M : BACK E : EXIT
M e n u [ C a r d
M e n u [ C a r d T i m e r r e c ]
S e t u p
S e t u p
A d j u s t T i m e r R e c . s e t t i n g
D a t e S t a r t S t o p C h M o d e S e t
D a t e S t a r t S t o p C h M o d e S e t
1 3 /
0
5 T h u 1 9 : 4 5
~
2 1 : 4 5 1 S P O n
0 0
Setting Timer Recording
1
2
3
5
4
7
6
LC-20B5E_E_P38-40.p65
04.3.7, 9:42 AM
38
Summary of Contents for AQUOS LC-15B5E
Page 66: ...64 ...

