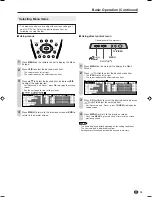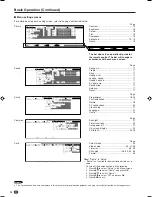
15
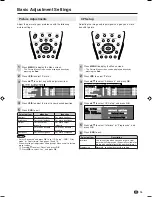
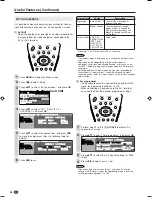
Picture Adjustments
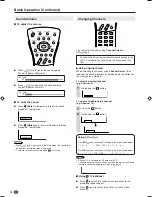
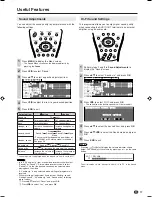
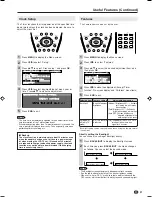
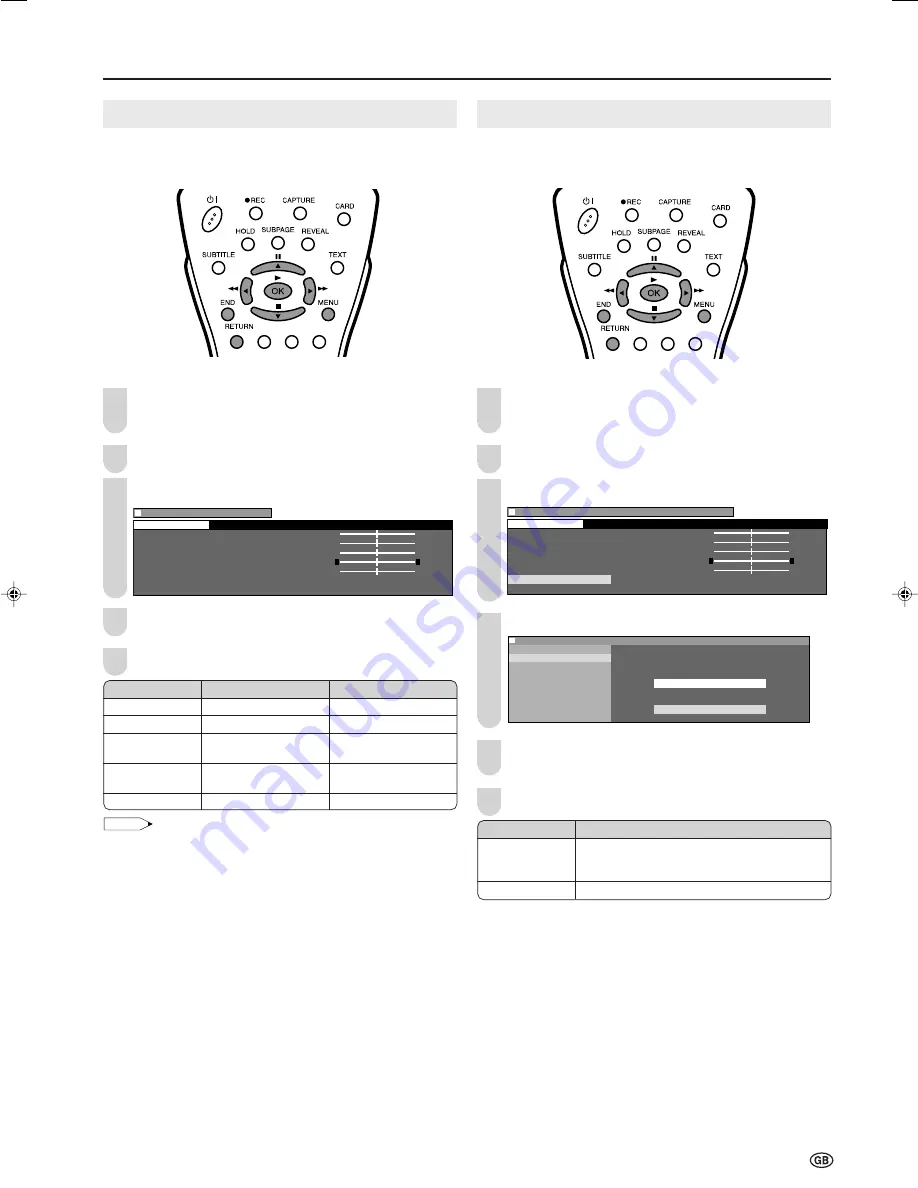
Adjust the picture to your preference with the following
picture settings.
Press
MENU
to display the Menu screen.
• The Picture Menu screen can be displayed directly by
pressing the
Red
.
Press
\
/
|
to select “Picture”.
Press
'
/
"
to select a specific adjustment item.
M e n u [ P i c t u r e ]
C o n t r a s t [ 3
C o n t r a s t [ 3 ]
] + 6
+ 6
B r i g h t n e s s [
B r i g h t n e s s [ ] - 3
] - 3 + 3
+ 3
C o l o u r [
C o l o u r [ ] - 3
] - 3 + 3
+ 3
T i n t [
T i n t [ ] - 3
] - 3 + 3
+ 3
S h a r p n e s s [
S h a r p n e s s [ ] - 1 + 1
A d v a n c e d
R e s e t
P i c t u r e
0
0
0
0
0
0
0
0
0
0
0
0
0
0
0
Press
\
/
|
to adjust the item to your desired position.
Press
END
to exit.
NOTE
• Select “Advanced” and press
OK
to set “I/P Setup”, “DNR”, “Film
mode” or “Cool climate”. See pages 15 and 16.
• When resetting all adjustment items (except “Advanced”) to factory
preset values,
1
Press
'
/
"
to select “Reset”, and press
OK
.
2
Press
\
/
|
to select “Yes”, and press
OK
.
1
3
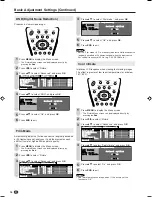
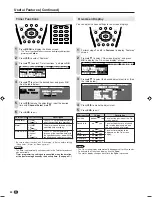
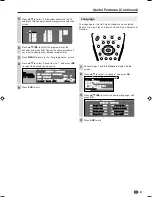
I/P Setup
Adjusting the image and input signal can give you a more
beautiful picture.
Press
MENU
to display the Menu screen.
• The Picture Menu screen can be displayed directly by
pressing the
Red
.
Press
\
/
|
to select “Picture”.
Press
'
/
"
to select “Advanced”, and press
OK
.
M e n u [ P i c t u r e A d v a n c e d ]
C o n t r a s t [ 3
C o n t r a s t [ 3 ]
] + 6
+ 6
B r i g h t n e s s [
B r i g h t n e s s [ ] - 3
] - 3 + 3
+ 3
C o l o u r [
C o l o u r [ ] - 3
] - 3 + 3
+ 3
T i n t [
T i n t [ ] - 3
] - 3 + 3
+ 3
S h a r p n e s s [
S h a r p n e s s [ ] - 1 + 1
A d v a n c e d
R e s e t
P i c t u r e
0
0
0
0
0
0
0
0
0
0
0
0
0
0
0
Press
'
/
"
to select “I/P Setup”, and press
OK
.
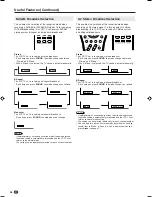
: SELECT O K : ENTER M : BACK E : EXIT
M e n u [ P i c t u r e
M e n u [ P i c t u r e A d v a n c e d ]
I / P S e t u p
D N R
S e l e c t o p t i o n
F i l m m o d e
C o o l c l i m a t e I n t e r l a c e
P r o g r e s s i v e
Press
'
/
"
to select “Interlace” or “Progressive”, and
press
OK
.
Press
END
to exit.
3
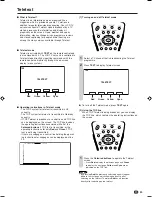
Basic Adjustment Settings
5
2
4
2
4
5
6
Selected item
Contrast
Brightness
Colour
Tint
Sharpness
d
d
d
d
d
button
For more contrast
For more brightness
For more colour
intensity
Skin tones become
greenish
For more sharpness
c
c
c
c
c
button
For less contrast
For less brightness
For less colour
intensity
Skin tones become
purplish
For less sharpness
Selected item
Interlace
Progressive
Description
Use this setting when you cannot get a clear
picture with Progressive. (Especially suitable for
media with special effects like game software.)
Normally, you should select this setting.
1
LC-20B5E_E_P15-16.p65
04.2.11, 2:52 PM
15
Summary of Contents for AQUOS LC-15B5E
Page 66: ...64 ...

