MGT Docking Station version II
13
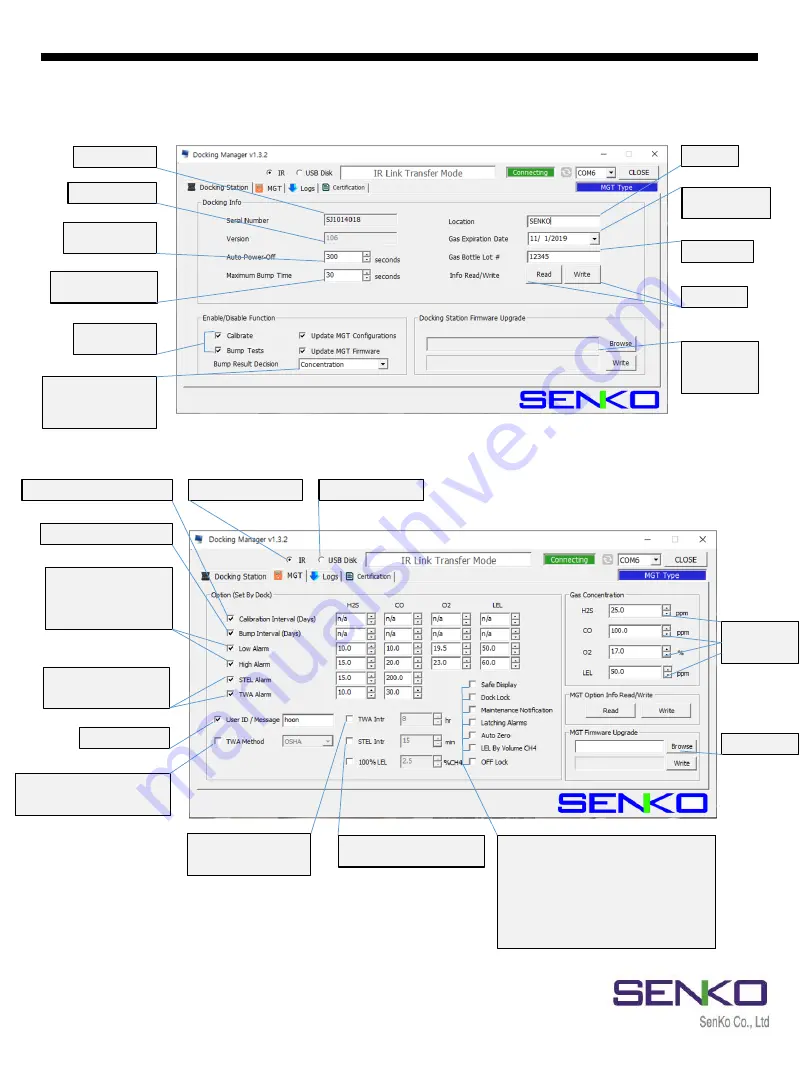
7. Using Software
7.1 Overview of Software
Detector User ID
Calibration interval: 0~365 days
Low / High Alarm Setting
- H2S : 0 ~ 100.0
- CO : 0 ~ 300
- O2 : 0 ~ 30.0
- LEL : 0 ~ 100.0
Bump interval: 0~365 days
MGT firmware
STEL / TWA Alarm Setting
- H2S : 0 ~ 100.0
- CO : 0 ~ 300
TWA Method
- ACGIH : Accumulation Average
- OSHA : Movement Average
TWA
- Default : 8 hours
average
STEL
- Default : 15 minutes average
Safe Display : In the safe area, SAFE will displayed.
Dock Lock : Lock the bump / calibration
Maintenance Notification
Latching Alarms : Until the users push the button,
the alarm will be activated continuously.
Auto Zero : When the device is turned on, the
zero calibration will be activated.
LEL by volume : 100%LEL Standard
Off Lock : Prevent users from turning off the
device.
To connect with USB
To connect with IR Link
Cal. Gas
Concentration
Upgrade
Figure 6
Enable/Disable
Cal./Bump Test
Serial Number
Firmware Version
Maximum Bump Time
(20 ~ 120sec)
Save power Mode
(1 ~ 3600sec)
Bump result decision
- Beep
- Concentration
- Beep + Concentration
Docking
Station
firmware
upgrade
Location
Gas Expiration
date on cylinder
Read/Write
Cylinder No.
Figure 5