background image

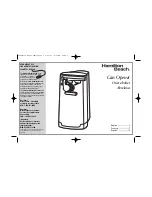
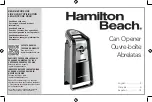
Multifunction Electric Can Opener

SMO 6601

EN

EN-9

 2015  


 07/2015

CLEANING AND MAINTENANCE

• 

Keep the appliance clean and clean dirty parts after every use.

1

2

1

2

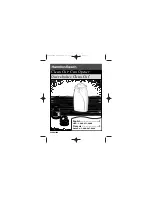
Before cleaning, make sure that the appli-
ance is disconnected from the power sock-
et and that all rotating parts have come to 
a complete stop.

Slide  button  A

2

  to  the  right  and  hold  it 

in  this  position.  Remove  the  can  opener 
assembly from the motor unit A

7

 and re-

lease the button A

2

3

4

3

4

Wash  the  can  opener  assembly  under 
running  water  with  neutral  dishwashing 
detergent.  Then  thoroughly  rinse  under 
flowing water and dry it.

Attention:

Be  especially  careful  not  to  injure 
yourself on the cutting blade that is 
a part of the can opener lever A

3

.

Wipe  the  bottle  and  plastic  packaging 
opener  A

9

  using  a  dampened  cloth  and 

they wipe dry. In the same way, clean out 
the jar opener A

1

Summary of Contents for SMO 6601

Page 1: ...in the manner described in this user manual Keep this user s manual in a safe place where it can be easily retrieved for future use We recommend saving the original cardboard box packaging material pu...

Page 2: ...S 3 DESCRIPTION OF THE MULTIFUNCTION CAN OPENER 5 BEFORE FIRST USE 6 USING THE MULTIFUNCTION CAN OPENER 6 CLEANING AND MAINTENANCE 9 STORAGE 11 TECHNICAL SPECIFICATIONS 11 INSTRUCTIONS AND INFORMATION...

Page 3: ...play with the appliance The appliance is designed for home use and serves to open cans jars with screw top lids cans with easy open lids drink bottles from glass or plastic plastic packaging e g blist...

Page 4: ...not submerge the appliance except for the removable parts or the power cord in water or any other liquid or wash it under running water Ensure that the power plug contacts do not come into contact wit...

Page 5: ...it 3 Lever with cutting blade for opening cans 4 Guide pin 5 Magnetic can lid holder 6 Geared wheel 7 Motor unit 8 Storage area for the drink bottle and plastic packaging opener 9 Opener for glass or...

Page 6: ...up lever A3 and the magnetic can lid holder A5 4 3 4 3 Place the can under the lever with the cutting blade A3 so that the edge of the can is located between the geared wheel A6 and the cutting blade...

Page 7: ...an If the can contains a liquid be especially careful not to spill it 2 USING THE JAR OPENER AND THE DRINK BOTTLE AND PLASTIC PACKAGING OPENER Make sure that the power cord is disconnected from the el...

Page 8: ...used to open various types of plastic packaging e g blister packs plastic bags etc Insert the edge of the packaging into the slit with the cutting blade Aqs and drag the cutting blade Aqs over it Usin...

Page 9: ...to the right and hold it in this position Remove the can opener assembly from the motor unit A7 and re lease the button A2 3 4 3 4 Wash the can opener assembly under running water with neutral dishwas...

Page 10: ...ght and hold it in this position Insert the opener assembly into the hole in the motor unit A7 and release the button A2 When the button A2 is released the opener assembly will be attached to the moto...

Page 11: ...CAL SPECIFICATIONS Rated voltage range 220 240 V Rated frequency 50 Hz Rated power input 70 W Electric shock protection class II Explanation of technical terminology Safety class for electric shock pr...

Page 12: ...appliance Correct disposal of this product helps save valuable natural resources and prevents potential negative effects on the environment and human health which could result from improper waste disp...

Reviews: