


2
SEL Application Guide 2016-16
Date Code 20160628
the SEL device even if the Arbiter clock is set to send local IRIG-B time; these changes will send
during the IEEE 1344 extension of the time code. The SEL device will use the delivered UTC
time, so setting the Arbiter clock to send local IRIG-B time has no effect. To set up the SEL
devices for the time zone of your choice, consult their corresponding instruction manuals.
S
ET
U
P
IRIG-B
S
ETTINGS
Once you have configured the Arbiter clock with the proper time settings, set up the IRIG-B
settings. If the device has a front-panel LCD, navigate to
IRIG Time Settings
. Configure the
device with
IRIG-B IEEE 1344
set to
ON
. This causes the Arbiter clock to send data related to
time quality, daylight-saving time, leap seconds, and local time offset. This setting is critical to
providing time to the SEL device. If the Arbiter device does not have a front-panel LCD, consult
your Arbiter clock instruction manual to determine the correct commands to set the IEEE 1344
extension to
ON
via a serial connection.
C
ONNECT THE
A
RBITER TO THE
SEL
D
EVICE
With the Arbiter clock configured, connect the IRIG-B input of the SEL device to the Arbiter
clock via one of the IRIG-B connectors on the device. If the device is an SEL-3622, ensure that
you use the demodulated signal because the device is unable to decode the modulated signal. The
SEL-3610 or SEL-3620 is able to use either a demodulated or modulated IRIG-B signal as an
input time source.
C
ONFIGURE THE
SEL
D
EVICE
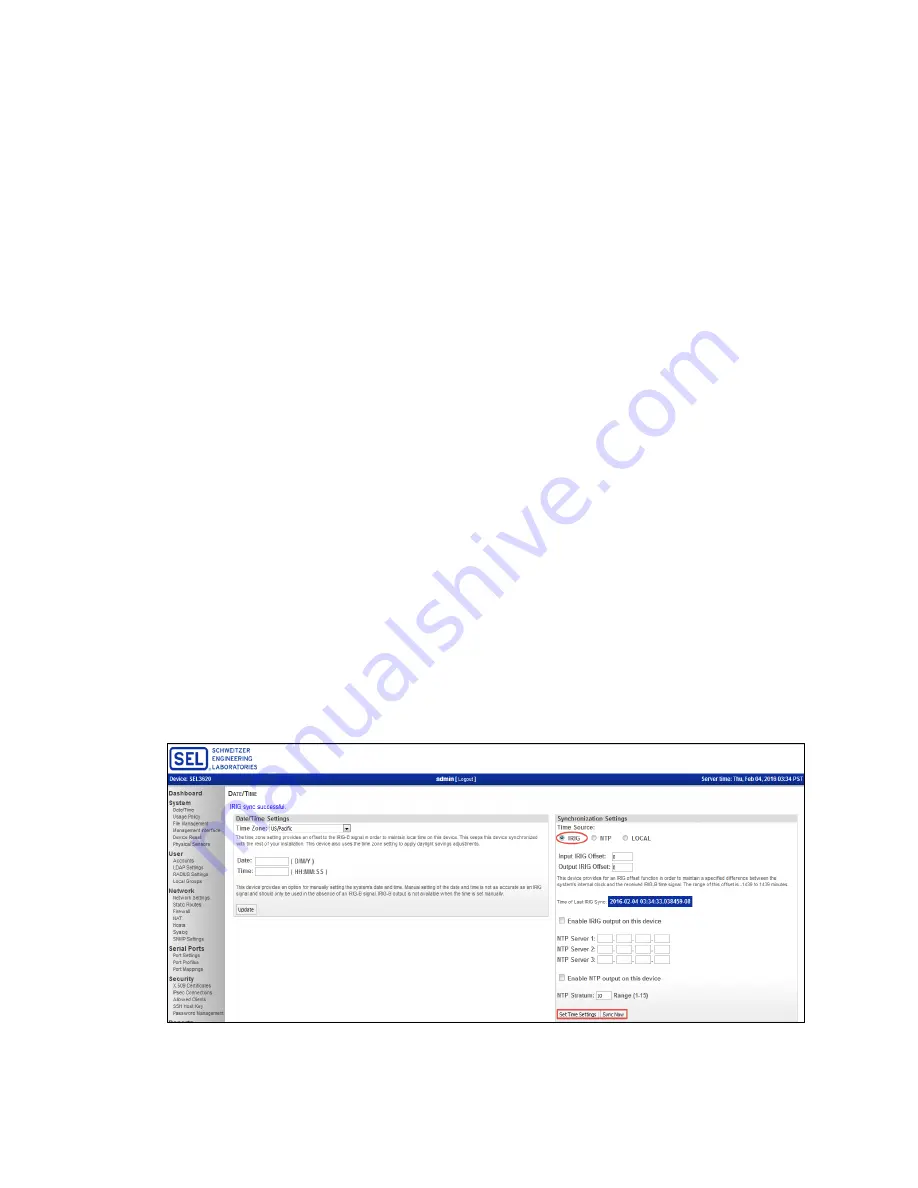
After connecting the Arbiter clock to the SEL device, connect your local computer to the device.
Log in and navigate to the
D
ATE
/T
IME
page. Select
IRIG
under
Synchronization Settings
and
set up IRIG-B offsets as needed. The SEL device will use the configured UTC time of the clock,
regardless of the IRIG-B time-zone settings on the Arbiter clock when IEEE 1344 is enabled.
Click the
Set Time Settings
button, wait for
Date/Time synchronization settings saved
to be
shown in the upper left corner of the screen, and then click
Sync Now
(see Figure 1).
Figure 1 Date/Time Page


