Chapter 2
Getting Started
2-6
Smart Label Printer Models 100, 200 and 240
Connecting the SLP to an IBM-compatible PC
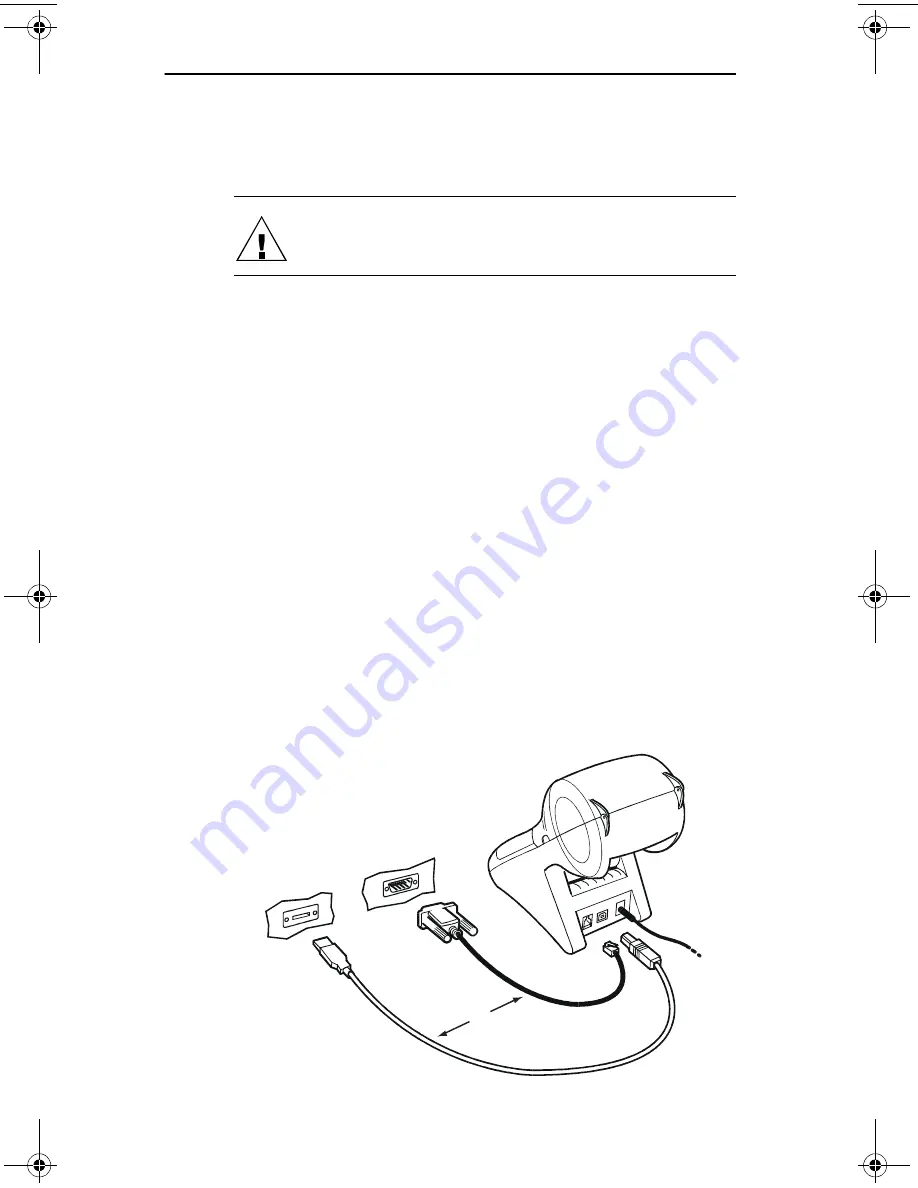
Use the USB or serial cable provided with the SLP 100/200/
240 to connect the SLP to your computer.
CAUTION: Connecting or disconnecting the interface
cable while the printer is turned on may damage the
printer.
Follow these steps:
1 Make sure that the SLP is turned off. If the status light is
on, hold the power button until it turns off.
2
Connect either the USB or serial cable.
USB cable.
Connect the cable to the SLP and the USB port
on your computer. If all USB ports are in use, you may
need to purchase a USB hub.
Serial cable.
Plug the telephone-style connector into the
jack on the rear panel of the SLP. Plug the other end of
the cable into a serial port on your computer.
Note…
Serial ports are also called COM ports — COM1,
COM2, COM3, etc. If your COM ports are all in use,
purchase either another serial port or an “A-B” switch
box to connect the SLP and another device to the same
port.
USB port
Serial port
Serial Cable
USB cable
OR
DO NOT use
both cables
100-200book.book Page 6 Thursday, July 13, 2000 12:14 AM
Summary of Contents for SLP100
Page 10: ...Chapter 1 User Guide 1 1 Introduction About Your Smart Label Printer 1 2 Software Features 1 3...
Page 33: ...Appendix B User Guide B 1 Commonly Asked Questions and Answers...
Page 35: ...Appendix C User Guide C 1 Technical Support and Service...
Page 37: ...Appendix D User Guide D 1 Ordering Labels and Parts...


