SVR-‐632/664 User’s Manual
12
5
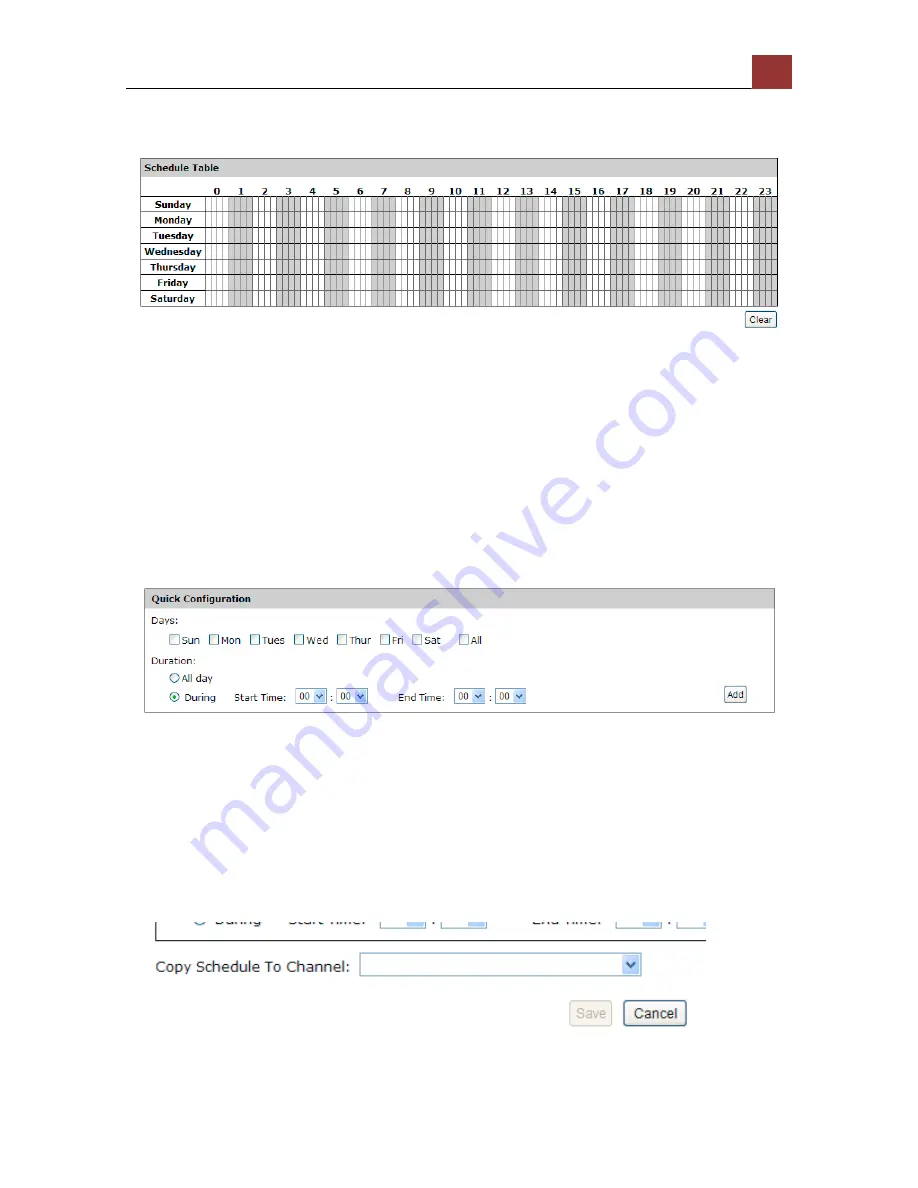
You can use the schedule table to set the time range. Click the cell
boxes then move horizontally lets you set what hours to perform
recording during a day. Click and move vertically lets you set what
days to perform recording at a specific time.
* Each cell box represents 15 minutes of time. Click one or more
boxes to omit consecutive recording.
You can also use the “Quick Configuration” to define recording time
range instead of clicking cell boxex one by one on the time table.
Simply check what days you would like to perform recording and
specify the recording duration by either choosing “All Day” or enter a
start and end time for specific recording duration.
Summary of Contents for svr-632
Page 4: ...4 SVR 632 664 User s Manual Play the backup file with the NVR Media Player 138 ...
Page 5: ...SVR 632 664 User s Manual 5 System Overview Front View Rear View ...
Page 6: ...6 SVR 632 664 User s Manual LED Definition ...
Page 9: ...SVR 632 664 User s Manual 9 Push the tray door back to the case to secure it ...
Page 27: ...SVR 632 664 User s Manual 27 Only PTZ capable cameras will be listed in the drop down menu ...
Page 40: ...40 SVR 632 664 User s Manual Type in the IP address of the NVR in the address bar ...
Page 43: ...SVR 632 664 User s Manual 43 Click on the Channel drop down menu to select other cameras ...
Page 47: ...SVR 632 664 User s Manual 47 Press the button highlighted above to go back to the browser ...
Page 48: ...48 SVR 632 664 User s Manual Type in the IP address of the NVR in the address bar ...


